Using Jupyter for prototyping
Jupyter notebooks are interactive documents that combine executable Python code with rich text documentation. This makes it easy to describe what you are doing, add screenshots, and execute code in one place.
Running the NOVA SDK notebook locally while iterating on your app.
Use Markdown cells for your explanations (for example headings, bullet lists, or embedded images) and Python code cells for commands you want to run. This mix keeps your experiments reproducible and easy to review with teammates.
Prerequisites
You completed the Wandelbots NOVA quickstart guide and have a NOVA cloud instance running including a robot. The local development setup will interact with this instance.
Install the NOVA CLI
The NOVA CLI is a command-line tool for creating applications and deploying them to Wandelbots NOVA.
It includes many additional features that you can explore on GitHub or after installation by running nova --help.
In this case you don’t need to deploy your app but still you need an app in which you will use the Jupyter notebook.
macOS/Linux
Install the Wandelbots NOVA CLI tool using Homebrew .
brew install wandelbotsgmbh/wandelbots/novaEnable autocompletion for zsh.
echo 'source <(nova completion zsh)' >> ~/.zshrcTo see all available autocompletion commands for other shell types, run:
nova completion --helpManual installation
Download the Wandelbots NOVA CLI tool and configure it in your local environment.
Rename the downloaded file to nova and make it executable.
Grant the file execution permissions, as the program is not signed.
In order to ensure a smooth process, add the Wandelbots NOVA CLI to your terminal’s path.
The exact process depends on your operating system and terminal.
Set up CLI
Once you have the CLI installed, the first step is to specify the NOVA instance you’re using.
If you don’t specify a host, the CLI will default to using a local instance.
Physical instance or VM
Deploying to a physical controller or virtual machine in your network typically relies on IP connectivity.
Set the host of your NOVA instance:
nova config set host 192.168.1.100Provide additional authentication details if your instance requires them.
Set image registry
If you are not planning to install your app, you can skip this step.
Now, configure the NOVA CLI to specify where to push your Docker images. This registry will also be used by your NOVA instance to pull the images.
nova config set image-registry MY-REGISTRYScaffold your Python app
Now it is time to create you app and install Jupyter notebook.
Create project with Python template
nova app create myappThe CLI creates a standard Python project that uses uv for dependency management and FastAPI for the HTTP interface.
Default FastAPI routes expose your robotics programs without any extra wiring,
and you can extend them whenever you need to customize the API.
Below are some helpful uv commands:
# Create the environment and install dependencies
uv sync

# Add a new dependency
uv add some-package
The template is optimized for GitHub Copilot and ships with prompts you can reuse:
local_setupchecks local prerequisites and tooling.new_programbootstraps robotics programs that follow the Python SDK patterns.start_serverstarts the development server.test_programruns a selected program.deploy_appwalks you through publishing to NOVA.copilot-instructions.mddocuments the project structure and collaboration tips.
Check the official visual studio code documentation to learn more about this feature.
Copilot accelerates the workflow, but it can also introduce incorrect or overly complex code. Knowing Python fundamentals makes it much easier to review Copilot’s suggestions and catch issues early.
Update .env file
When working with any project you created with NOVA CLI, you need to make sure the .env file is updated. The following information is needed in the .env file:
- NOVA_API: this is your NOVA HOST. If you have an instance from our cloud, you should put xxxxx.instance.wandelbots.io
- CELL_ID: every NOVA application exists in a cell. When you get started, you will have only one cell which is named
cell. - NOVA_ACCESS_TOKEN: This is the access token you can get from our developer portal. Only set this if you are using an instance from the cloud.
- NATS_BROKER: You don’t need this if you are using the cloud, as it is automatically created for you. But if you are using NOVA in an IPC or in a virtual machine, it should be set up like this
ws://IP:80/api/nats
Start app
Start your app by running
uv run python -m myappThen, open the browser and see the API.
As you can see you got a couple of APIs out of the box. These APIs are integrated to our system and when you write robotic programs they will automatically be integrated with these APIs.
If you want to extend the project no worries. We only register some routes to your API, you still have the full flexibility to implement new APIs and own the FastAPI object.
Deploy app
Now that your app is up and running, you can deploy it by running this command.
nova app install myappVerify app installation
After your app is installed, go to the home screen and make sure the app is visible.
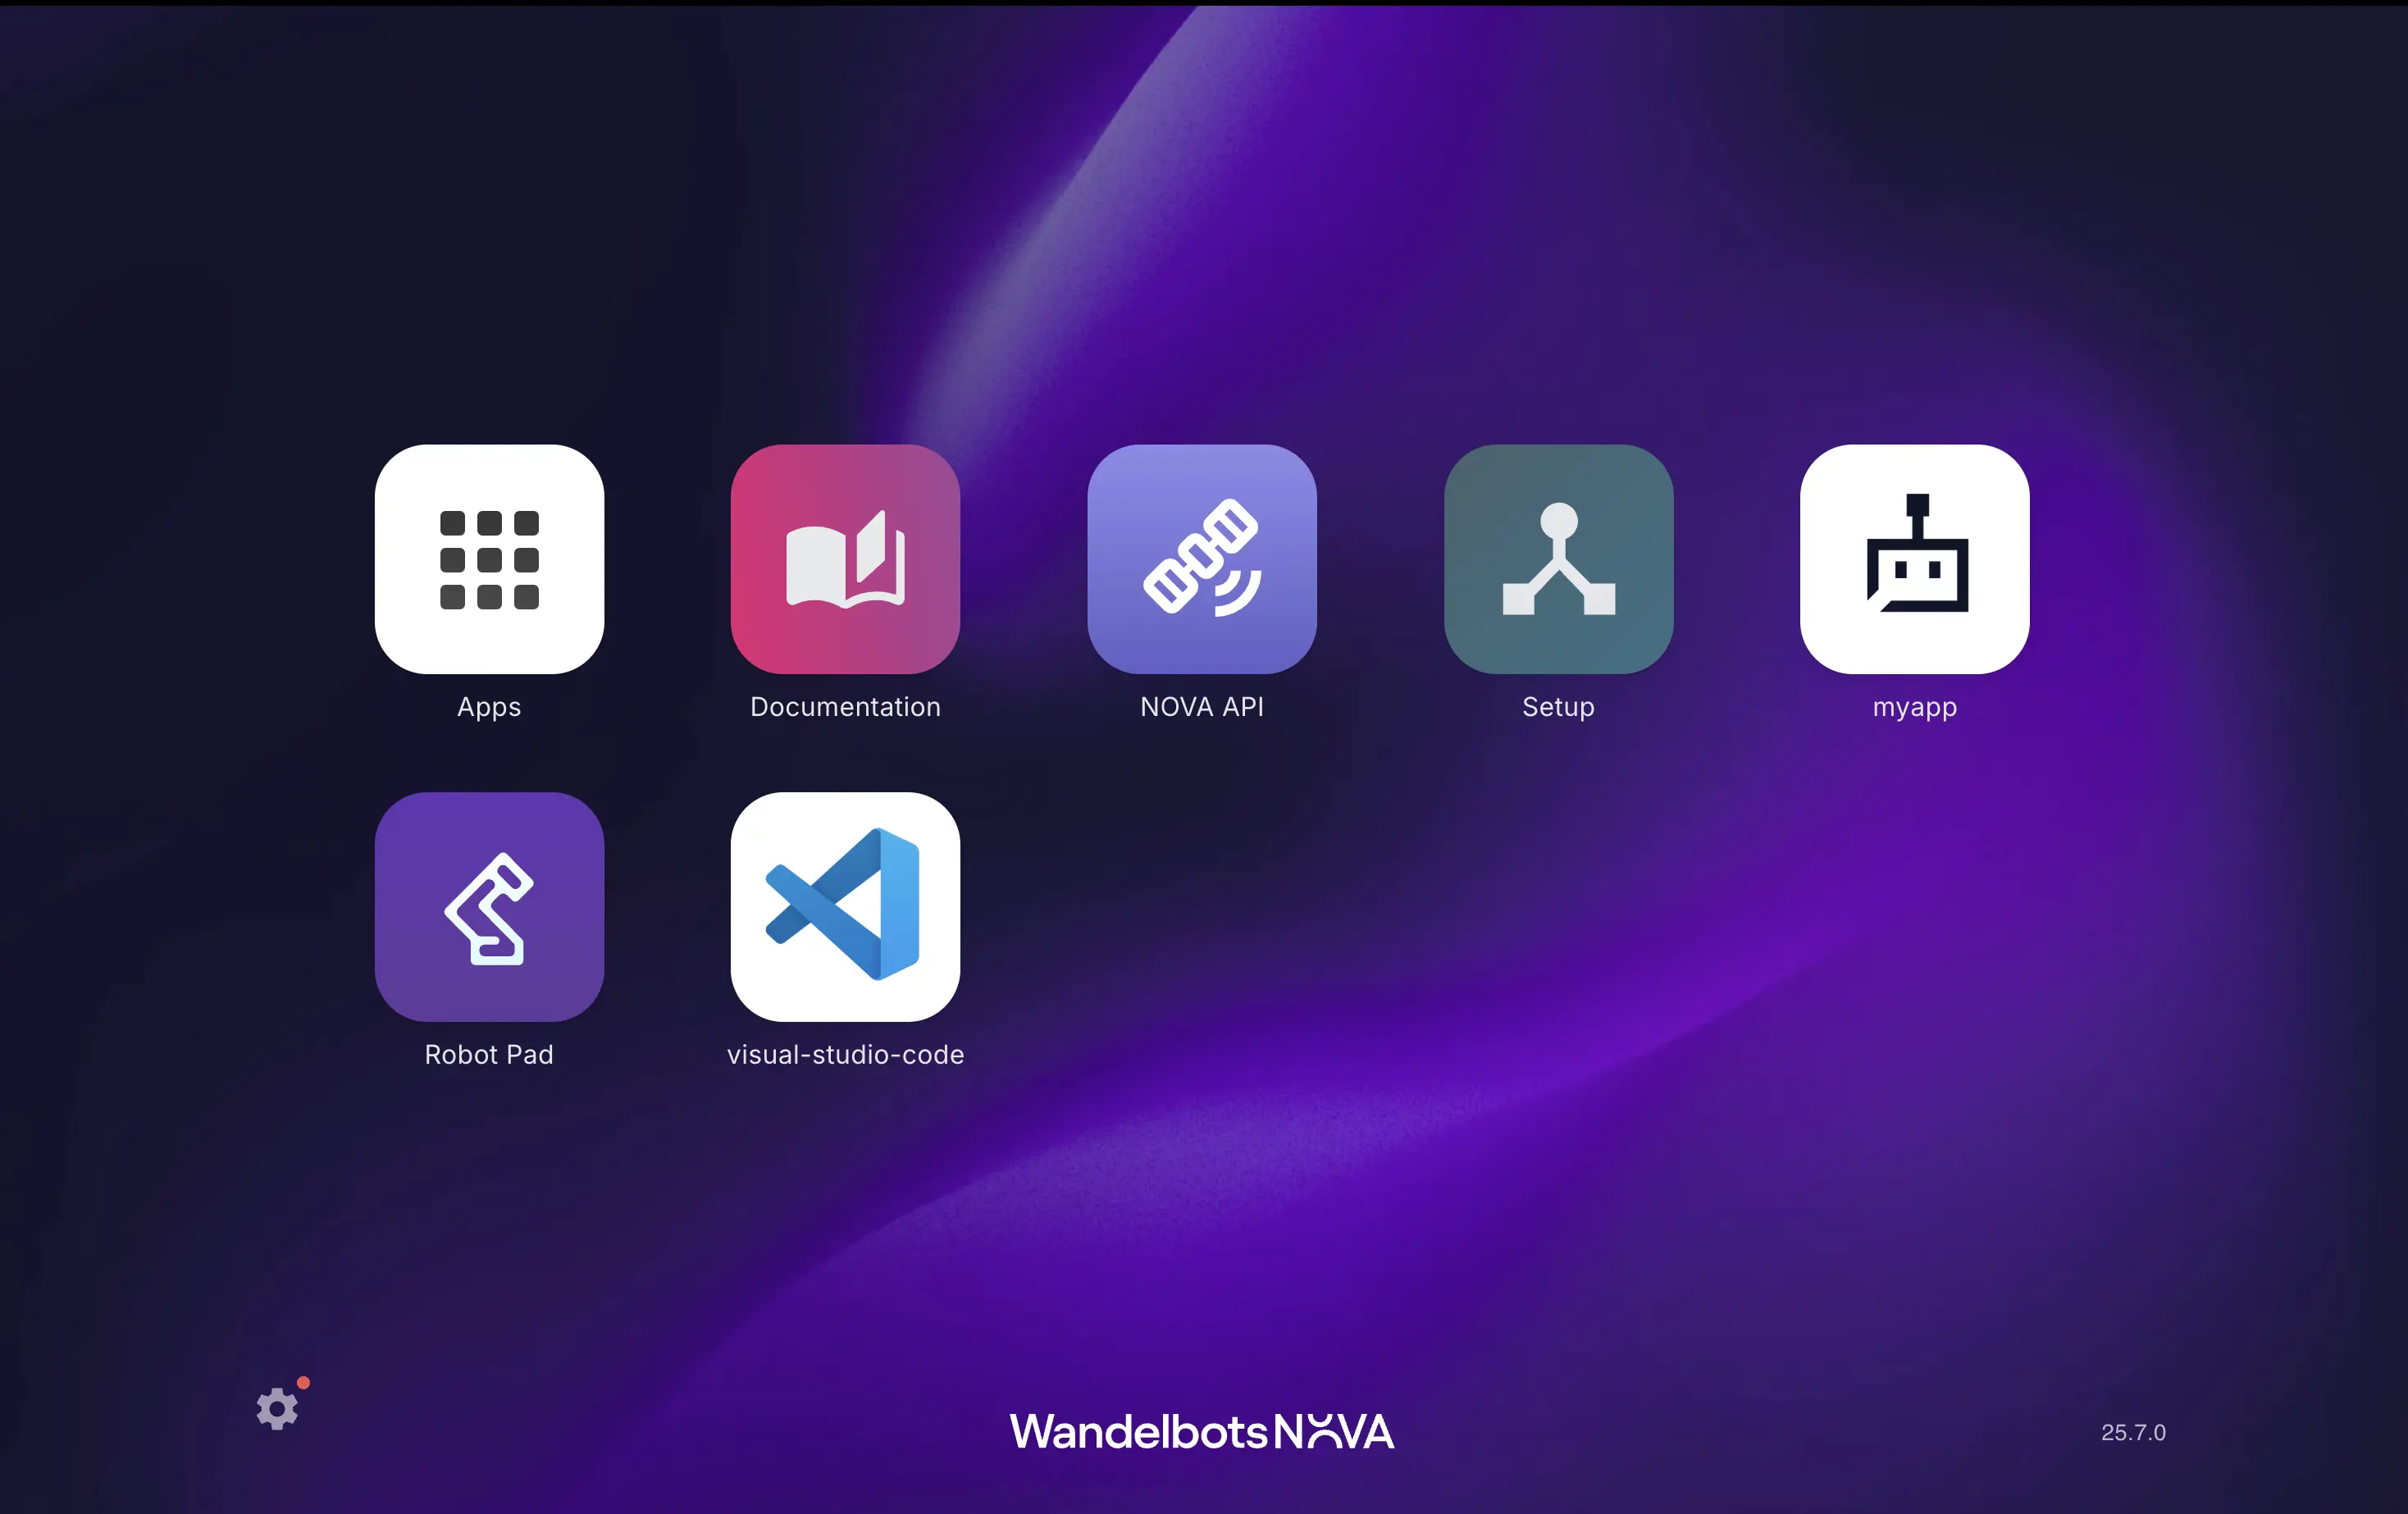
You can customize the icon by changing the app_icon.webp in the auto generated project.
Install Jupyter notebook
Run the following command in terminal to add necessary python packages to your project.
uv add ipykernelCreate a notebook
Now, in any folder in your project you can create a file with .ipynb extention and visual studio code will see this as a Jupyter Notebook app.
Go ahead and create a file named: my_notebook.ipynb
Explore the notebook interface
- Click
+ Markdownto add documentation blocks and+ Codeto insert executable Python cells. - Press
Shift + Enterto run the active cell—the output appears directly underneath so you can see results immediately.
Run some example python code
Create a short Markdown cell to describe what the notebook does, then add a code cell underneath to print a confirmation message. This pattern keeps intent next to execution.
# My first Jupyter experiment
In the next cell I print a message to confirm the notebook runs code.
message = "Hello from Jupyter!"
print(message)Connect to NOVA
Now eveything is ready to start writing some Python SDK code. Let’s start by connecting to NOVA.
from nova import Nova

nova = Nova()
await nova.connect()
List all controllers
Let’s list all the robot controllers available in your cell.
cell = nova.cell()
controllers = await cell.controllers()
for controller in controllers:
    print(controller.id)
Let’s plan a motion
Let’s use a motion group and plan some robot movements.
from nova.actions import ptp

motion_group = controllers[0].motion_group(motion_group_id="@ur10e")
actions = [
    ptp((724.3, -11, 564.8, -3.1414, -0.0003, 0.001)),
]

joint_trajectory = await motion_group.plan(actions, "Flange")
print(joint_trajectory)
Congratulations 🎉
You have now finished this tutorial. Go ahead and try out more with Python SDK. Check our examples . Create notebooks and share them with your colleagues.