Simulate using RealVirtual.io
Wandelbots NOVA allows you to connect your Unity Editor with your WandelbotsNOVA instance via the realvirtual.io assets.
In order to use Unity integration with NOVA you are going to need an additional license from realvirtual.io.
Prerequisites
Make sure you have downloaded Unity and realvirtual.io.
Video tutorial
The following video shows all the steps that you need to perform to get Unity running with realvirtual.io and the Wandelbots NOVA interface.
Before following the steps below, please make sure you have downloaded Unity and realvirtual.io.
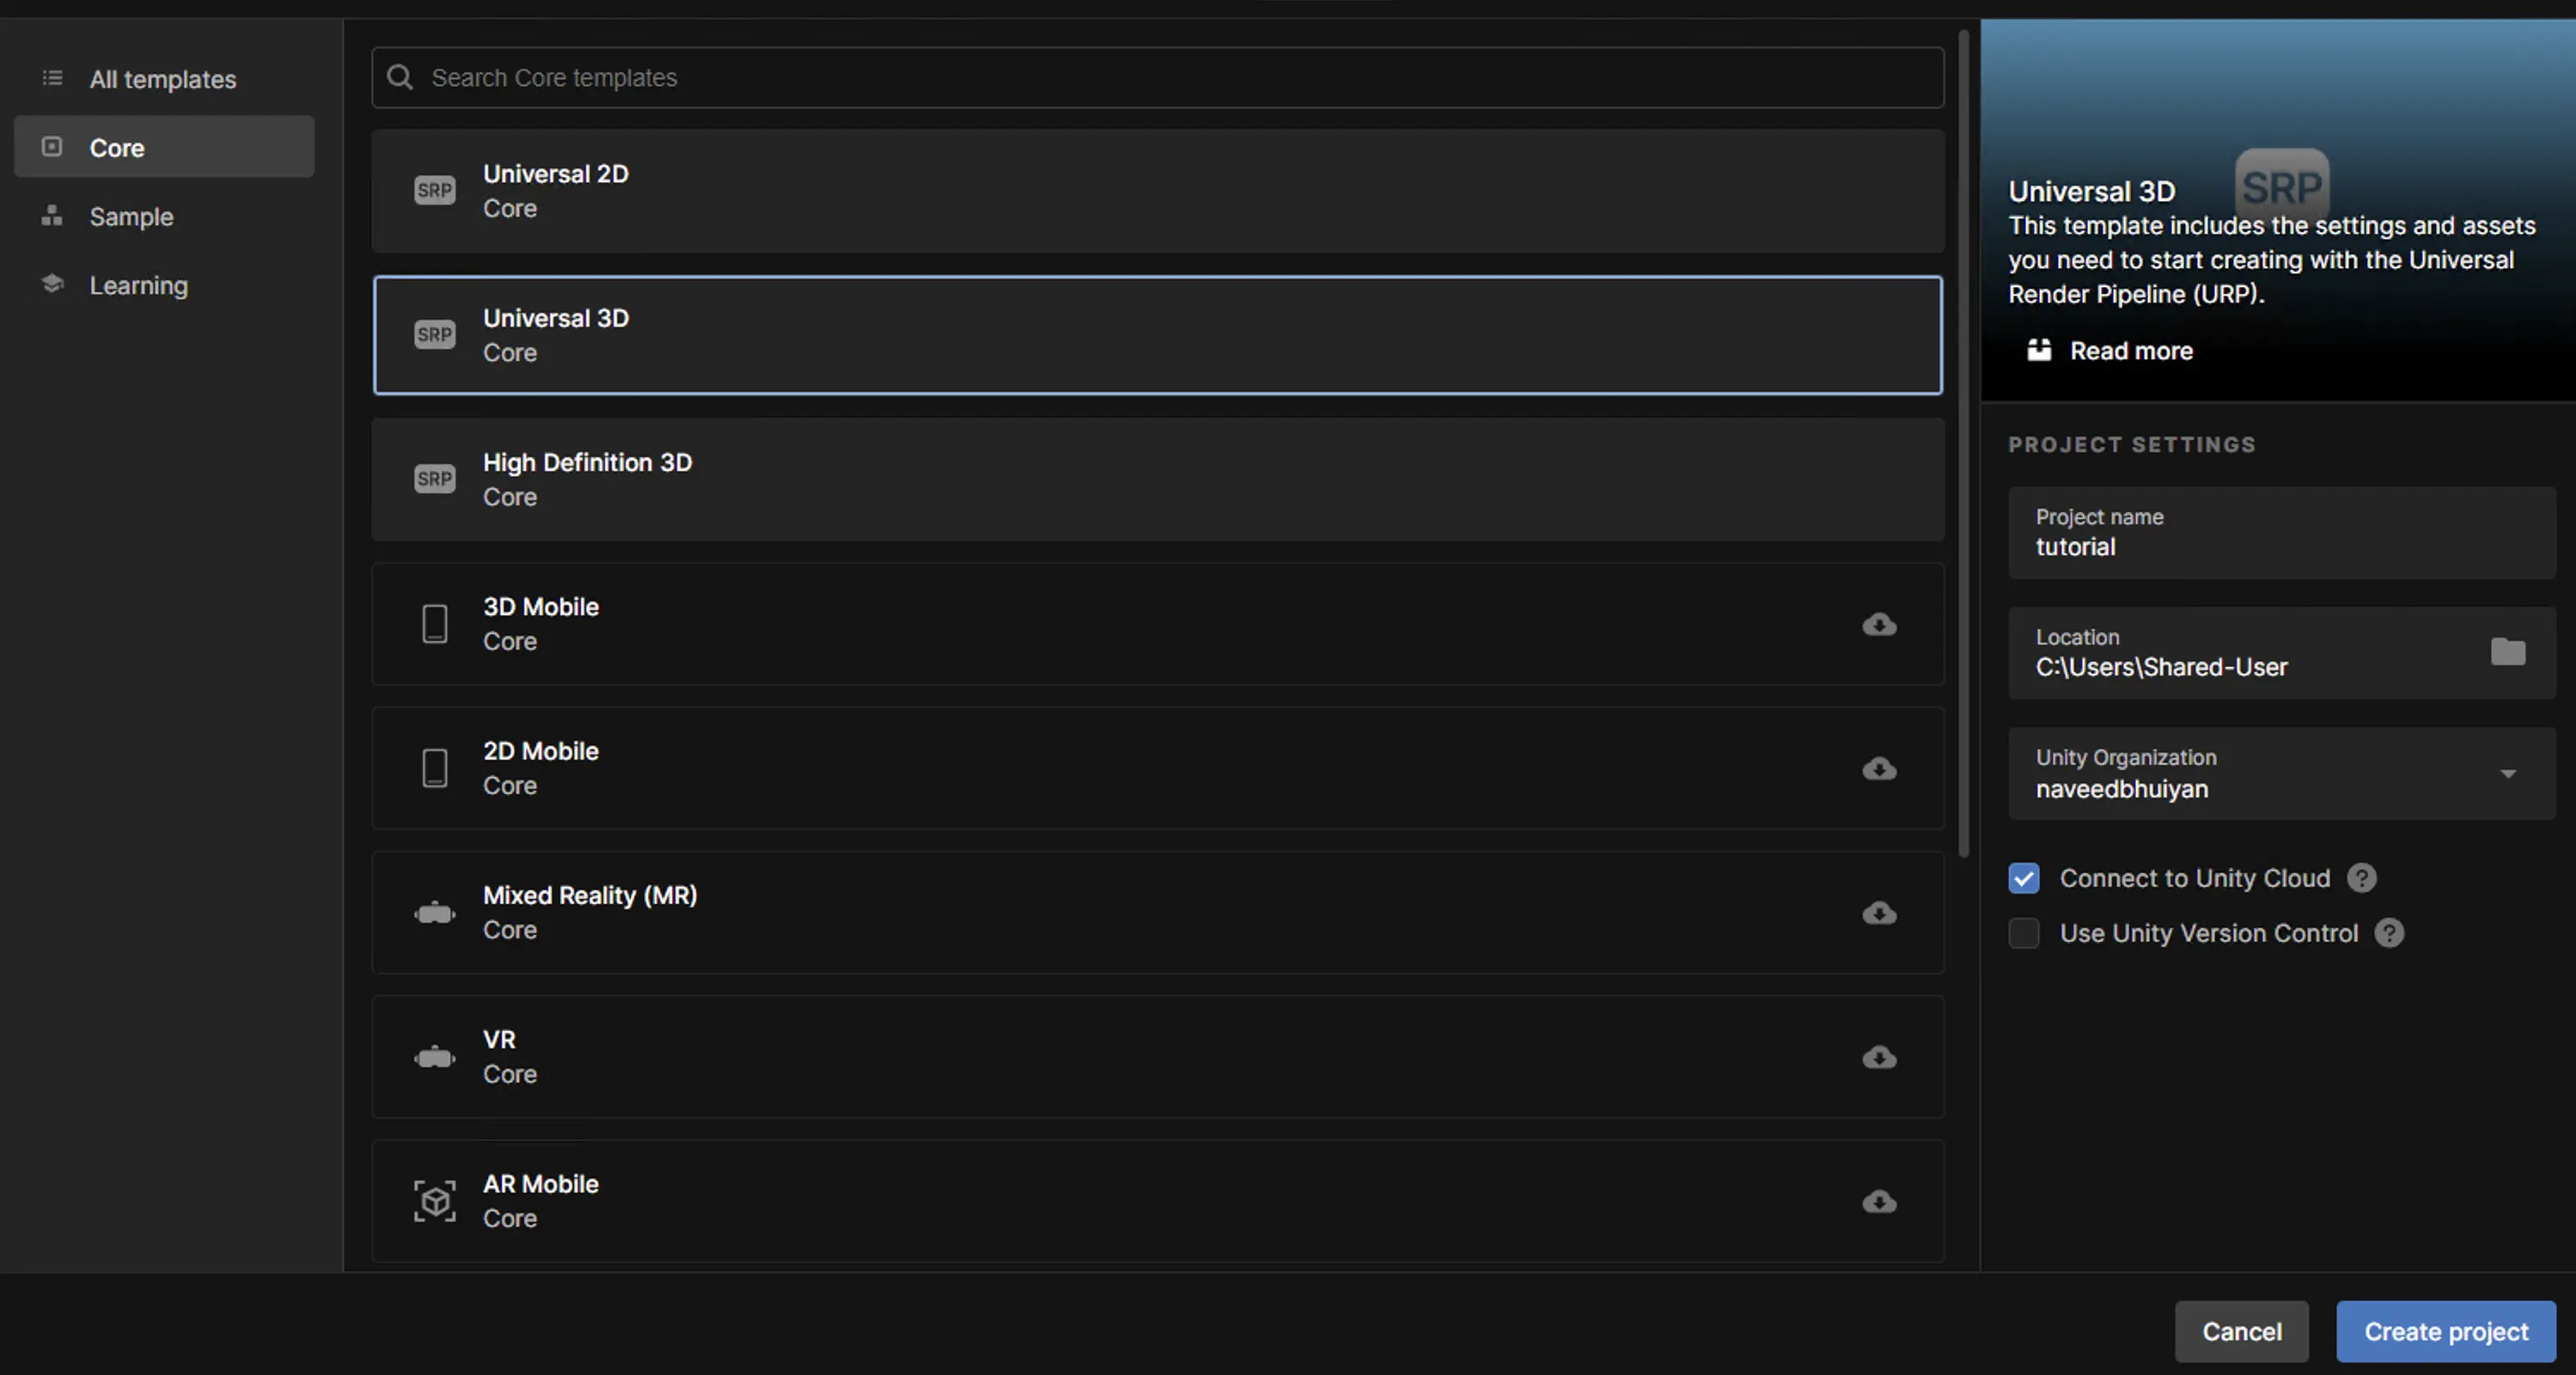
Create a new project
- Open the Unity hub.
- Create a new project by clicking on
Create projectand then selectingUniversal 3D coreas the project template. - Name your project and click on
Create.
The Unity editor opens with the default template.
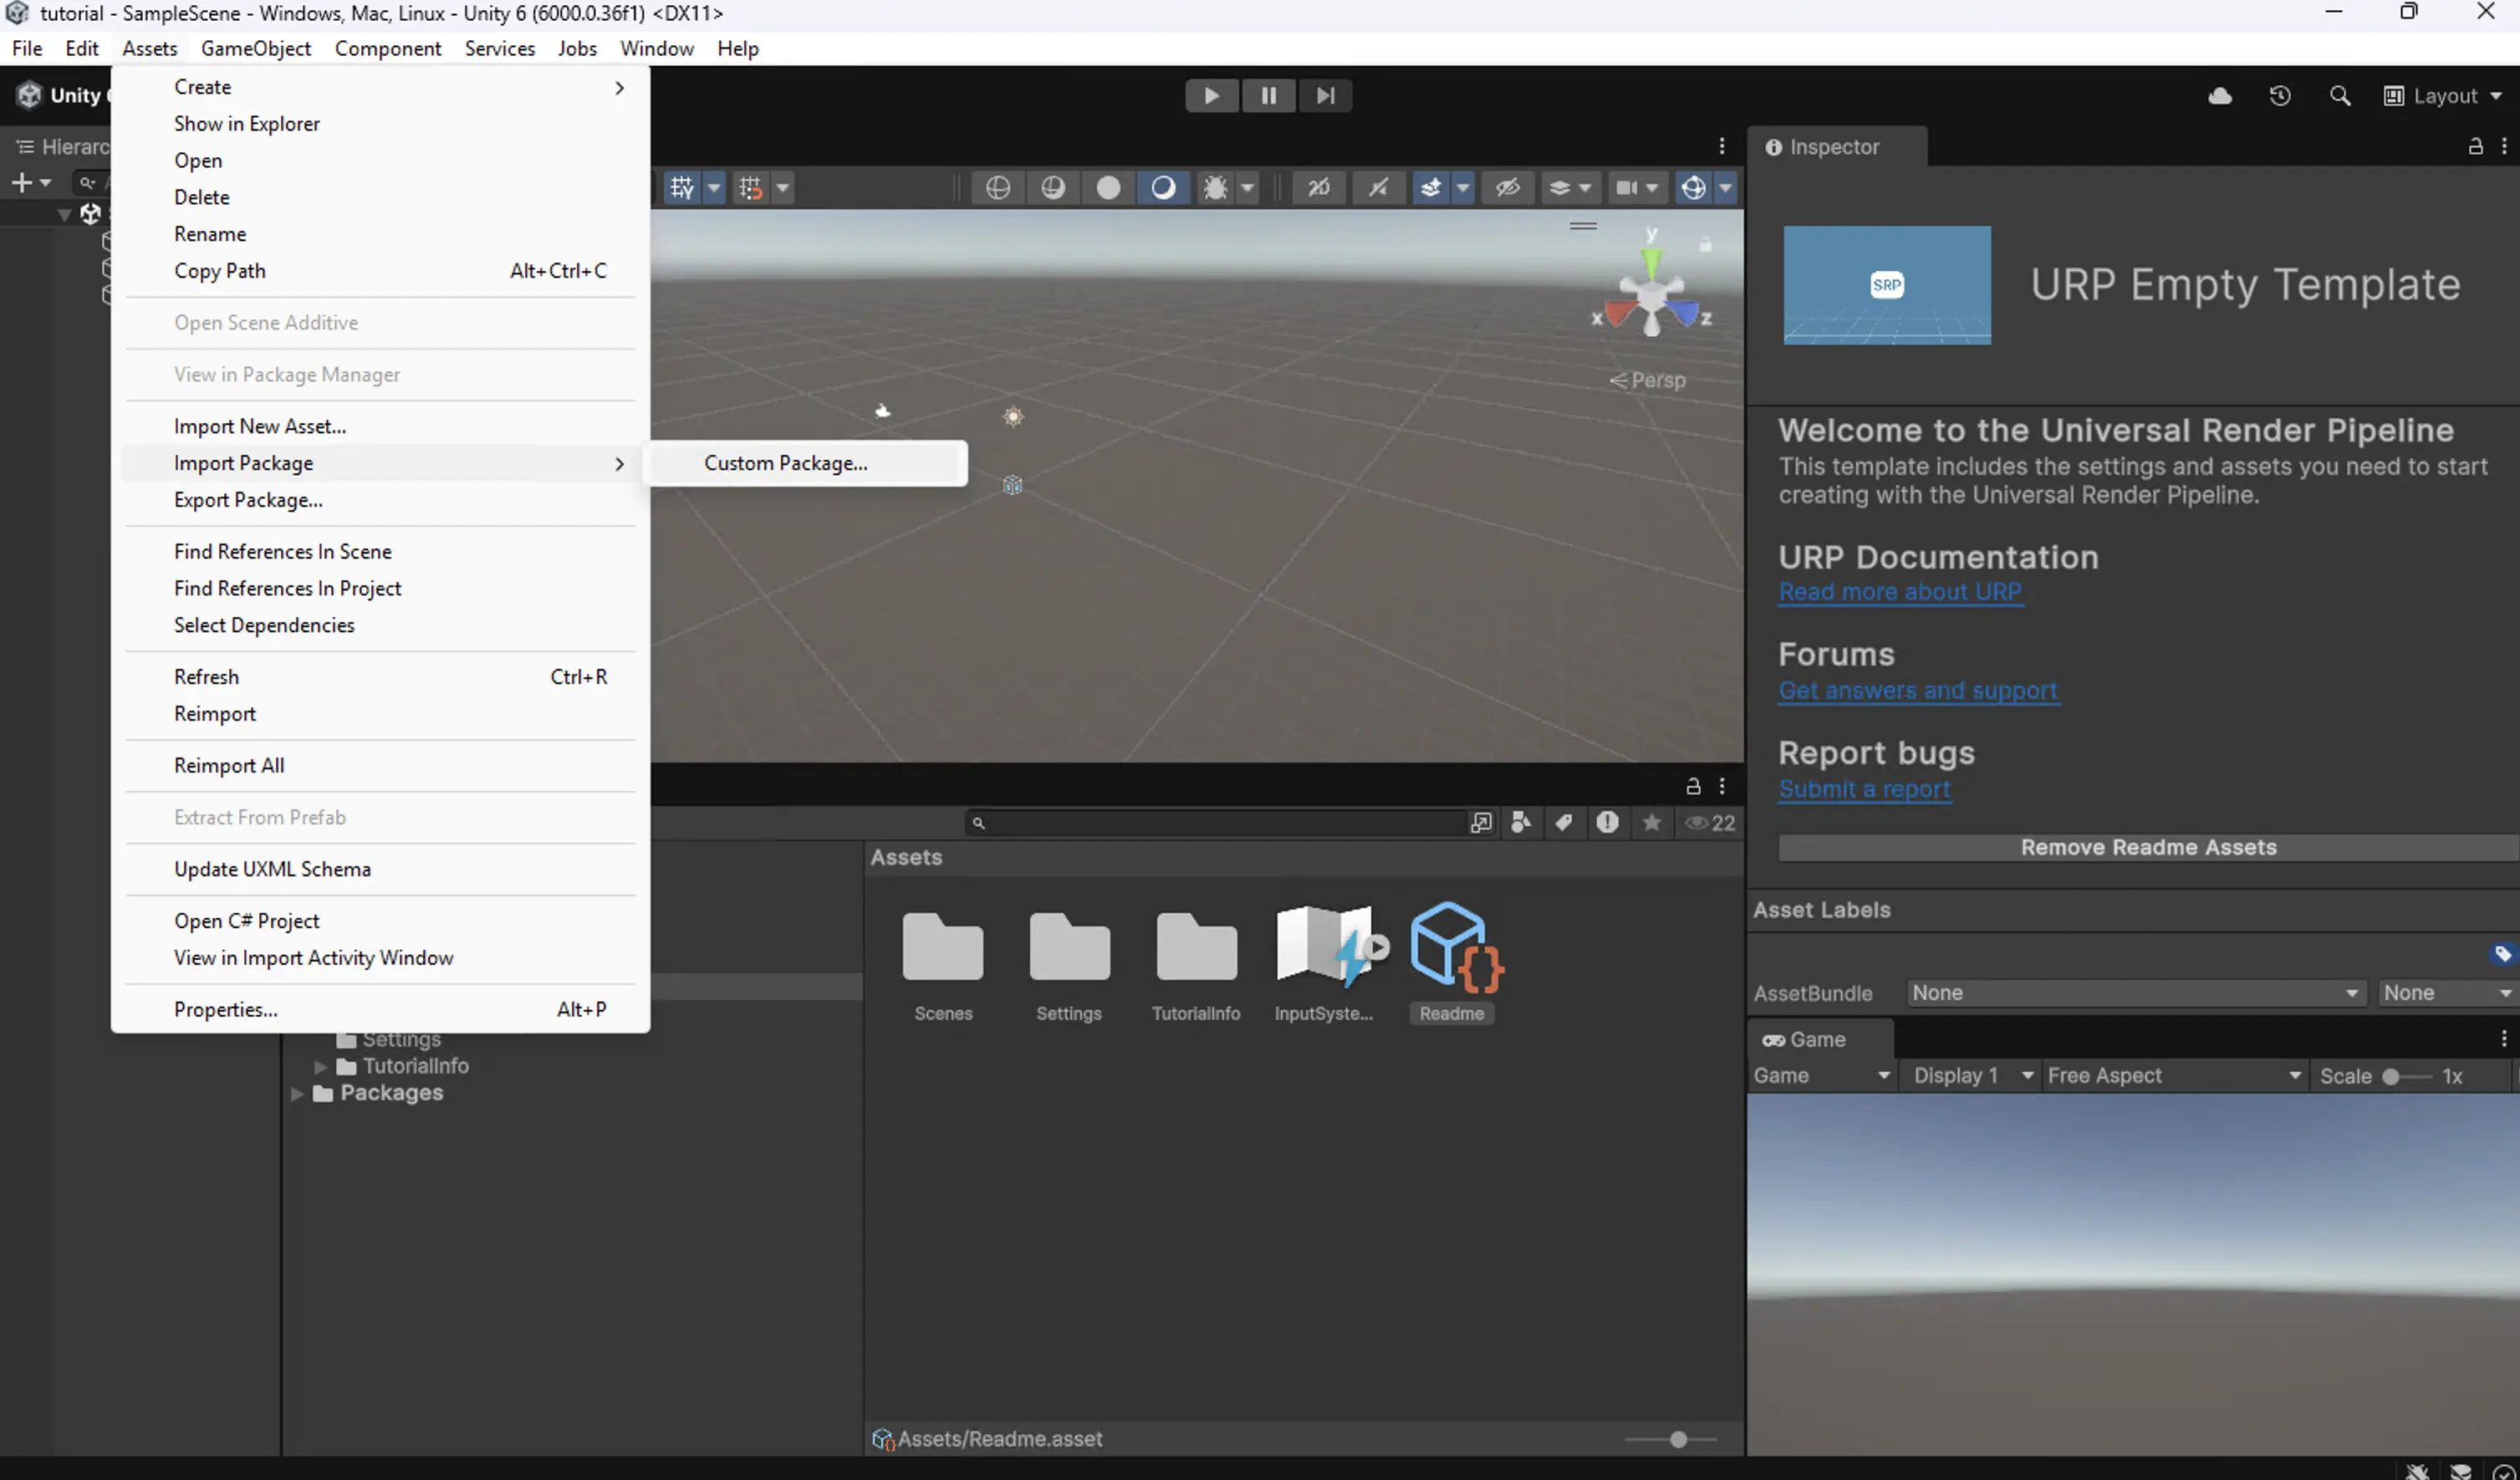
Open RV assets
- Once the Unity editor is open, click on
Assets→Import Package→Custom Package. - Select the realvirtual.io package you have downloaded.
If possible, always use the latest version. - To proceed with the integration, you have to agree to the realvirtual.io Terms and Conditions when prompted.
The RV assets are loaded.
Open Wandelbots NOVA interface
Once the realvirtual.io assets are loaded, you should be able to see a demo scene on the scene window.
- To open the NOVA interface, you need to follow this specific hierarchy in the project folder structure (lower-left window block).
- Go to
Assets→RealVirtual→Interfaces→WandelbotsNOVA./ The demo scene folderDemowandelbotsNovais displayed.
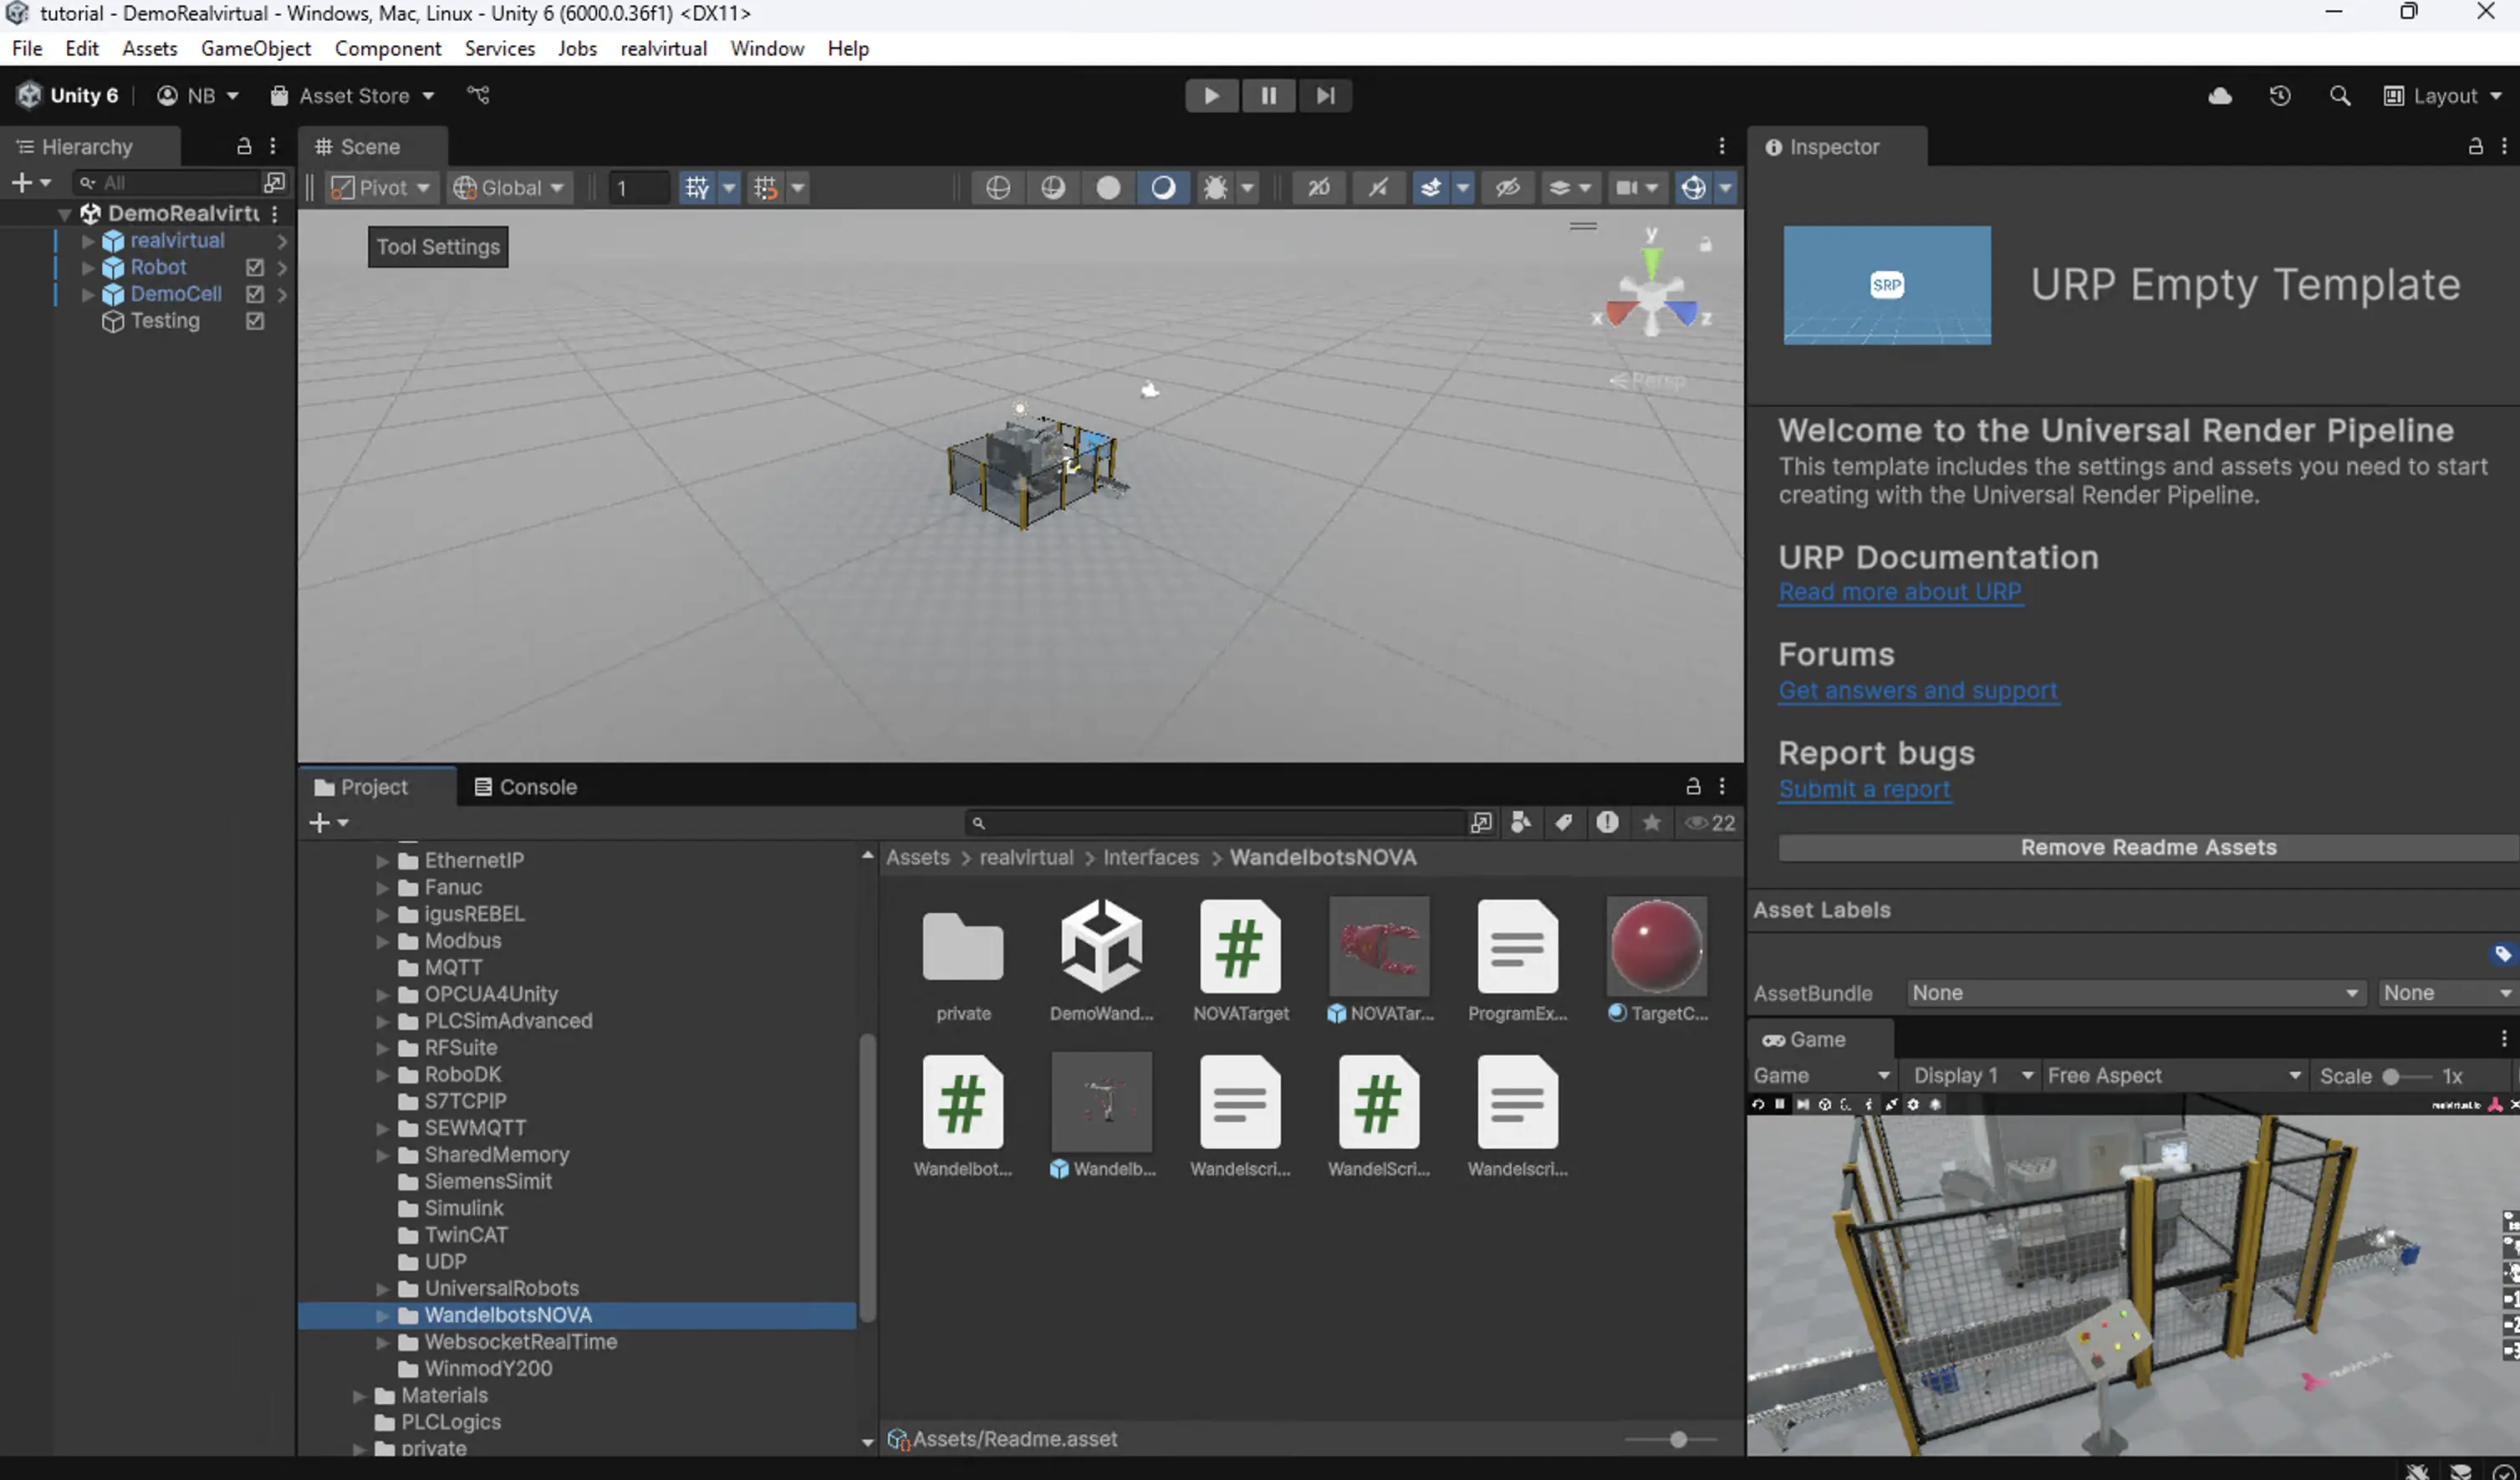
- Drag and drop the demo scene inside the hierarchy to load it.
- If displayed: Click on
Import TMP essentials. - Remove the
demo realvirtual cellto make sure the cells are not overlapping each other.
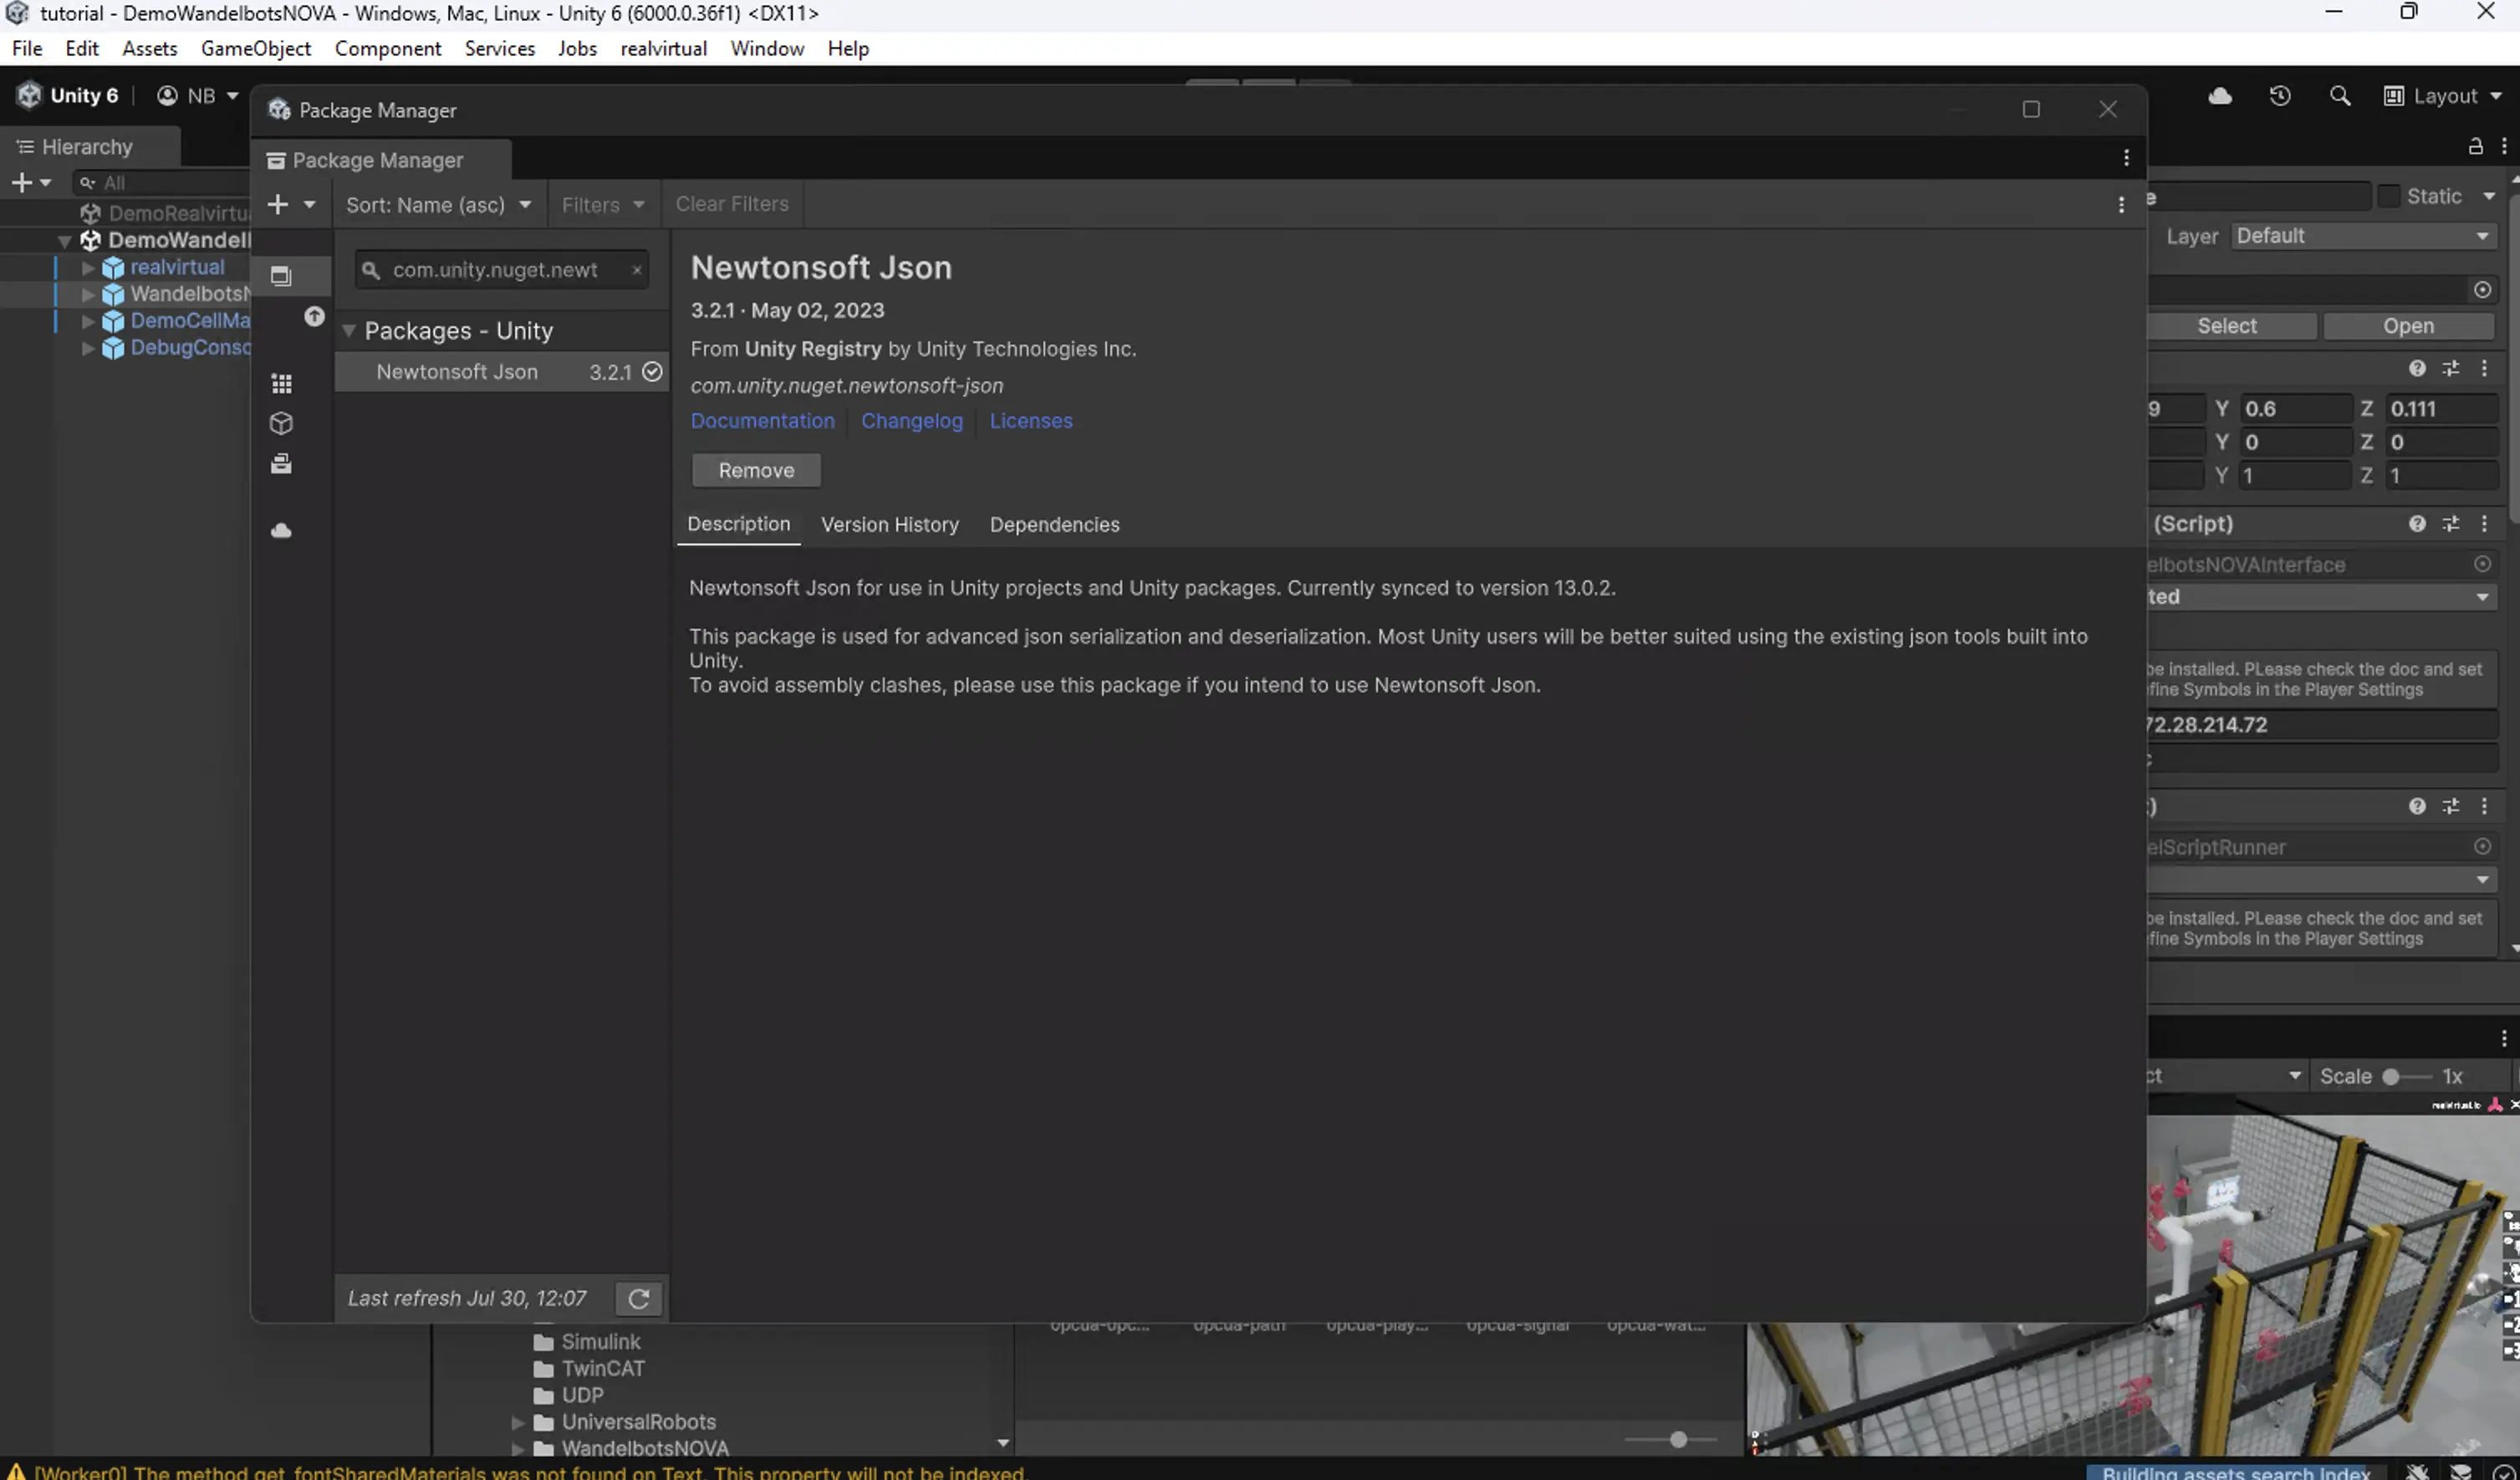
Download package newtonsoft-json
Wandelbots NOVA requires the package newtonsoft-json.
- Click on
Windows→Package managerto download it. - Click
+↓and selectInstall package by name. - Enter
com.unity.nuget.newtonsoft-jsonas the desired package name.+ - Click on
Install. The package manager displays the requirednewtonsoft-jsonpackage.
Next, add this package to our player settings. Click on the search bar on the top-right and type “player settings”. In the search results, select “player project - player”. Scroll down to the script compilation section and then click on “+”. Add the following under “scripting define symbols” and click on apply:
REALVIRTUAL_JSONAdd newtonsoft-json to player settings
- Use the search bar and search
Player settings.
The search results displayPlayer project - player. - Select
Player project - player. - Scroll down to the script compilation section and click on
+. - In
Scripting define symbols, addREALVIRTUAL_JSONand click on apply.
The newtonsoft-json is added to the player settings.
Wandelbots NOVA is prepared to connect to realvirtual.
Connect Realvirtual to Wandelbots NOVA
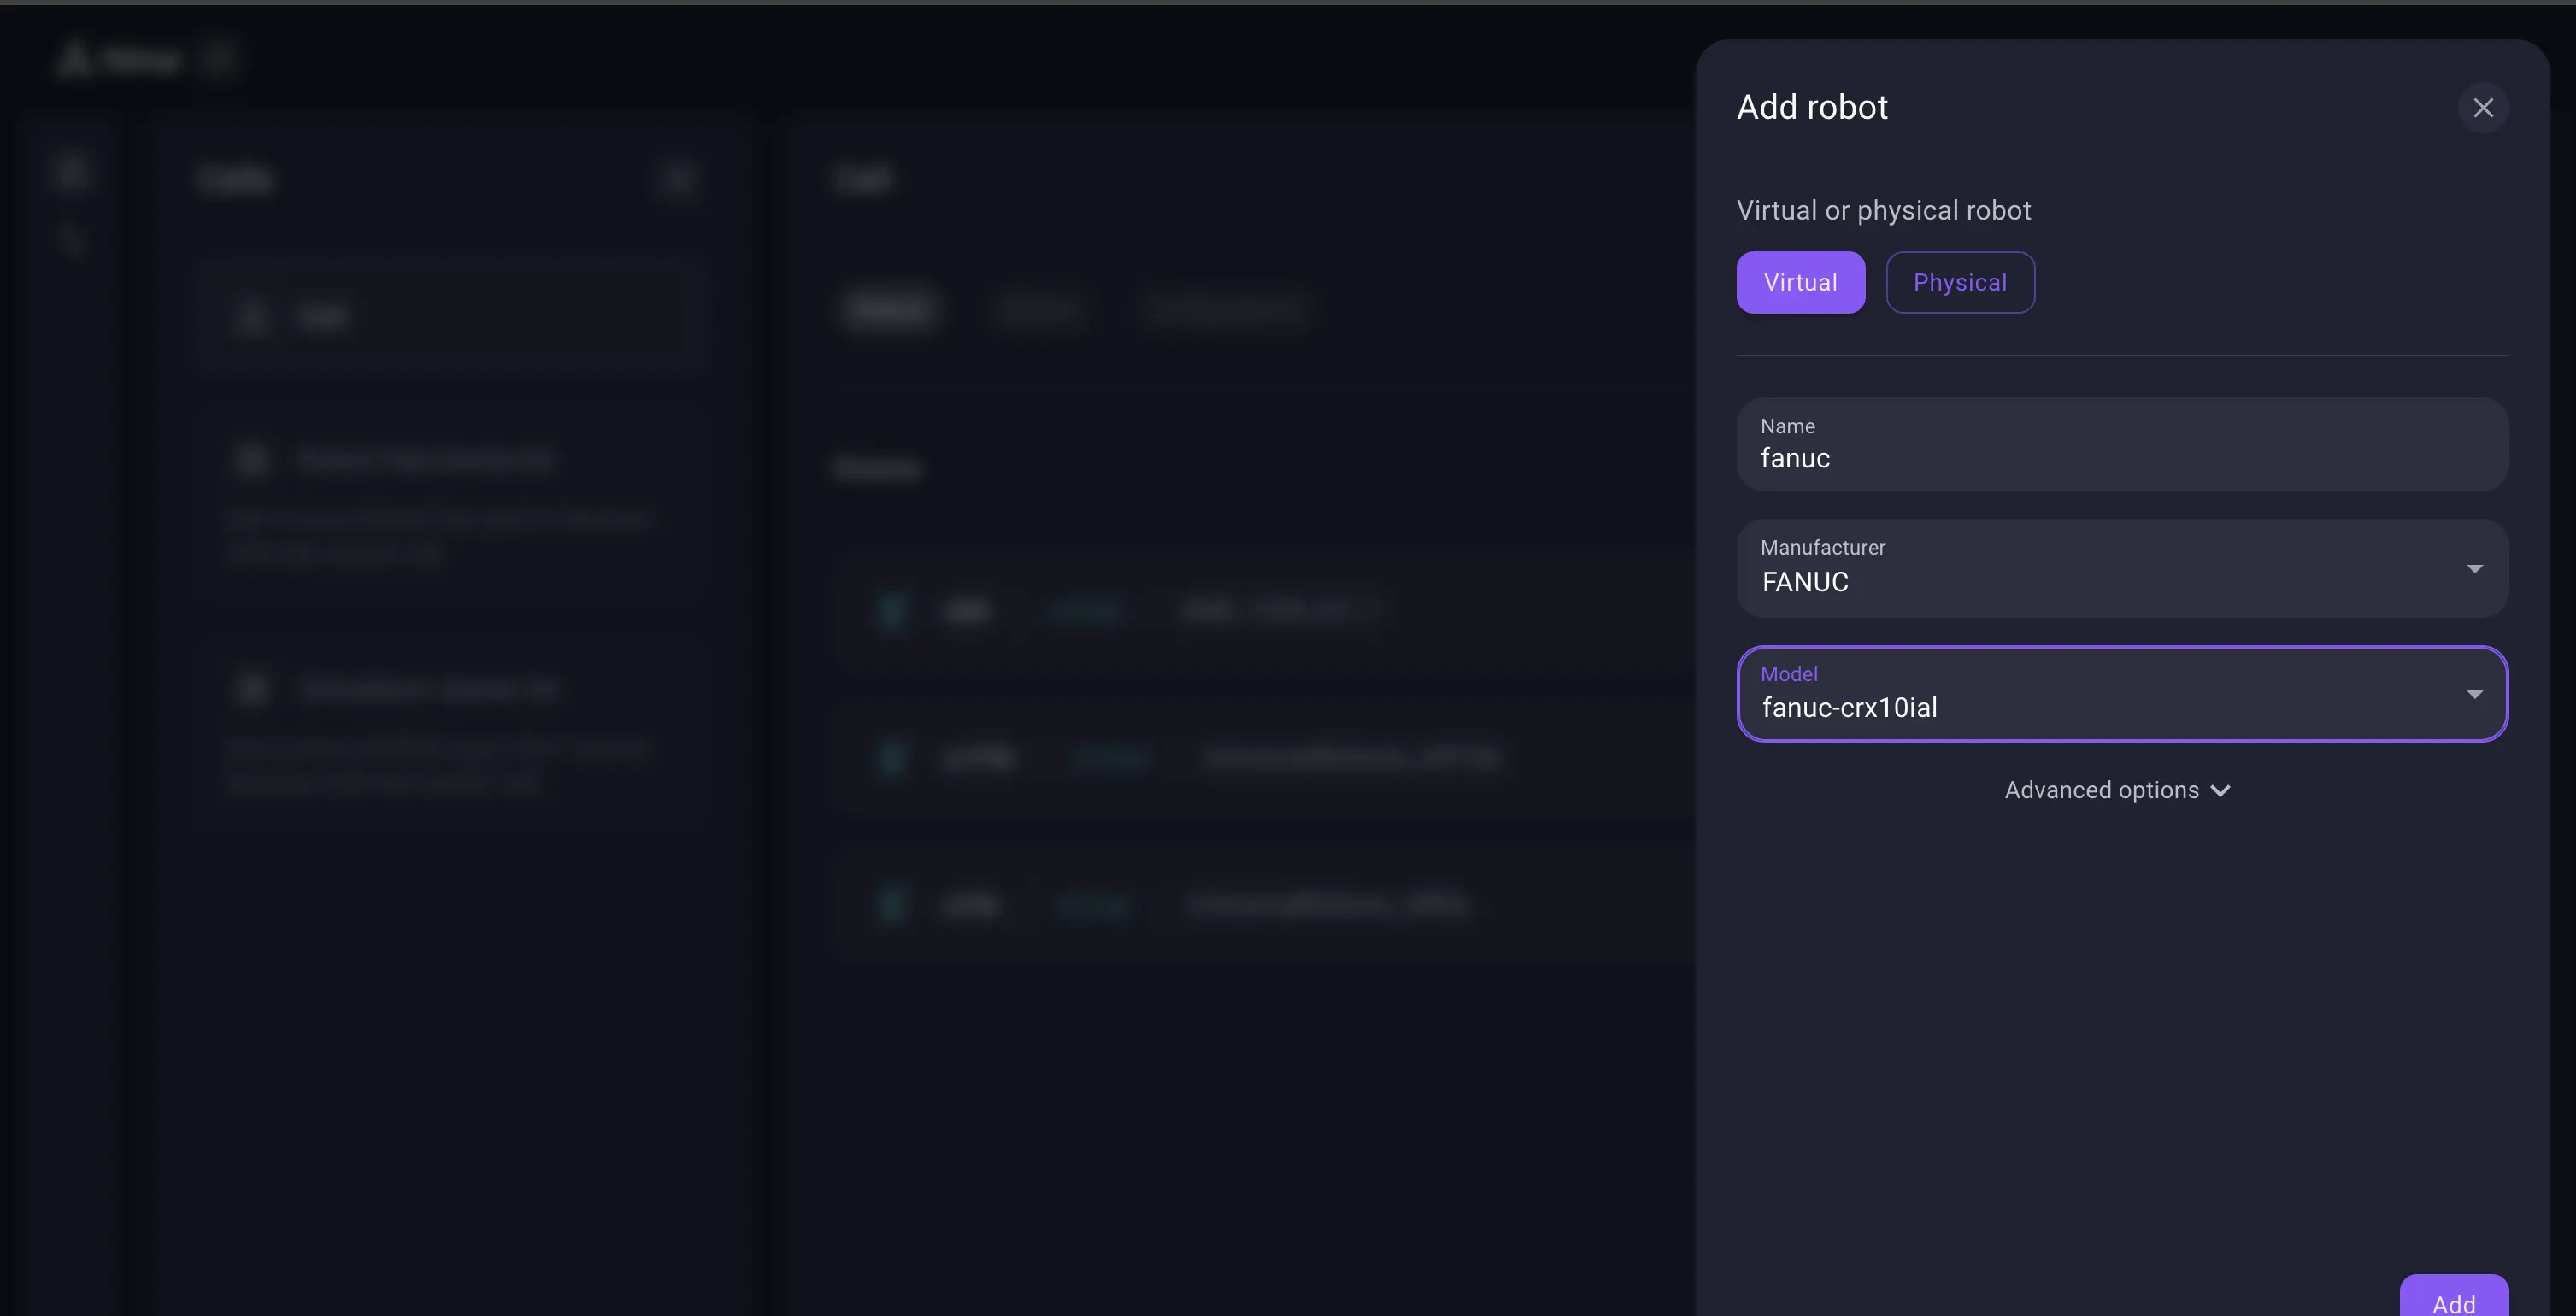
- Using Wandelbots NOVA, add a virtual robot to the cell using the Setup app: select FANUC as the robot manufacturer and
fanuc-crx10ialas model.
See the Quickstart for more information. - Open Robot Pad.
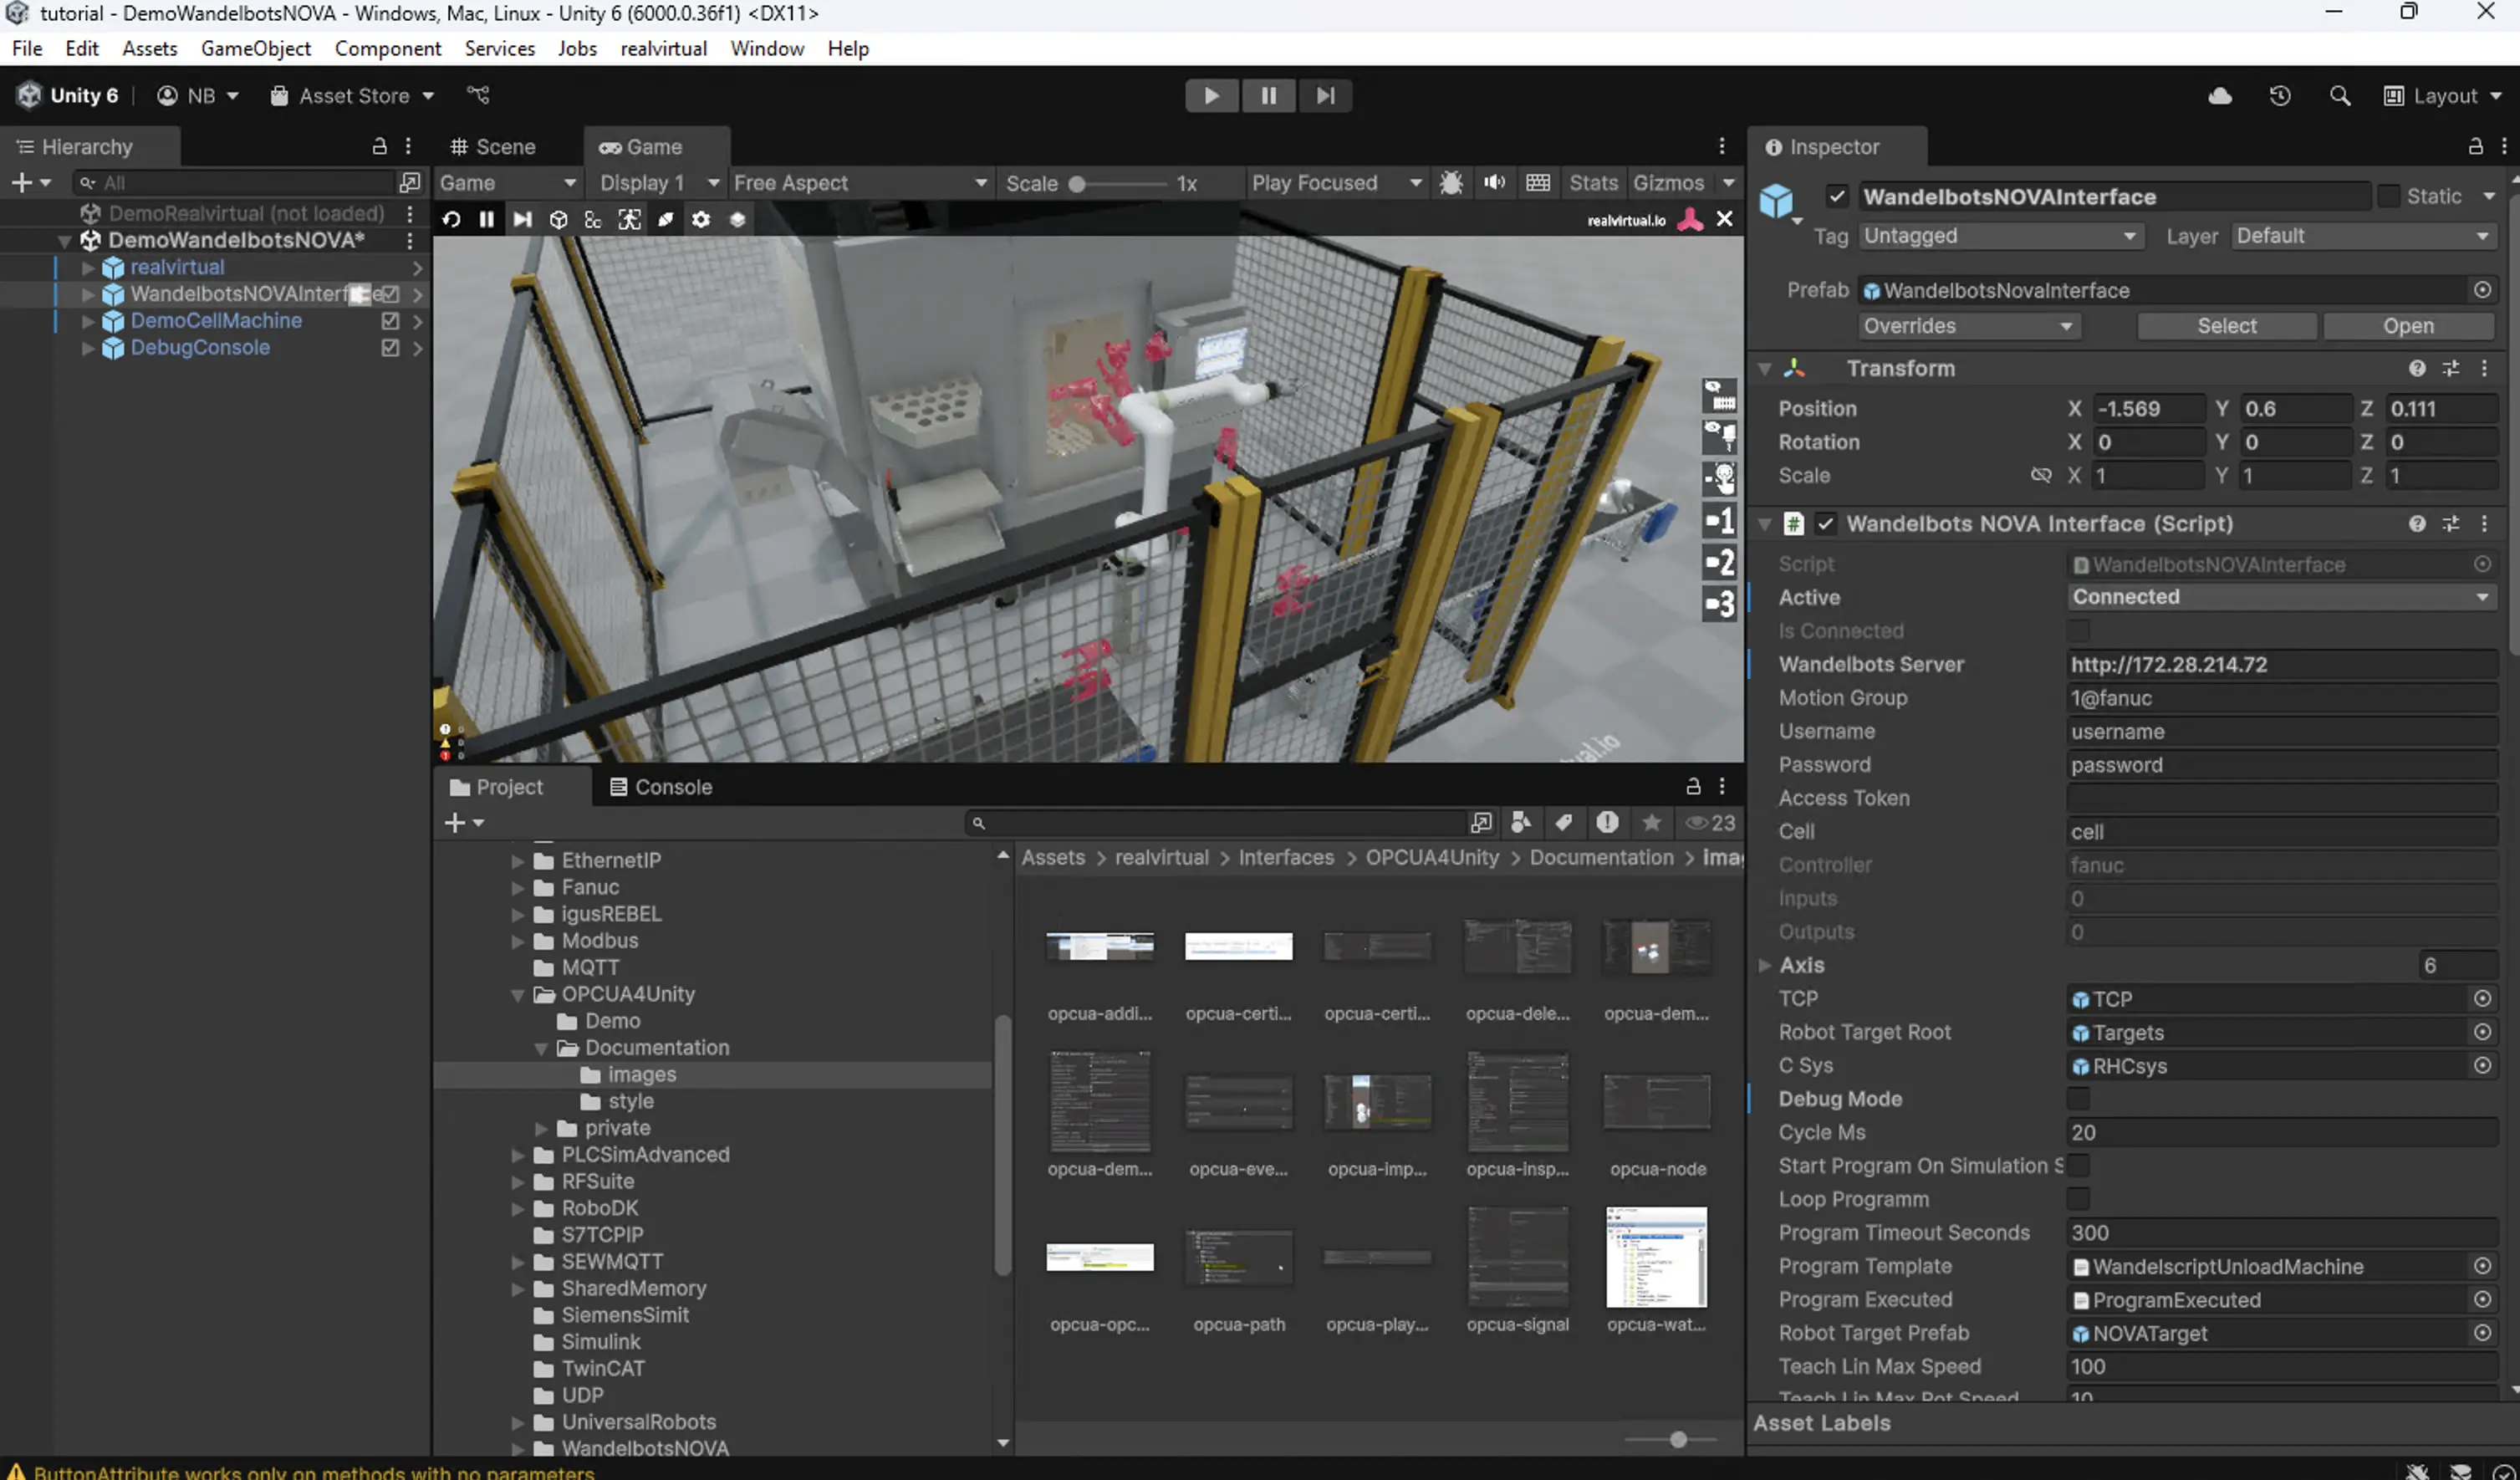
Now that the Wandelbots NOVA instance features a Unity editor, you can connect it to Reealvirtual. A successful connection is established via the instance URL and access token of a cloud instance or the instance URL for VMs and IPCs.
- In the Unity editor, go to
wandelbotsNovaInterfacein the folder hierarchy and enter the instance URL and the access token in their respective fields.
Depending on your instance type, you need to preface the instance URLs.
Local instance: preface the URL with http://.
Cloud instance: preface the URL with https://.
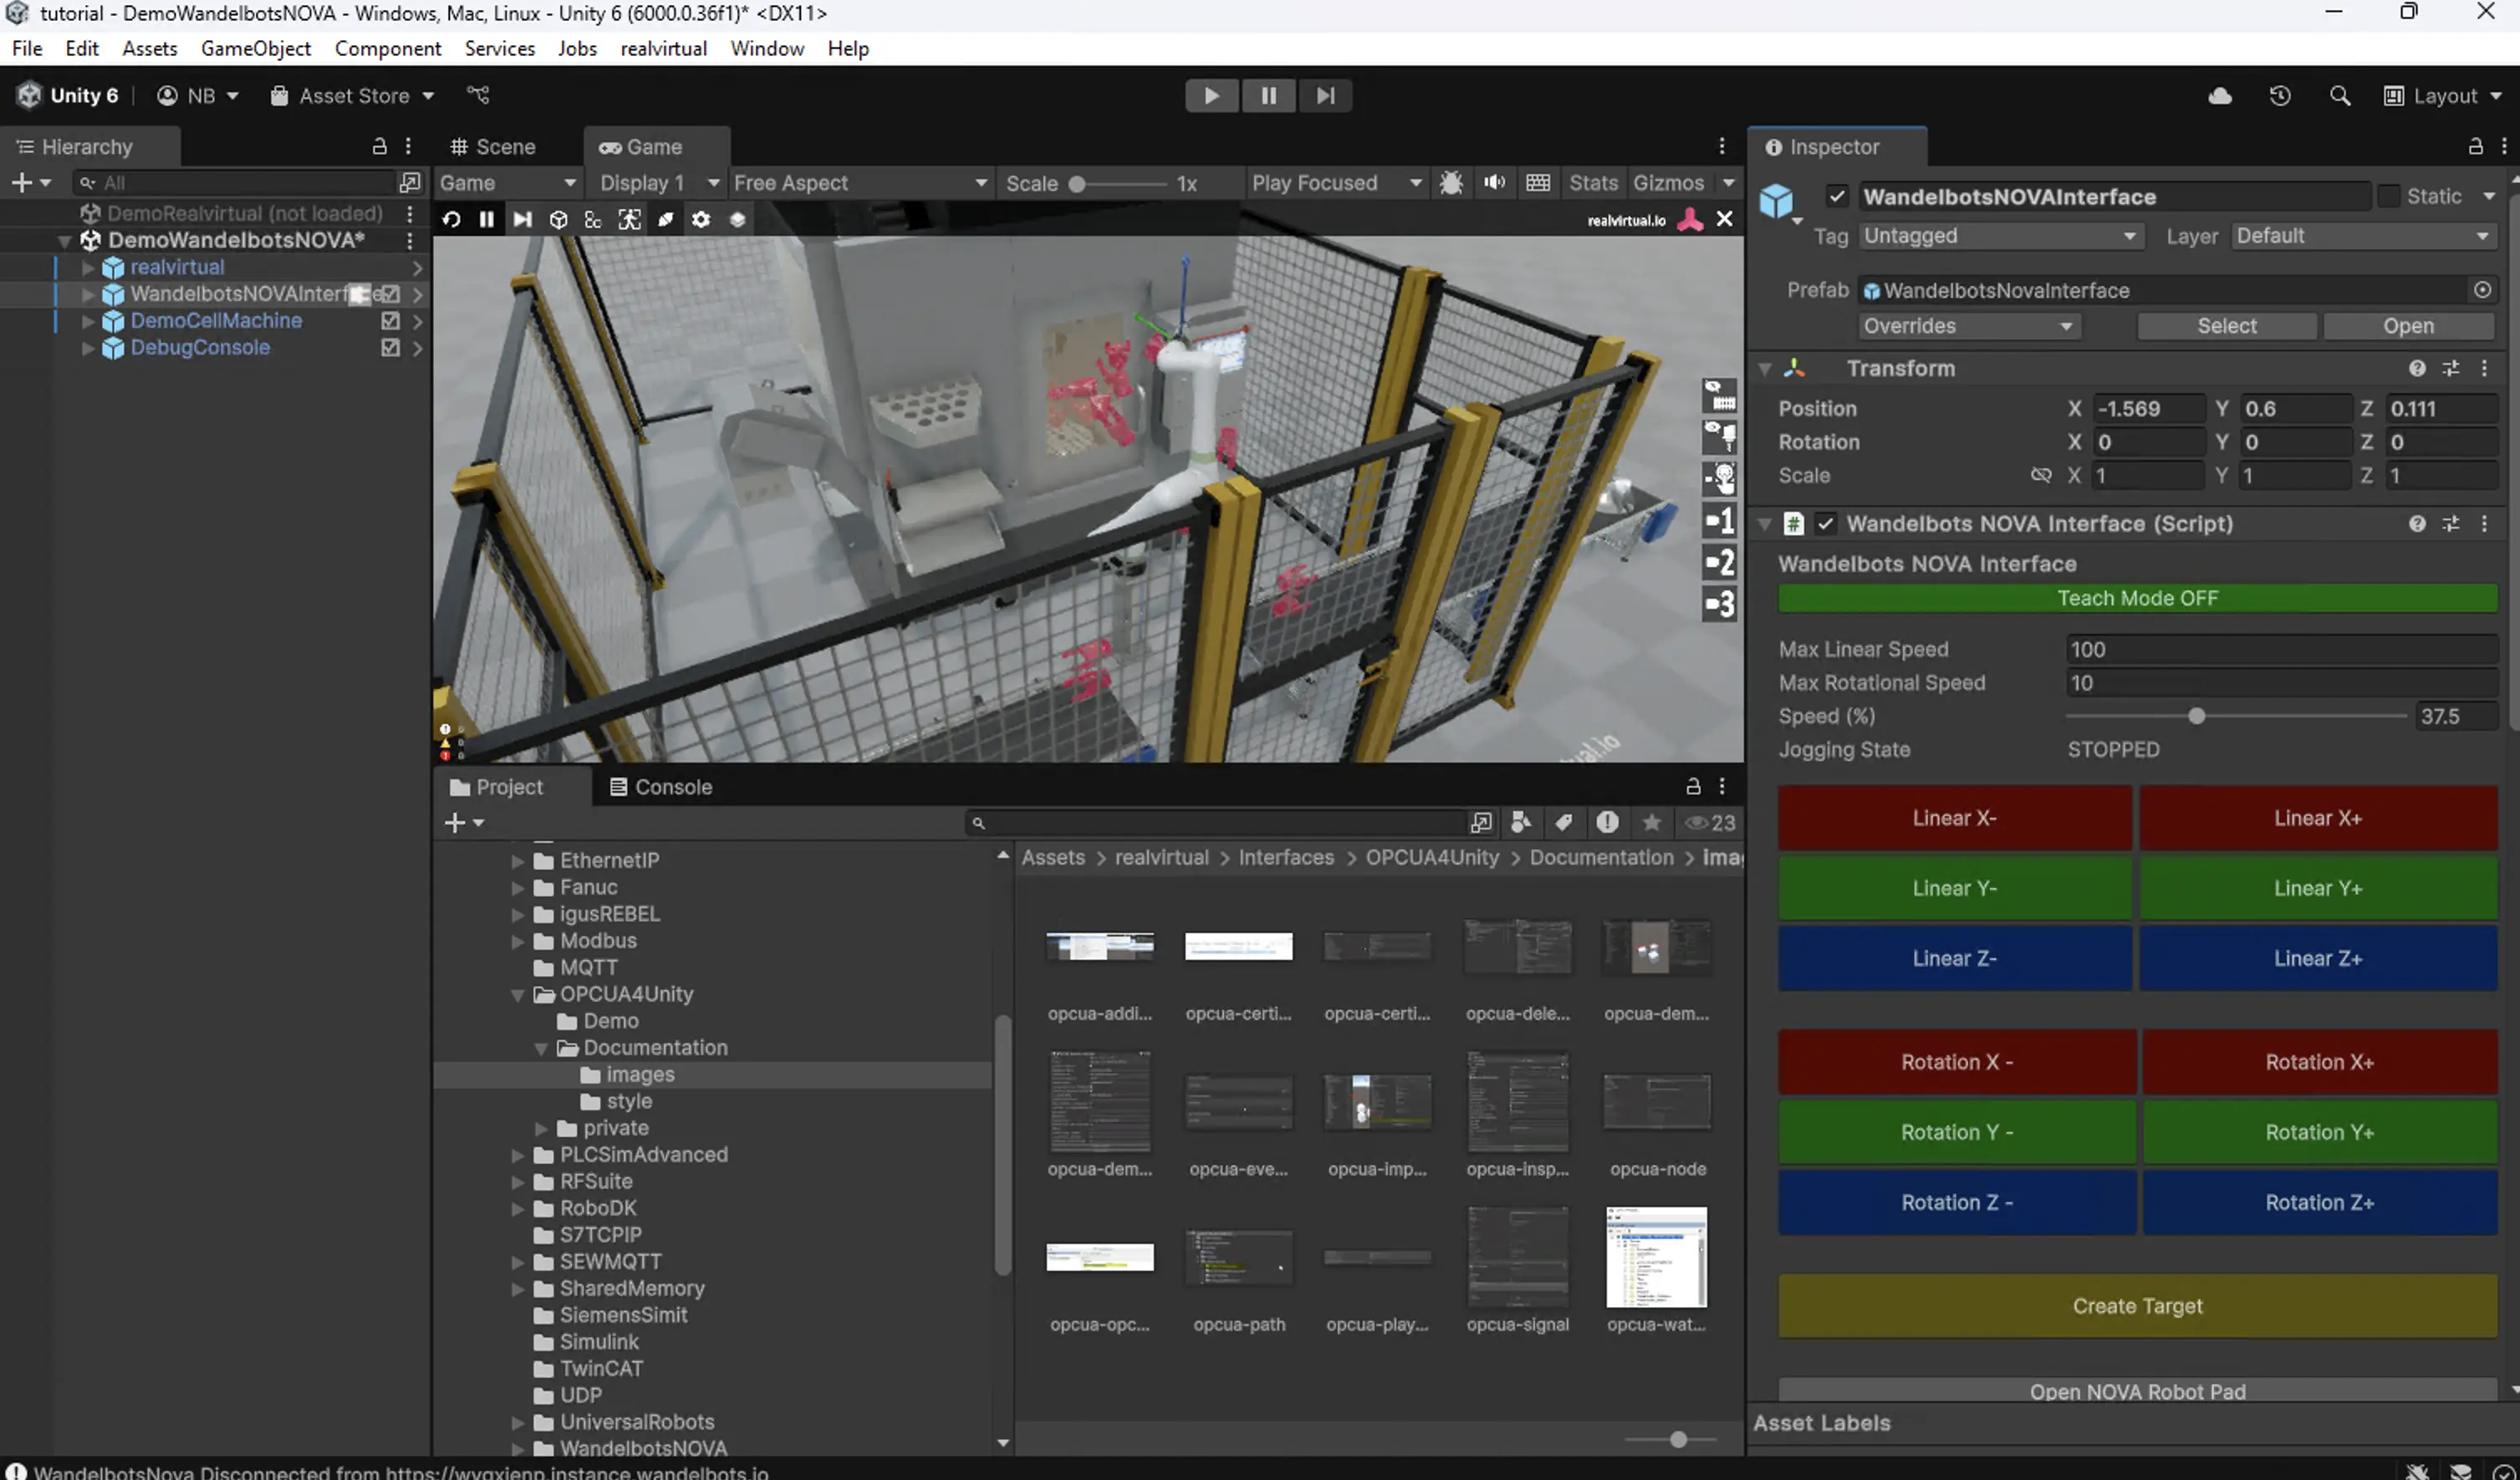
- Scroll down on the inspector page for
wandelbotsNovaInterfaceand click onsave 0 posto save the robot's default position.
This helps debugging during path planning in Teach mode. - Start the demo scene by clicking on the Play button.
The FANUC in Wandelbots NOVA Robot Pad as well as the FANUC in the Unity Editor execute the same movements.
Teach mode
To jog and save target positions, teach mode needs to be enabled.
- Go to the inspector page of
wandelbotsNovaInterface. - Click on
Teach mode ON.
Jogging controls will be displayed.
Saved positions will only be saved in Unity.
Congrats, your demo cell is ready to explore 🚀. Find more information on realvirtual.io (opens in a new tab).
Some of your burning questions have been left unanswered? Try out the search function or visit the FAQ page.