Create a tool
In this section you will learn how to create a reusable tool in Isaac Sim and connect it to Wandelbots NOVA. First time using OmniGraph (OGN)? Check out the OmniGraph Nodes documentation to learn more about the basics of OGN.
Creating tools from CAD files is not in the scope of this section.
As the tool configuration via the Robot Pad will be deprecated with Wandelbots NOVA extension 2.0, please transfer your existing tools to the OmniGraph Nodes approach as described in the following article.
You'll need a scene containing a tool. Check out our asset package provided on the Developer Portal (opens in a new tab) to get started.
Open tool and add function attributes
Open the desired tool which only contains the tool which can be attached to the robot later on. In case there are any other elements (xform, mesh, lights etc.) in the stage of your tool which should not be imported into the robot scene, please remove them.
In the first step the interface of the tool needs to be defined. This will be done via custom attributes. In the video below the workflow is shown for a boolean open attribute which indicates the gripper open state (true or false). Additionally a finger distance attribute (float) is added which indicates the distance between the gripper fingers. This is used to calculate the target position of the gripper fingers later on.
Using attributes as abstraction of the inner logic offers the user of the tool an easy way to connect the node with any scene logic later on.
Adding I/O logic right to the tool decreases the flexibility of the tool and makes it harder to use in different scenarios.
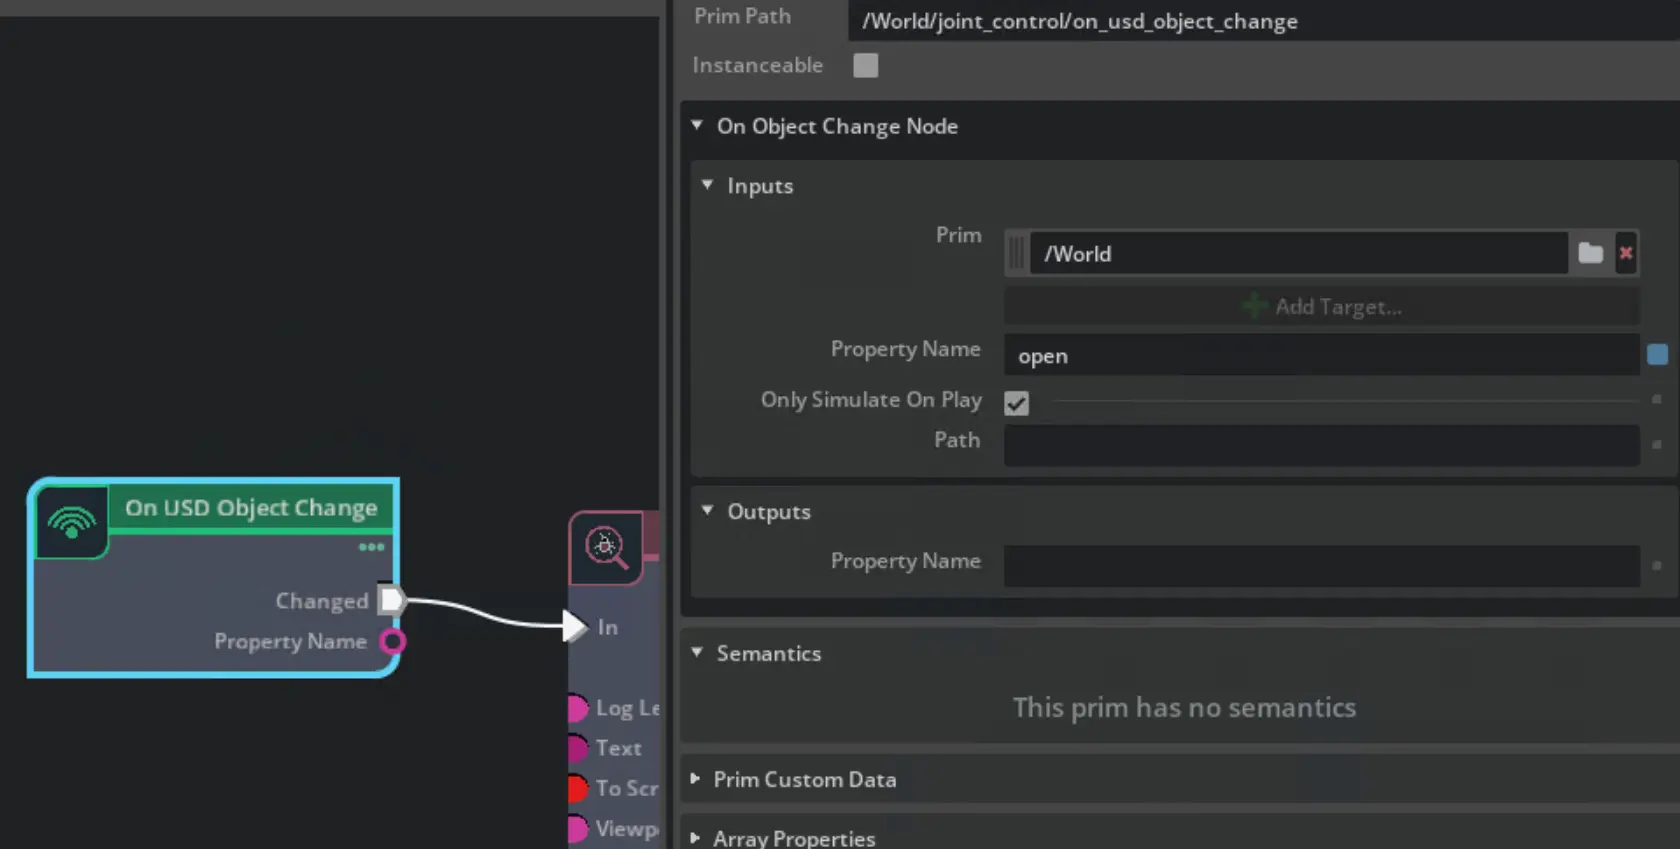
Add OGN trigger for attribute changes
Next up, the tool needs an action graph. An action graph allows for modifying the gripper fingers on
attribute change (open to true or false). On USD object change (opens in a new tab)
enables listening for changes to the created open property. Once a change is detected for open, the node will trigger a
changed execution which can be used in action graphs to call other nodes and change properties of the tool prims.
Read the attributes to change tool prims
Before writing anything to the tool prims, the values of the open and finger_distance attributes
need to be read. This can be done with the Read Prim Attribute (opens in a new tab) node.
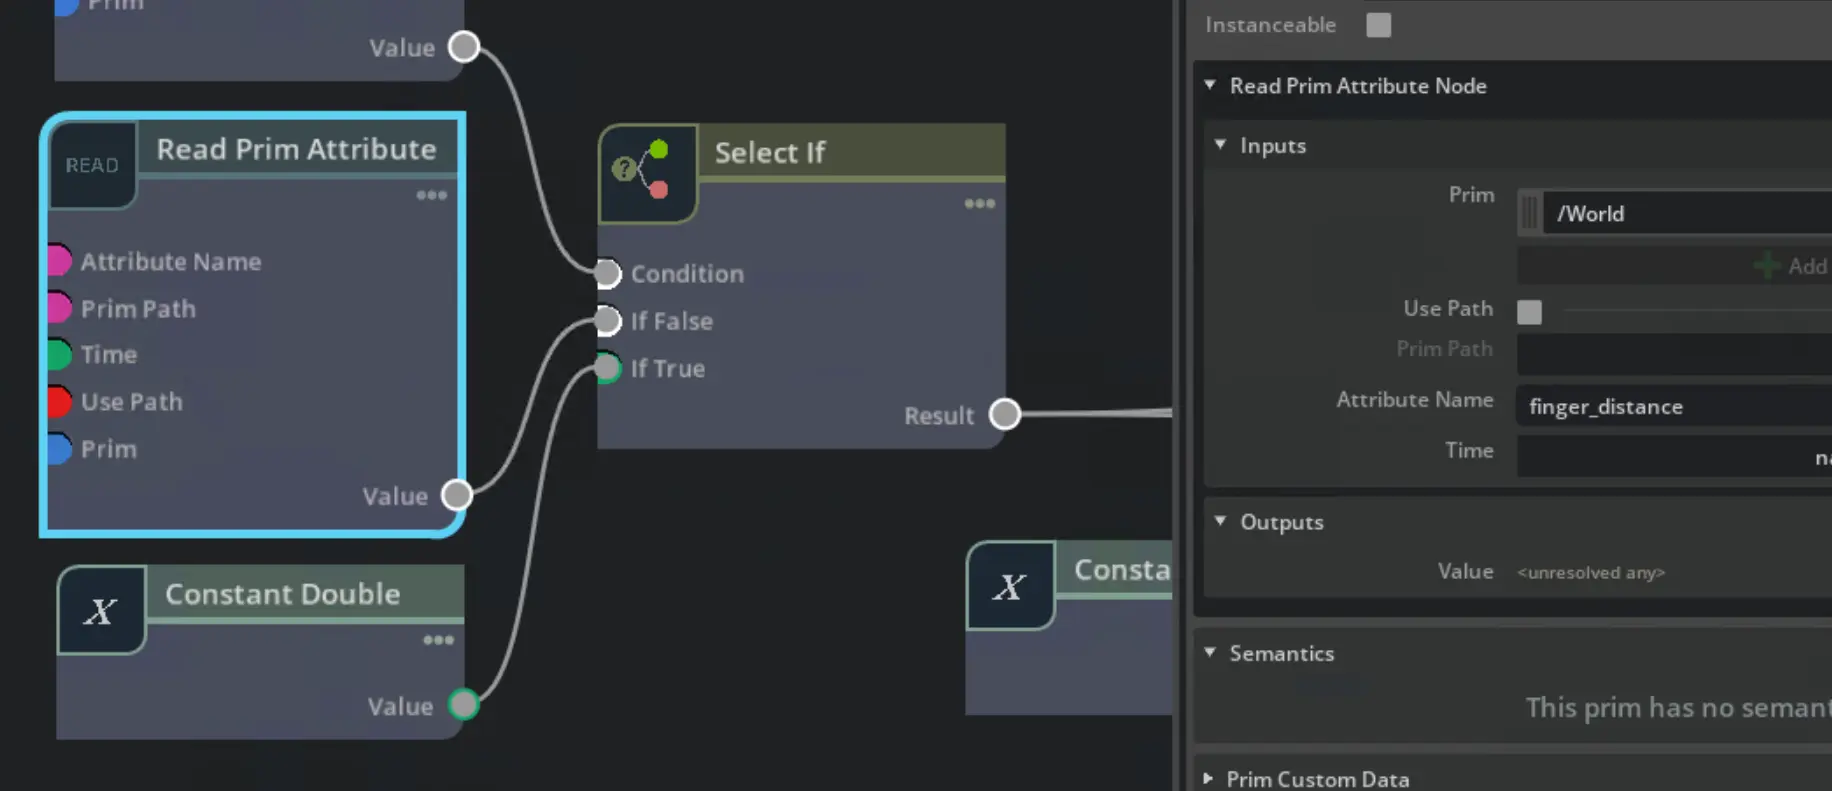
Based on the open attribute, finger_distance value is selected.
If the gripper state open is true, the distance is read from the prim attribute. Otherwise a constant value of zero is used.
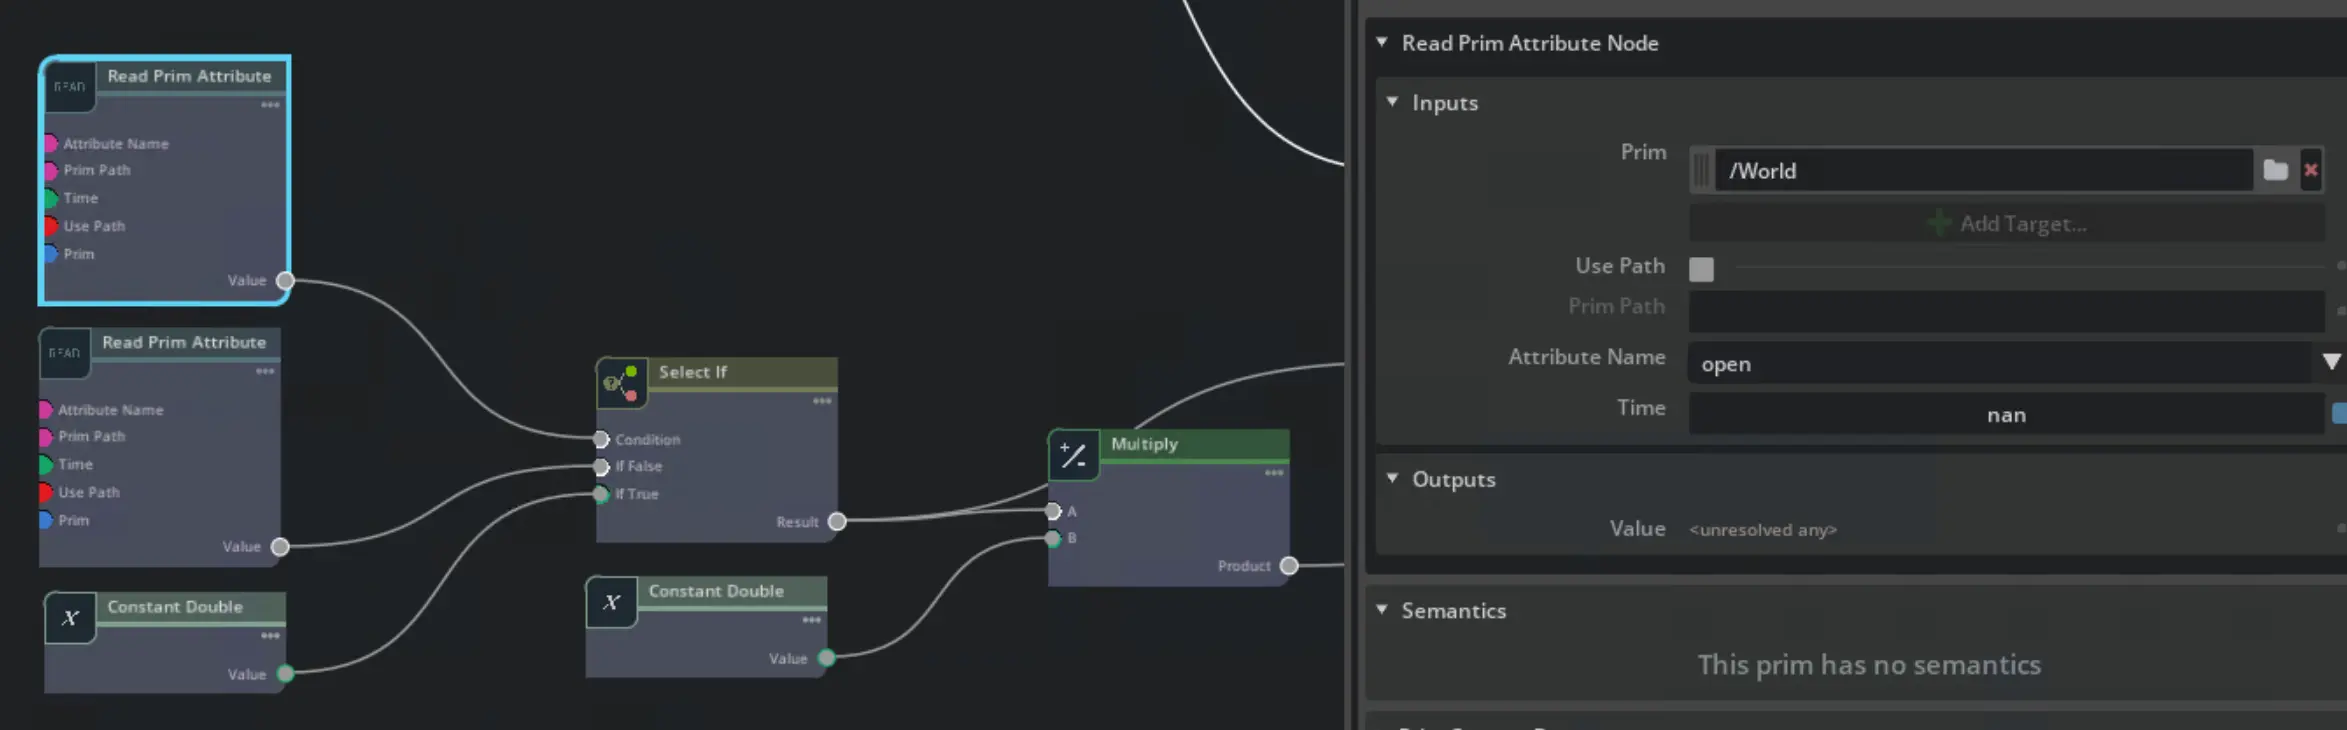
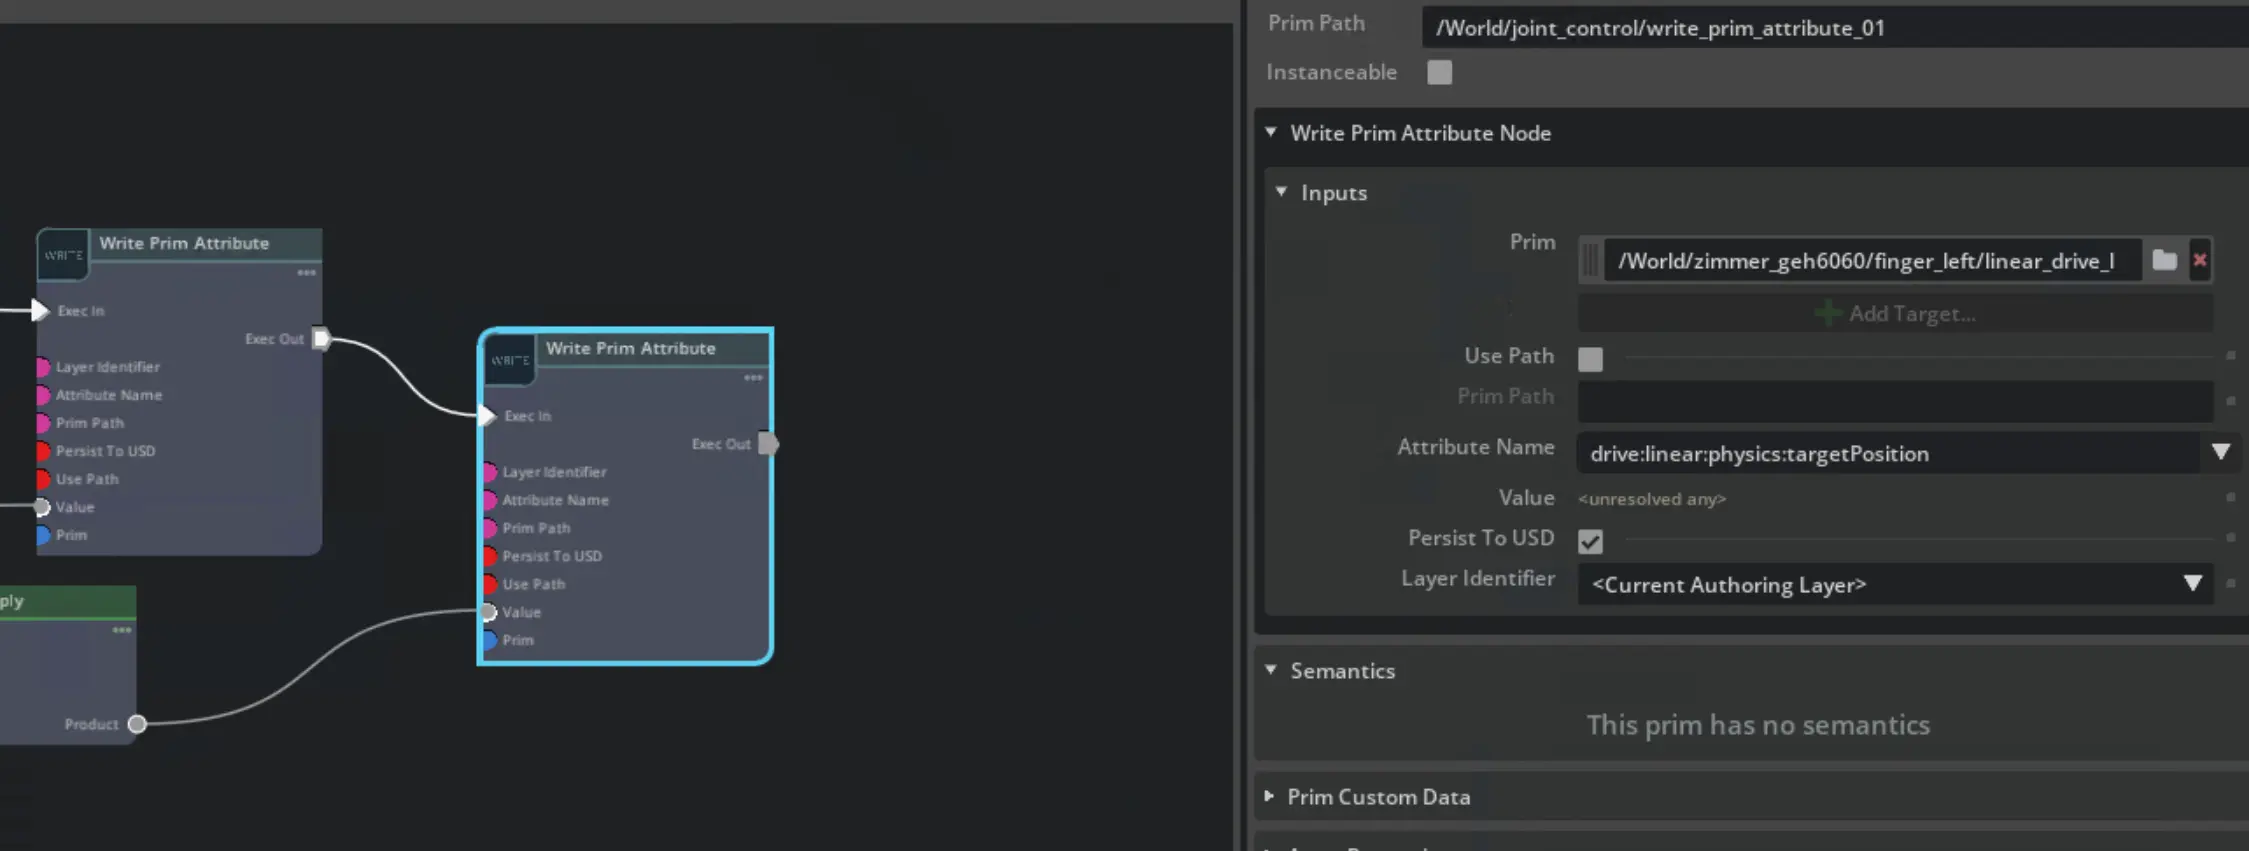
With the right distance values passed, the values can be updated via a Write Prim Attribute (opens in a new tab)
node. In this case the tool has one prismatic joint for each finger.
These joints are controlled using their targetPosition attribute.
One joint needs to move in the opposite direction of the other joint,
so the finger_distance value is negated for one of the joints with a multiply node which takes minus one as one constant input.
Replicator offers a Write Prim Attribute (opens in a new tab) as well.
The input requires an array and the node from omni.graph.nodes offers
a dropdown to select the right attribute which smooths the workflow.
Testing the tool
Now the tool graph should look something like this:
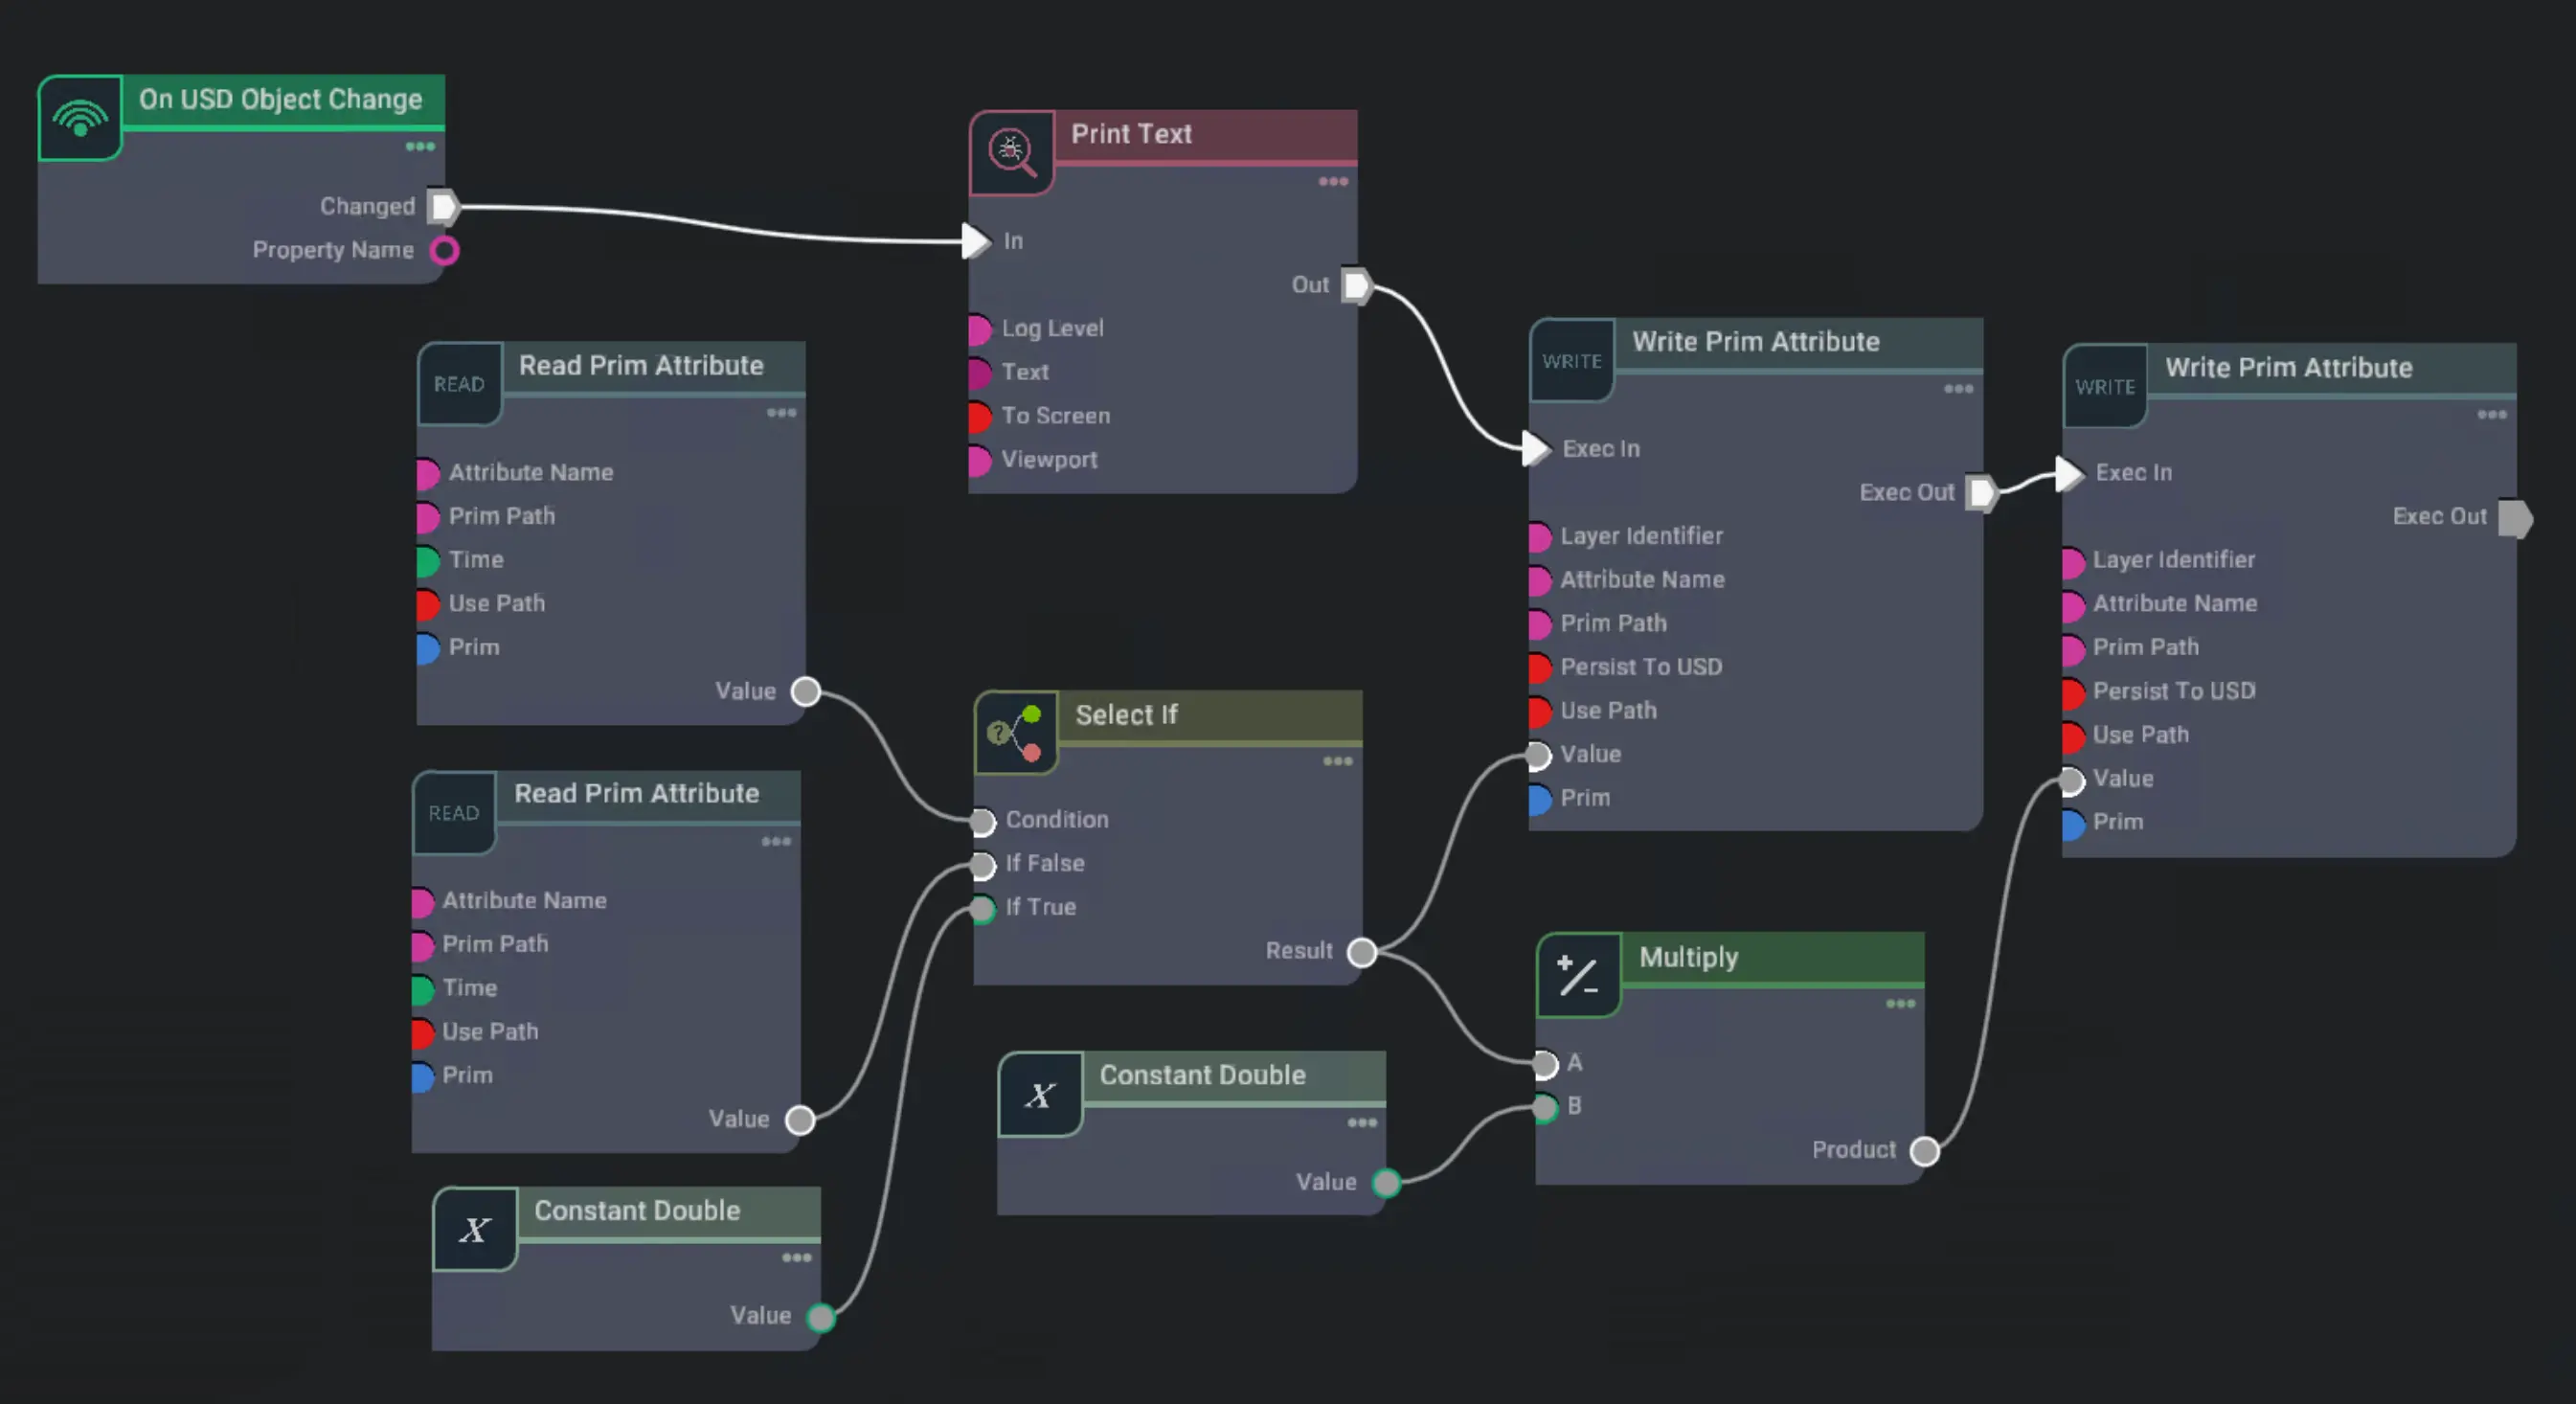
For debugging a print text node was added to print a string once the open attribute is changed.
To test the setup, start the simulation and change the open attribute of the tool prim.
The gripper fingers should move to the target position based on the finger_distance value.
If everything works as expected, the tool is ready to be added to the robot scene and connected to the robot.
Save the scene and close it.
Add the tool to the scene
To explain how to add the created tool to a robot scene, the explanatory video uses a minimal scene with a UR5e robot.
Drag and drop the tool scene into the robot scene. The tool will be added as a child of the flange_tcp prim. This way the tool will receive
the right offsets once its moved to be a child of the robot root node.
Once the tool is at the right position, link the rigid body of the tool to the flange rigid body, usually at link_6.
If everything is connected properly the tool is attached to the flange and will move with any robot motion.
Connect the tool to the robot
You have tested the tool functionality with toggling the open attribute. You can do the same with the provided Input/Output nodes.
Create an On IO Change node which is connected to a Write Prim Attribute node.
The Write Prim Attribute node will write the value of the open attribute to the tool prim.
The On IO Change node will listen to the bool/digital tool_out[0] Input/Output from the scene UR5e robot.
Use the tool via Input/Output changes
If everything is set up correctly, you can toggle tthe gripper state via python or Wandelscript
by writing true or false to the tool_out[0] Input/Output of the UR5e robot.
controller = await cell.controller("ur5e")
await controller.write("tool_out[0]", True)