Build a scene
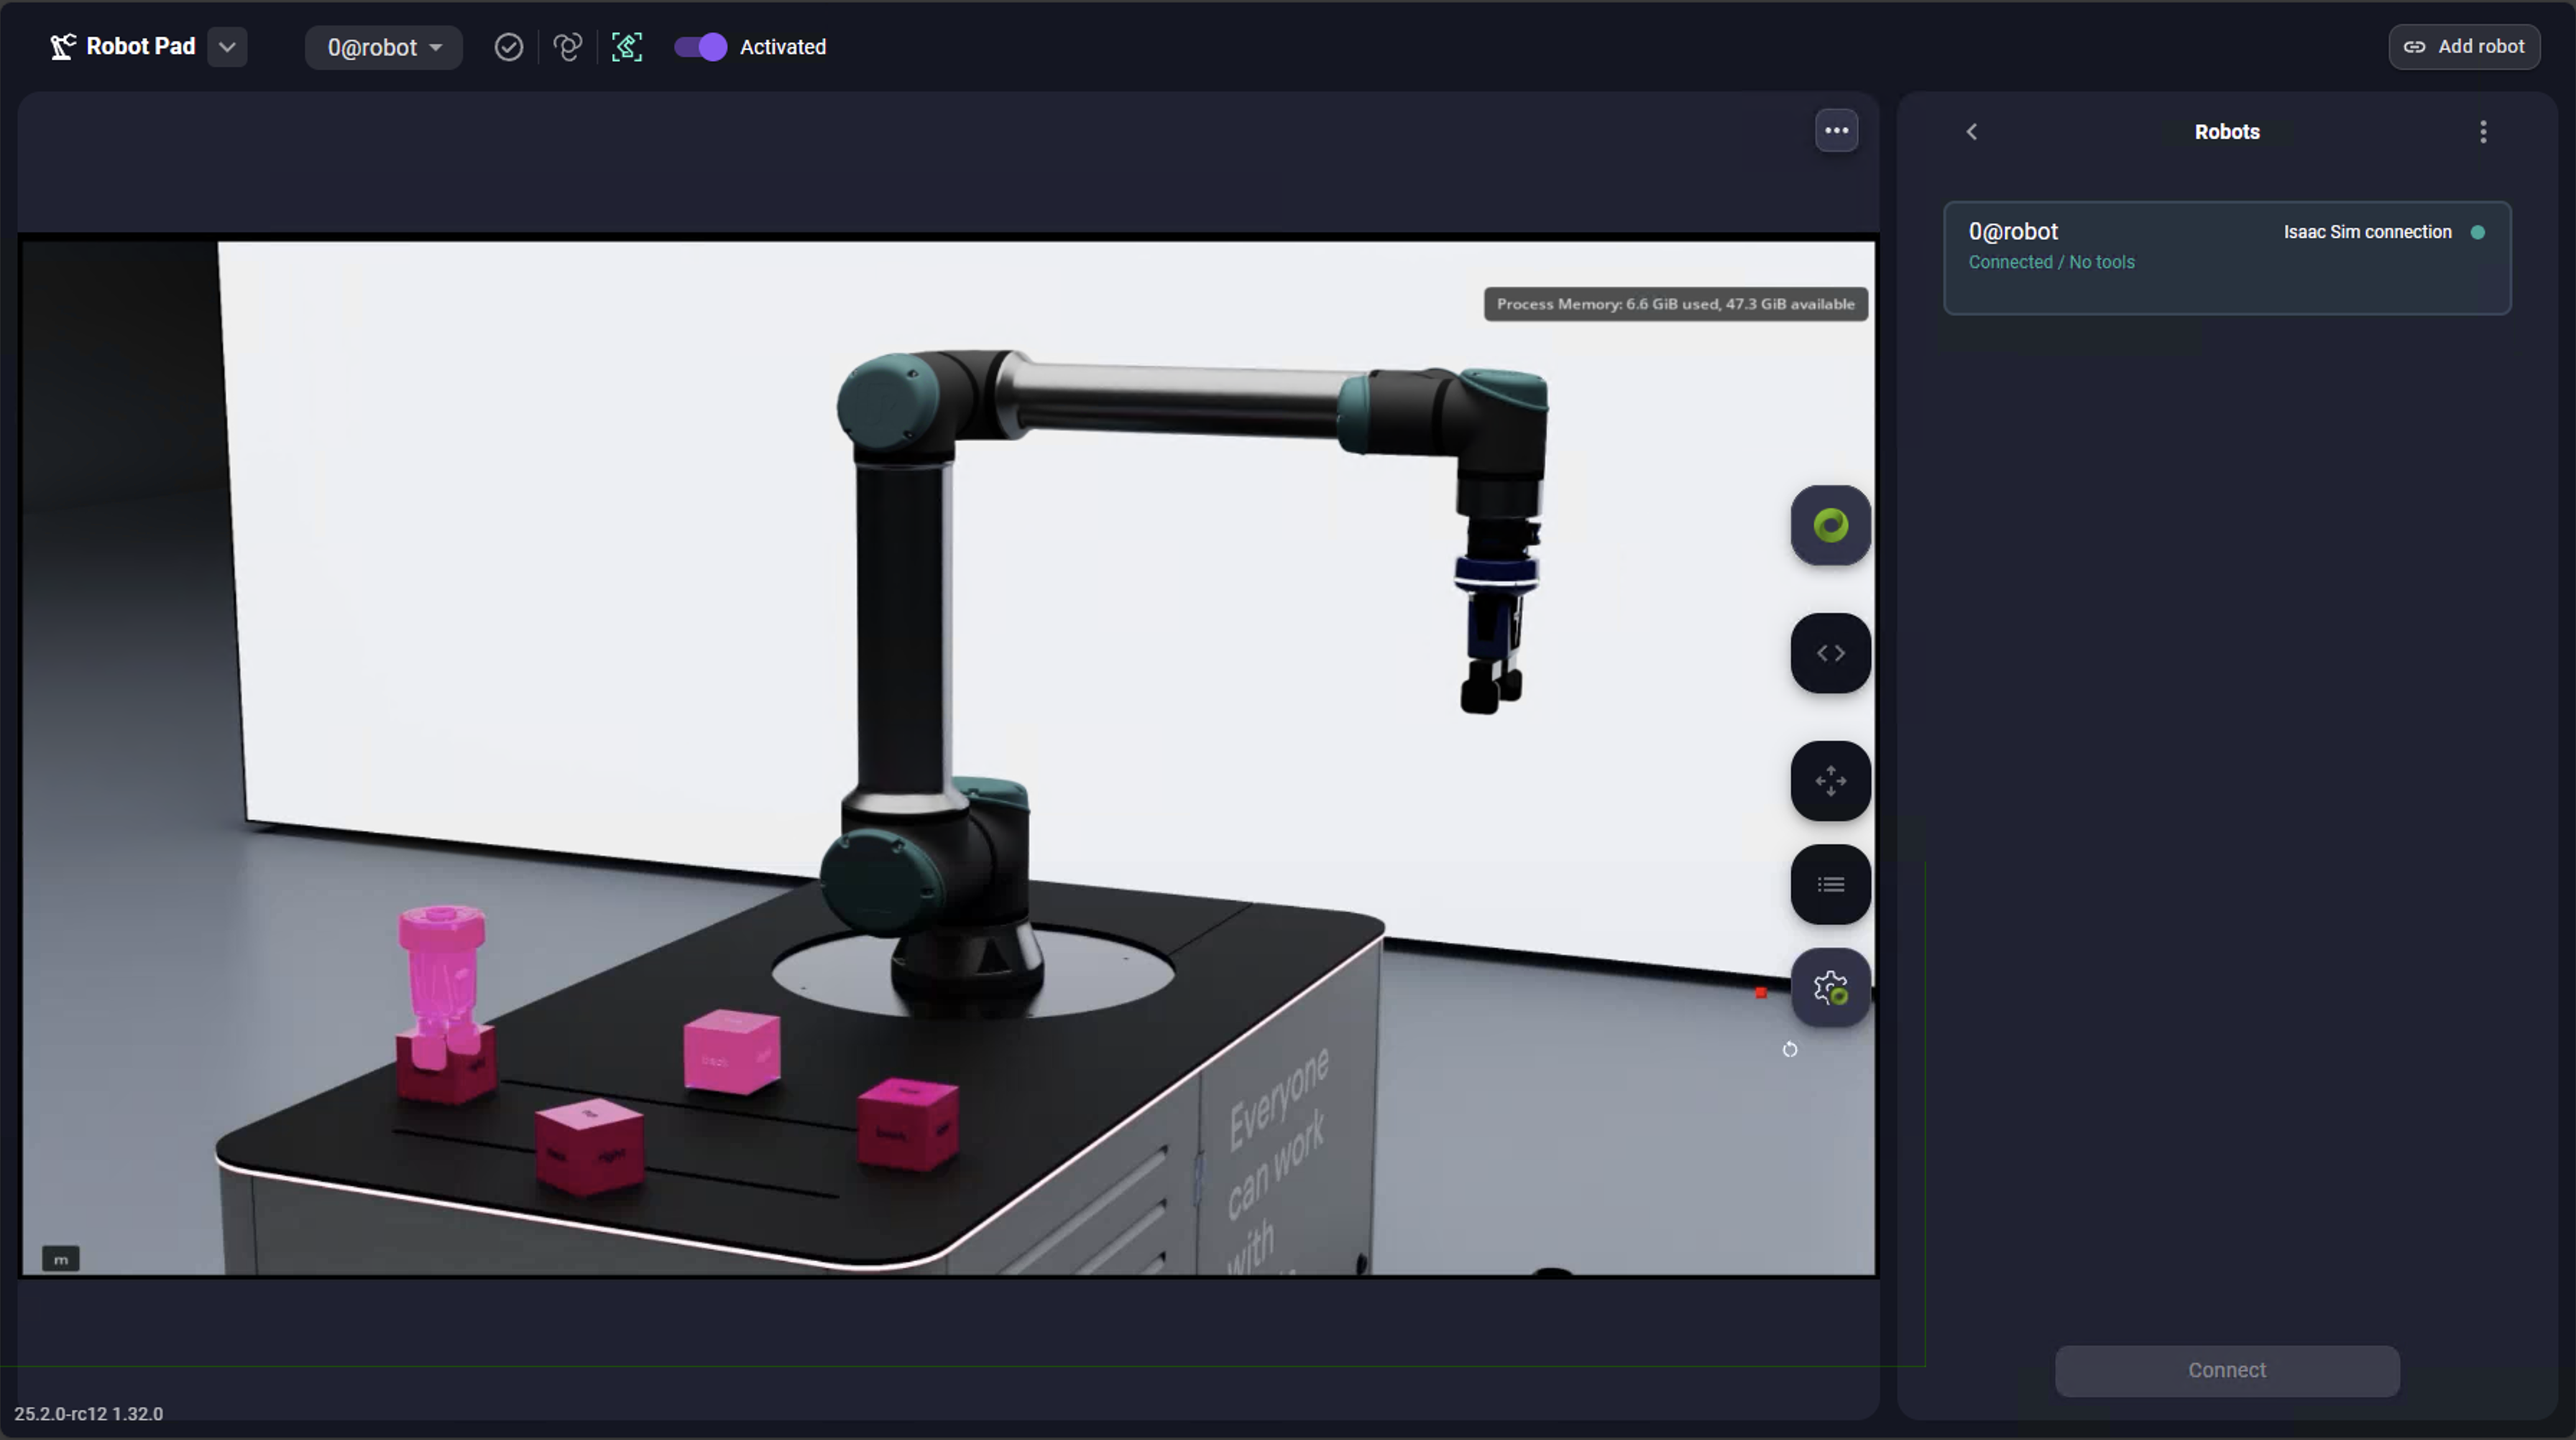
Now that you’ve installed the simulation environment and the Wandelbots NOVA extension for NVIDIA Isaac Sim, you’re good to start simulating your first use case. In case you want to get familiar with potential new use cases or are getting started with scene building, we’ve prepared a stacking demo for you.
The stacking demo package that you can download from the Wandelbots Developer Portal includes the predefined scene main.usd, tool configurations and assets that you can use to simulate a stacking scenario.
To set up the stacking demo and simulate successfully, you’ll use the apps provided by Wandelbots NOVA as well as the Wandelbots NOVA API and the Wandelbots NOVA Extension. Let’s get started!
Complete the viewport instructions first to display the NVIDIA Isaac Sim scene in the Robot Pad’s 3D view.
Resources
- External editor setup guide
- Introduction to scripting inside Omniverse Kit
- Overview of Isaac Sim APIs and robotics simulation features
- Documentation for accessing and controlling articulated robots
- Background on the physics engine (PhysX) used by Isaac Sim
Create a scene
As an experienced user, you’d now create a scene using assets, robots and tools also from our asset starter package.
But for the stacking scene, you can import the predefined scene main.usd from the stacking demo into NVIDIA Isaac Sim.
Add a robot to your cell
Open Setup and go to the cell tab. Add a virtual robot to your cell, select the desired robot brand and name it.
For the stacking scene, select universalrobots-UR10e and name it ur10e.
Configure the TCP
As the stacking scene includes a tool, a gripper, you need to adjust the virtual robot’s tool TCP to match the simulated tool’s TCP. Adjusting the TCP to match the simulated tool is required in order to correctly carry out API calls.
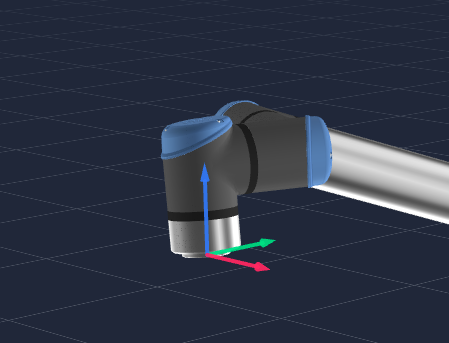
Flange TCP
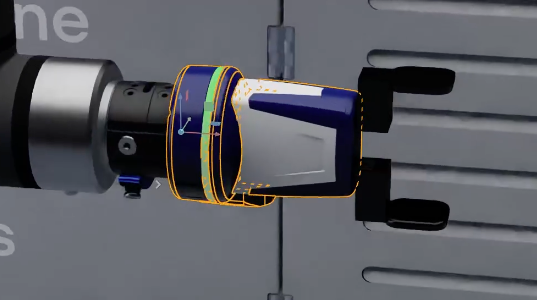
Gripper TCP
The default TCP for a robot in a cell is Flange. The TCP selector is displayed in the Jogging panel within the Robot Pad, currently only displaying the flange TCP.
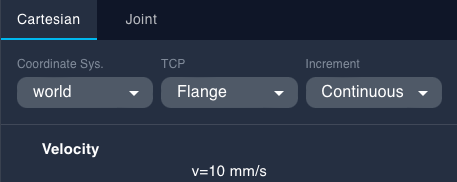
You can either use Setup to configure the TCP or the Wandelbots NOVA API.
via Setup
- Select the
ur10e.
The TCP overview is displayed. - Click on the TCP
gripperand enter the desired values.
The desired TCP values are also provided in the NVIDIA Isaac Sim scene. - Click on
Saveto add the TCP to the available TCPs. - Add other TCPs if needed.
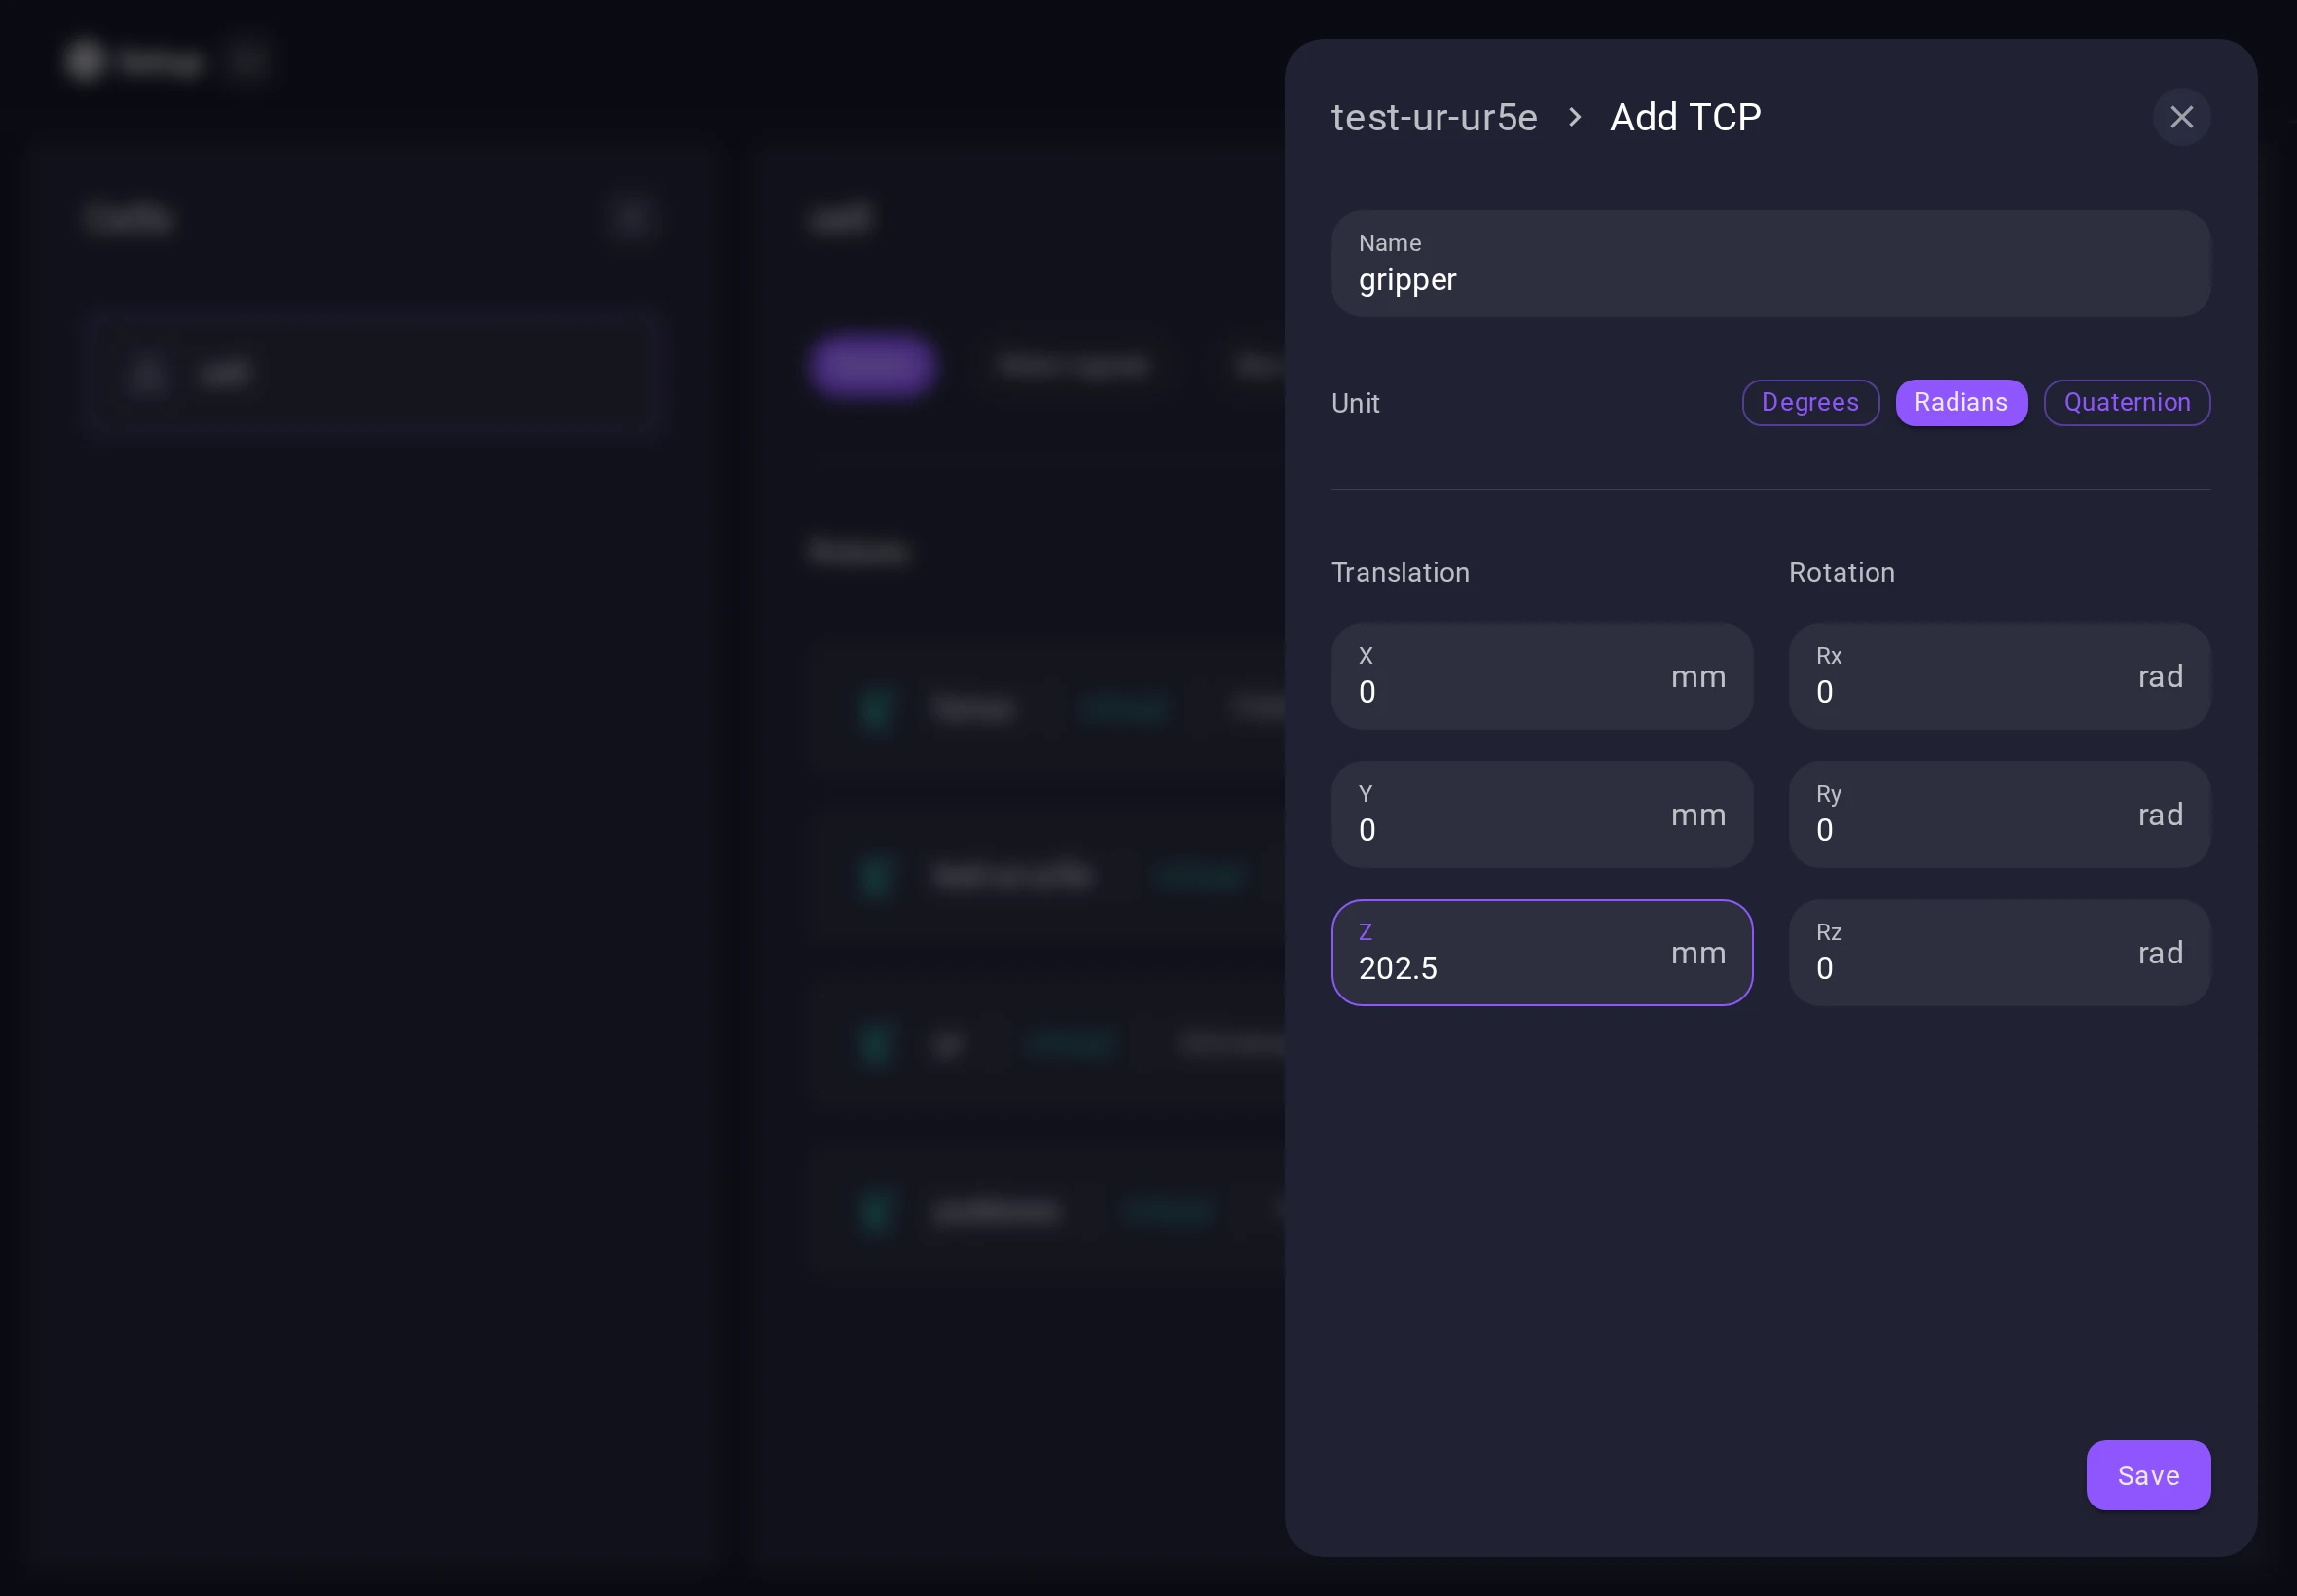
The gripper TCP is now available in the Robot Pad TCP selector.

If you want to use your own tool, adjust the TCP values accordingly. Pass the original tool file to a CAD tool and calculate the TCP values. If the TCP has angles, additional calculation is required which the Wandelbots Customer Success is happy to help you with.
Configure the robot
Configure the robot via the Isaac Sim Extension API v2 and connect it via prim path to the scene.
Configure tools
You can now configure tools for your robot and use them in the simulation.
Refer to the tool guides for parallel grippers, surface grippers and also external axes.
Alternatively, configure a tool via OmniGraph Nodes.
Start simulating
Click on Play and watch the robot execute the stacking scenario.
Execute trajectory via articulation controller using Python script
Additionally, instead of executing the trajectory through the usual NOVA motion streaming integration, you can:
- Retrieve or compute a trajectory using the NOVA Python SDK,
- Sample the resulting joint positions,
- Apply these joint values to the Isaac Sim articulation controller in a Python script while the simulation is running
This approach can be useful for testing trajectories, debugging kinematics results, or replaying motion inside the simulation. Most articulation operations require the simulation to be running. Python scripts interacting with articulations are typically executed inside Isaac Sim. Although Isaac Sim includes an internal script editor, it is recommended to use an external editor setup such as VS Code when developing Python scripts.
When generating trajectories using trajectory_plan, make sure to provide an empty actions array in the request if required by the workflow.
Congrats! You’ve successfully set up the stacking demo and simulated the stacking scenario. 🎉
How about recreating the scene with another robot? Download the asset starter package from the Developer Portal which contains a variety of assets, robots and tools and try changing the robot in the stacking demo!
Let us know how it went!