Add external axis
Create and configure an external axis for your robot by building a static base and moving carriage, applying necessary APIs and joints, and mounting your robot on top.
Configure the external axis position using one of two methods:
ActionGraph-based, with position control via signal exchange withOn BUS IO ChangeOGN orArticulationRootAPI-based, with position control via dedicated virtual controller.
Final result:
Model the external axis in Isaac Sim
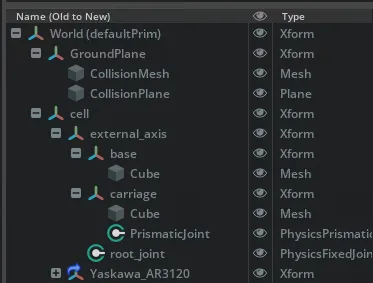
Build the external axis structure with a static base and moving carriage as shown in the stage tree below.
- In the
Worldprim, create the Xformcellwith the childexternal axis. - Create the children Xforms
baseandcarriage. - Create one
Cubemesh for each child Xform. Scale and position as you like. - Add
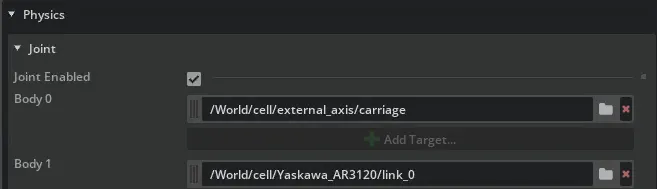
Rigid Body with Colliders Presettobaseandcarriage. - Create a PrismaticJoint that connects
baseandcarriage. - Create a FixedJoint called
root_jointwith the XformbaseasBody 0. - Import a robot into the scene and place it onto the carriage.
- Start the simulation and test your setup at runtime.
Controlling the external axis
There are two approaches to control the external axis from NOVA. One is a more Isaac Sim native approach based on robot or bus signals on NOVA side and an Action Graph on Isaac Sim side. The other is more sophisticated, based on specific APIs and allows for a NOVA native control via virtual controllers.f
Action Graph
This approach aligns more closely with native Isaac Sim workflows but provides less convenience. The position of the external axis is set via a dedicated signal created in NOVA. The following configurations must be made in NOVA and Isaac Sim.
NOVA
- Create NOVA instance.
- Create robot virtual controller.
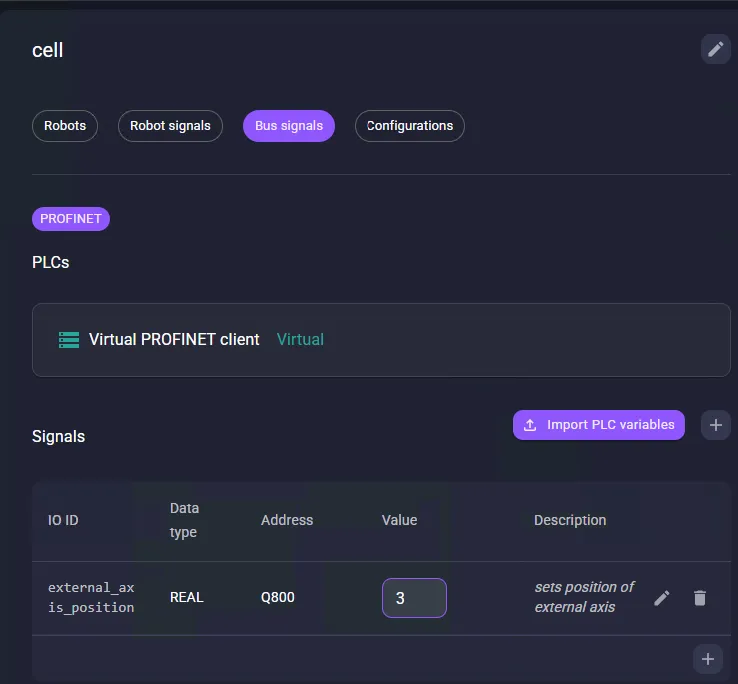
- Add a Bus signal with the following values:
- IO ID: string, e.g., Some ID
- Data type: REAL
- Address: 800
- Description: optional
Isaac Sim
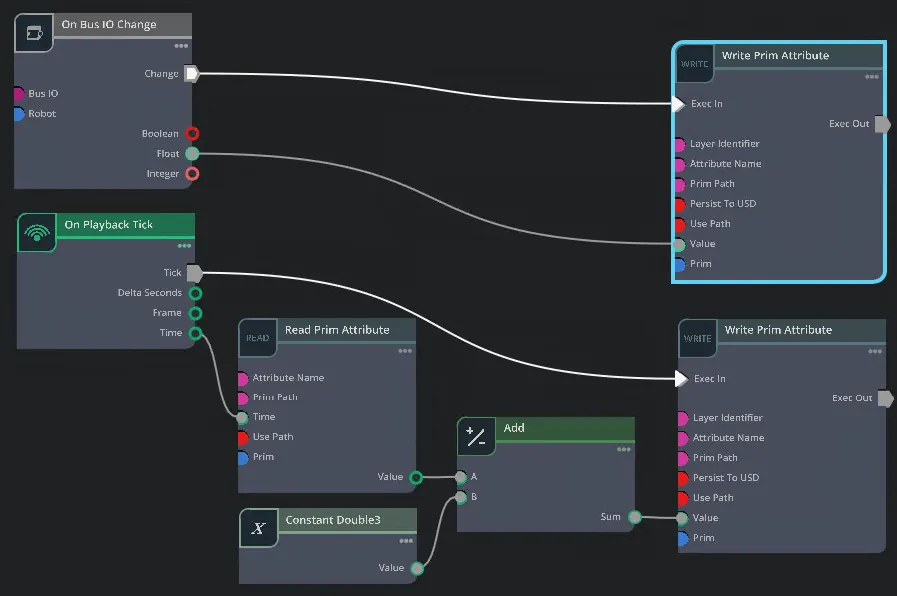
- Create the Action Graph as depicted on the right.
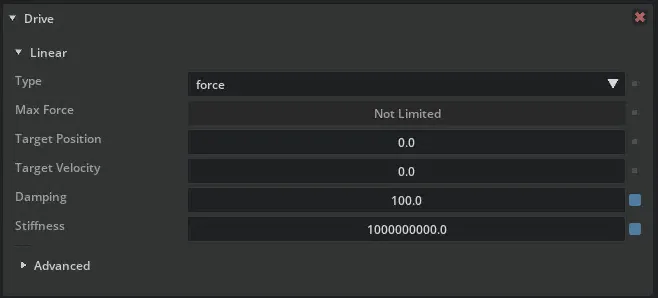
- The highlighted node controls the property
drive:linear:physics:targetPositionof the external axis’ PrismaticJoint`. - The other
Write Prim Attributenode sets the robot’s propertyxformOp:translateto equal thecarriageprim’s attribute of the external axis offset by 0.55m, because there is an offset in z direction with the Yaskawa_AR3120 base link. - Configure the
On Bus IO Changenode to listen to the Bus signal, e.g.,Some ID, you created earlier in NOVA.