Local development
Develop within your local environment to get quicker turnaround times and improve the developer experience. To start local development, you have to complete the quickstart guide to set up your instance which you can reuse for local development.
Install dependencies
Open your basic template application with a code editor of your choice. We recommend Visual Studio Code (opens in a new tab). You can explore the code and start developing your own application.
To start developing, you will need node.js installed. The recommended way to install node is with nvm (opens in a new tab) or nvm-windows (opens in a new tab) (you may have to restart the terminal) by running nvm install in the repository root. This will get the specific version of node from .nvmrc that the project expects (only for MacOS/Linux).
After that you can install the node packages via npm.
curl -o- https://raw.githubusercontent.com/nvm-sh/nvm/v0.39.7/install.sh | bashThe script will write to your ./.bashrc or ./.zshrc file.
Restart your terminal after successful installation or input the following commands to directly access npm:
export NVM_DIR="$HOME/.nvm"
[ -s "$NVM_DIR/nvm.sh" ] && \. "$NVM_DIR/nvm.sh"  # This loads nvm
[ -s "$NVM_DIR/bash_completion" ] && \. "$NVM_DIR/bash_completion"  # This loads nvm bash_completion
With nvm installed, you can now install node and the node packages via npm.
nvm install
nvm alias default mode
npm install
Connect to the created instance
Skip this step if you followed the quickstart guide: you already have .env.local file in your project root with the required environment variables.
In case you manualy created the project you will need to adapt those values with the following steps:
Connect the template app to the instance by providing the WANDELAPI_BASE_URL, CELL_ID and NOVA_ACCESS_TOKEN environment variables.
Remember to replace the IP address with the one of your cloud instance.
In case you created an instance which is using Bearer, you can provide the NOVA_ACCESS_TOKEN. You will also need to use the https protocol in that case.
In this example your instance is at my.instance.wandelbots.io and the cell is named cell.
echo "WANDELAPI_BASE_URL=http://my.instance.wandelbots.io\nCELL_ID=cell\NOVA_ACCESS_TOKEN=token\n" > .env.local# .env.local
WANDELAPI_BASE_URL=https://my.instance.wandelbots.io
CELL_ID=cell
NOVA_ACCESS_TOKEN="token"Run the dev server
Once everything is set up, you can run the NextJS dev server:
npm run devOpen http://localhost:3000/<your-nova-app> with your browser and enjoy the result.
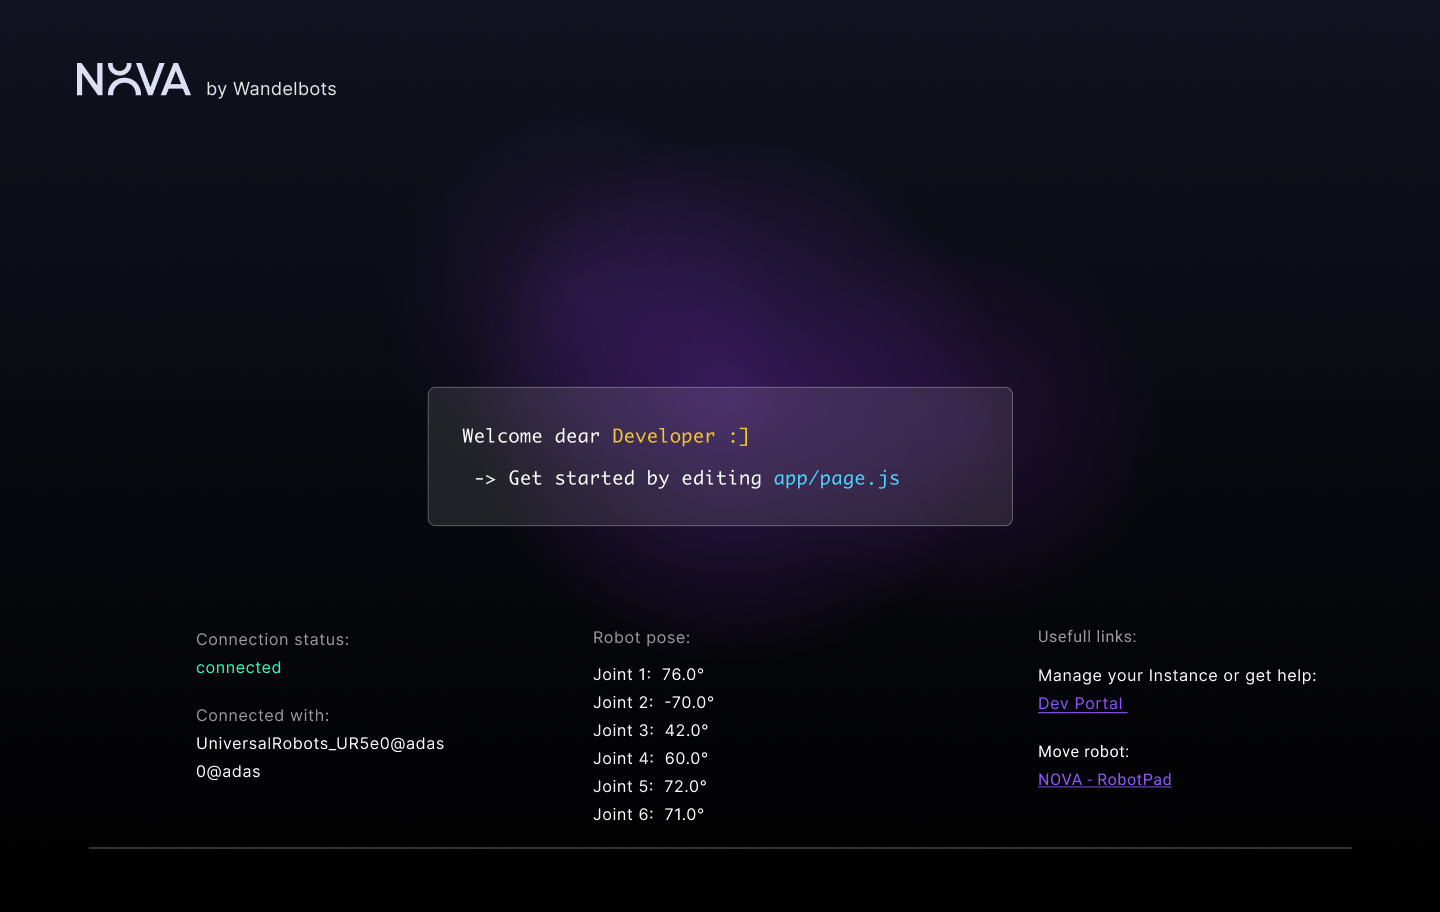
You can start developing your application now. Remember: The template app is connected to the instance and provides a connection to the created robot. Quickcheck of the connection are the visible robot joint values in the template app.
We provide a set of libraries to interact with the robot and the Wandelbots NOVA API. Find them as well as the corresponding documentation on the Wandelbots Github (opens in a new tab).
If required, you can now debug the application or continue to deploy it to your Wandelbots NOVA instance.
Optional: Debug the application
The template app includes a launch configuration for the debugger integrated in Visual Studio Code.
This configuration uses Chrome as debugging target. Select NextJS Fullstack Debugfrom the dropdown menu within Visual Studio Code's launch section to start the debugger.
Afterwards you can set breakpoints in your code and start inspecting your variables.