Set up and simulate
Now that you've installed the simulation environment and the Wandelbots NOVA extension for NVIDIA Isaac Sim™ (Omniservice), you're good to start simulating your first use case. In case you want to get familiar with potential new use cases or do not have a real use case, we've prepared a stacking demo for you.
The stacking demo package that you can download from the Wandelbots Developer Portal, includes the predefined scene main.usd, tool configurations, assets and a matching Wandelscript that you can use to simulate a stacking scenario.
To set up the stacking demo and simulate successfully, you'll use the apps provided by Wandelbots NOVA as well as the Wandelbots NOVA API and the Wandelbots NOVA Extension. Let's get started!
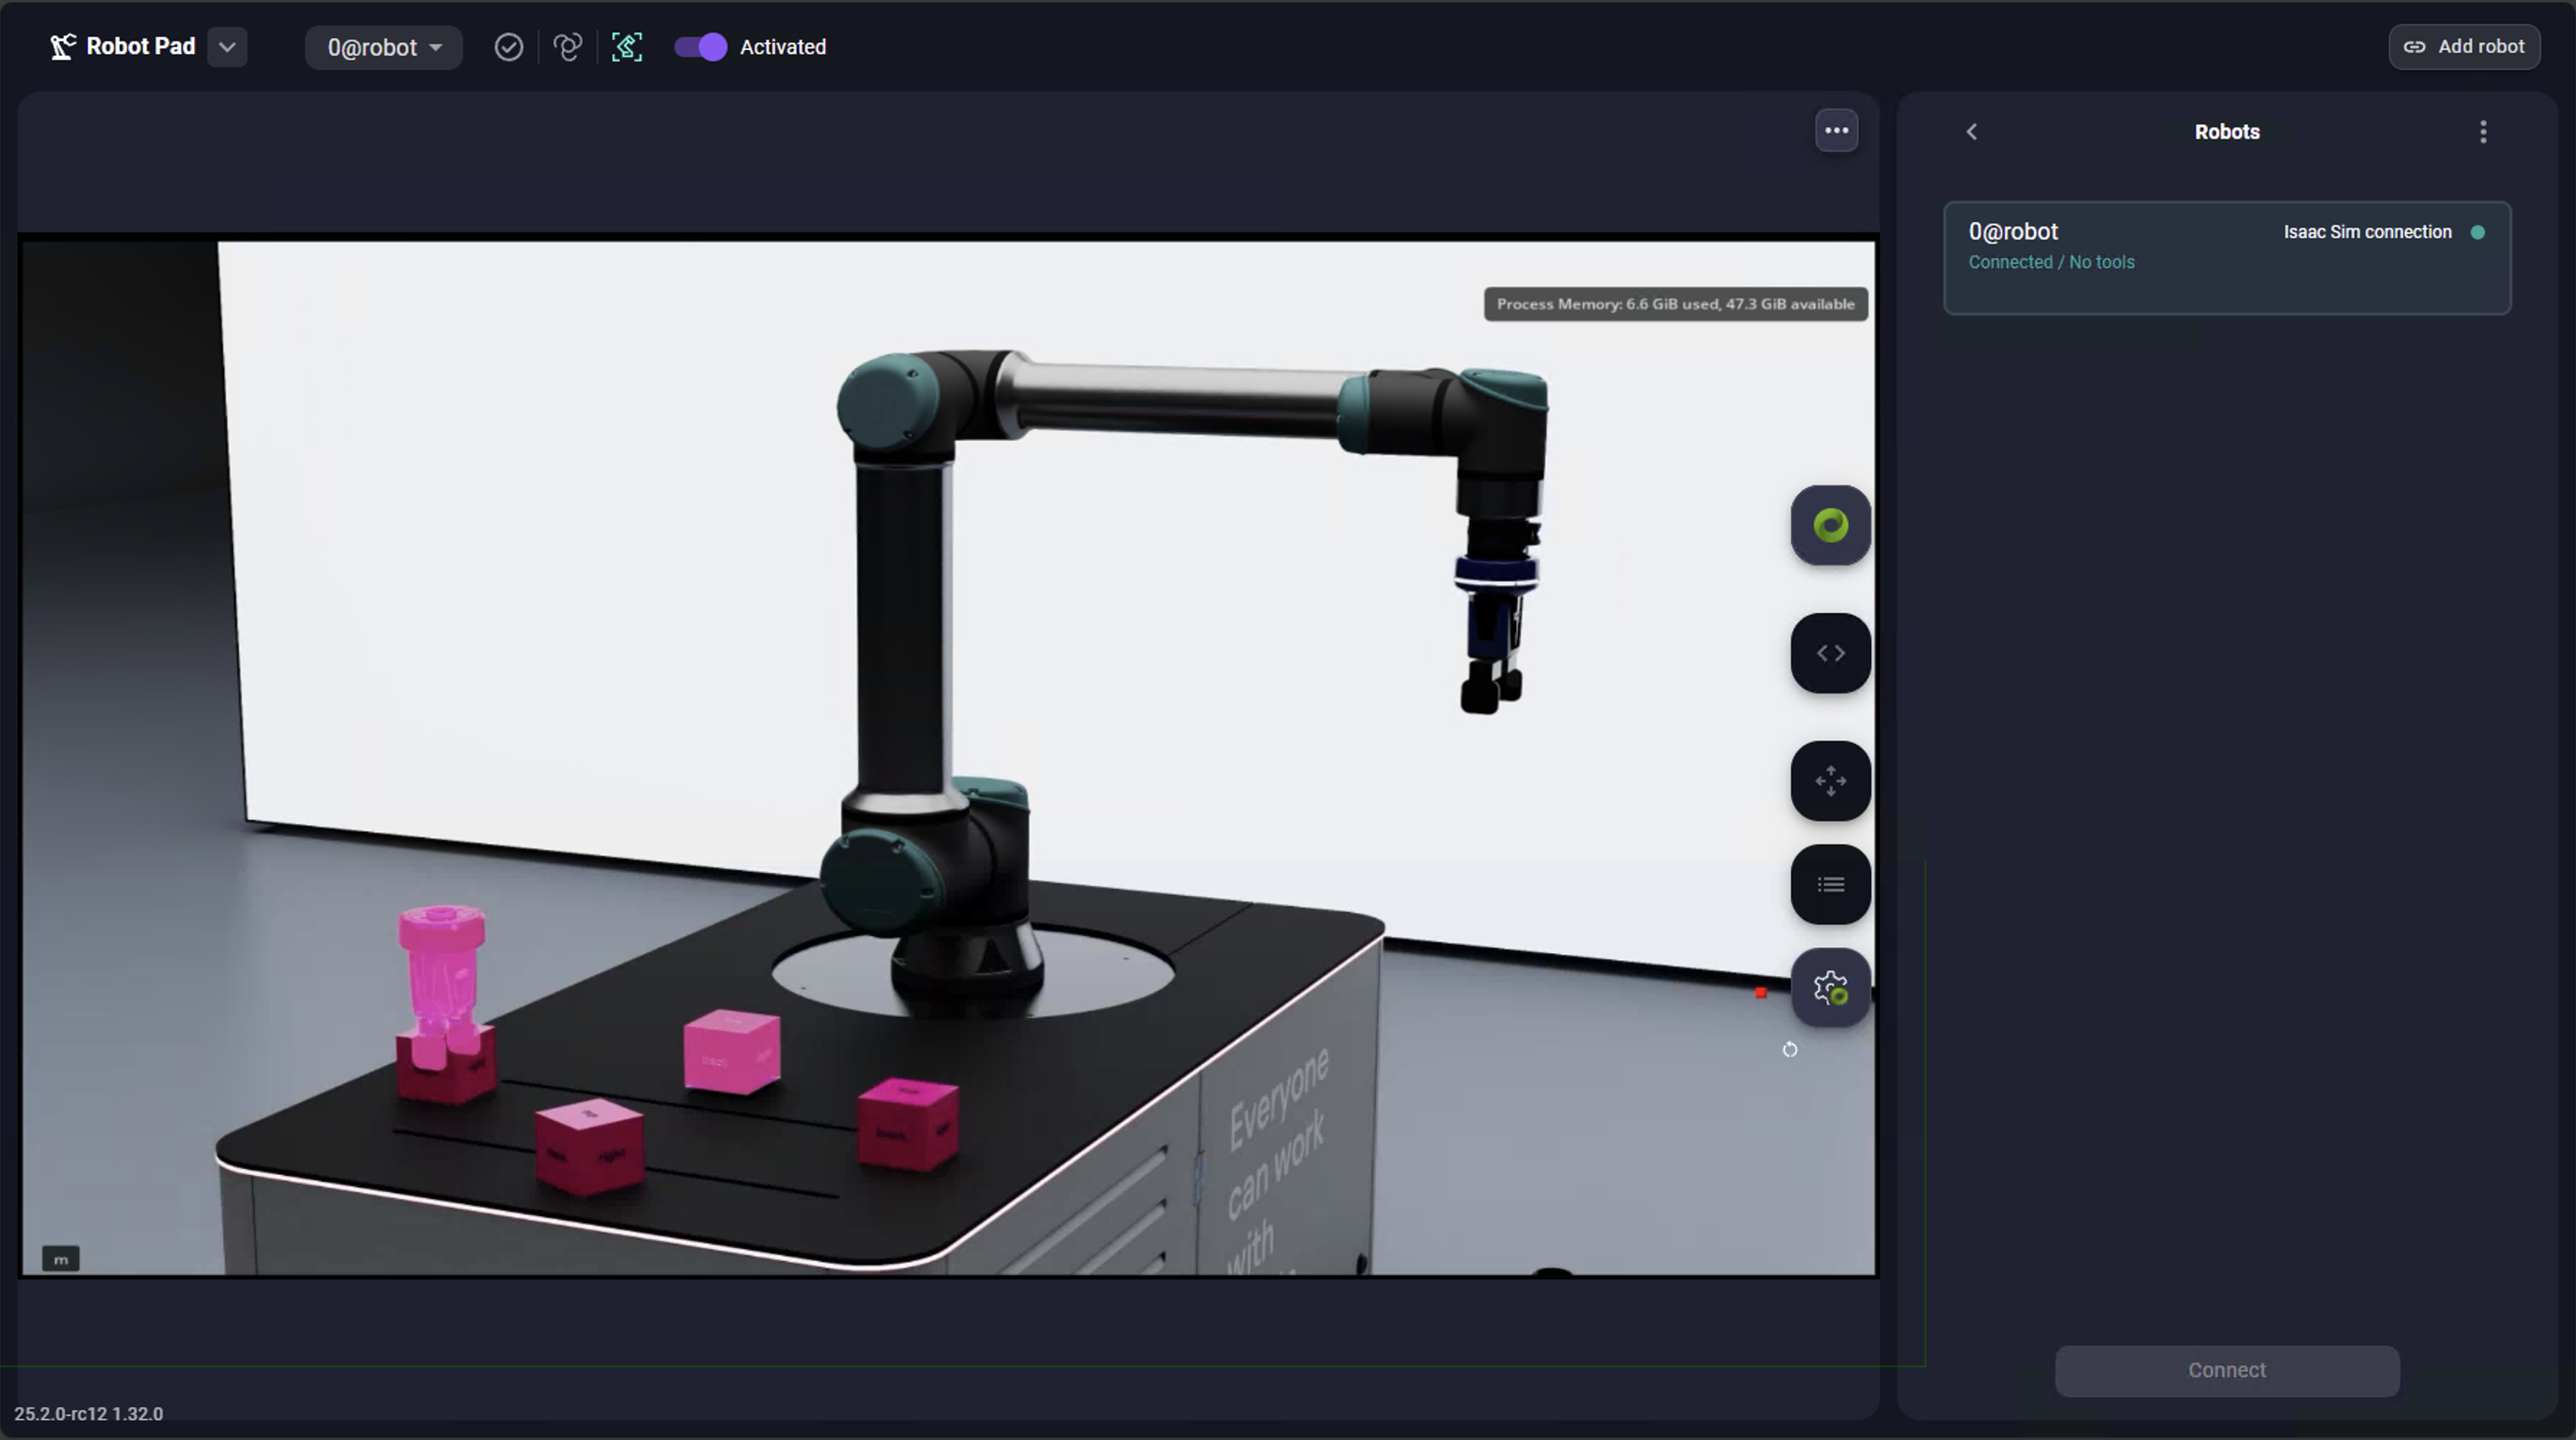
Complete the viewport instructions first to display the NVIDIA Isaac Sim™ scene in the Robot Pad's 3D view.
Create a scene
As an experienced user, you'd now create a scene using assets, robots and tools also from our asset starter package.
But for the stacking scene, you can simply import the predefined scene main.usd from the stacking demo into NVIDIA Isaac Sim.
Add a robot to your cell
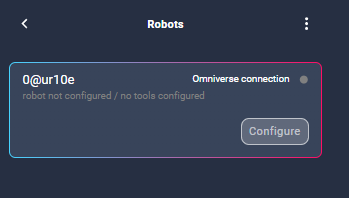
Open the settings app and go to the cell tab. Add a virtual robot to your cell, select the desired robot brand and name it.
For the stacking scene, select universalrobots-UR10e and name it ur10e.
Configure the TCP
As the stacking scene includes a tool, a gripper, you need to adjust the virtual robot's tool TCP to match the simulated tool's TCP. Adjusting the TCP to match the simulated tool is required in order to correctly carry out Wandelscript and API calls.
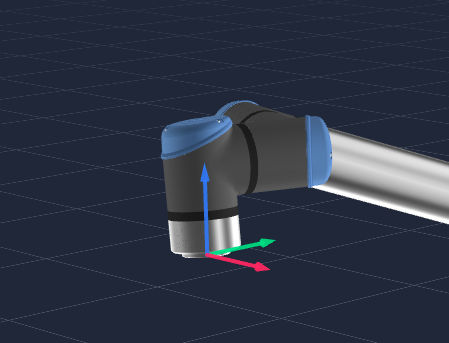
Flange TCP

Gripper TCP
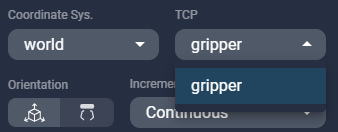
The default TCP for a robot in a cell is Flange. The TCP selector is displayed in the Jogging panel within the Robot Pad, currently only displaying the flange TCP.
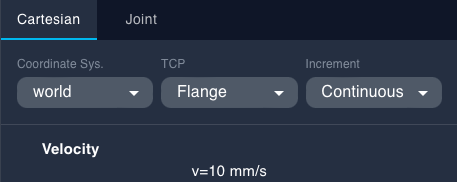
You can either use the settings app to configure the TCP or the Wandelbots NOVA API.
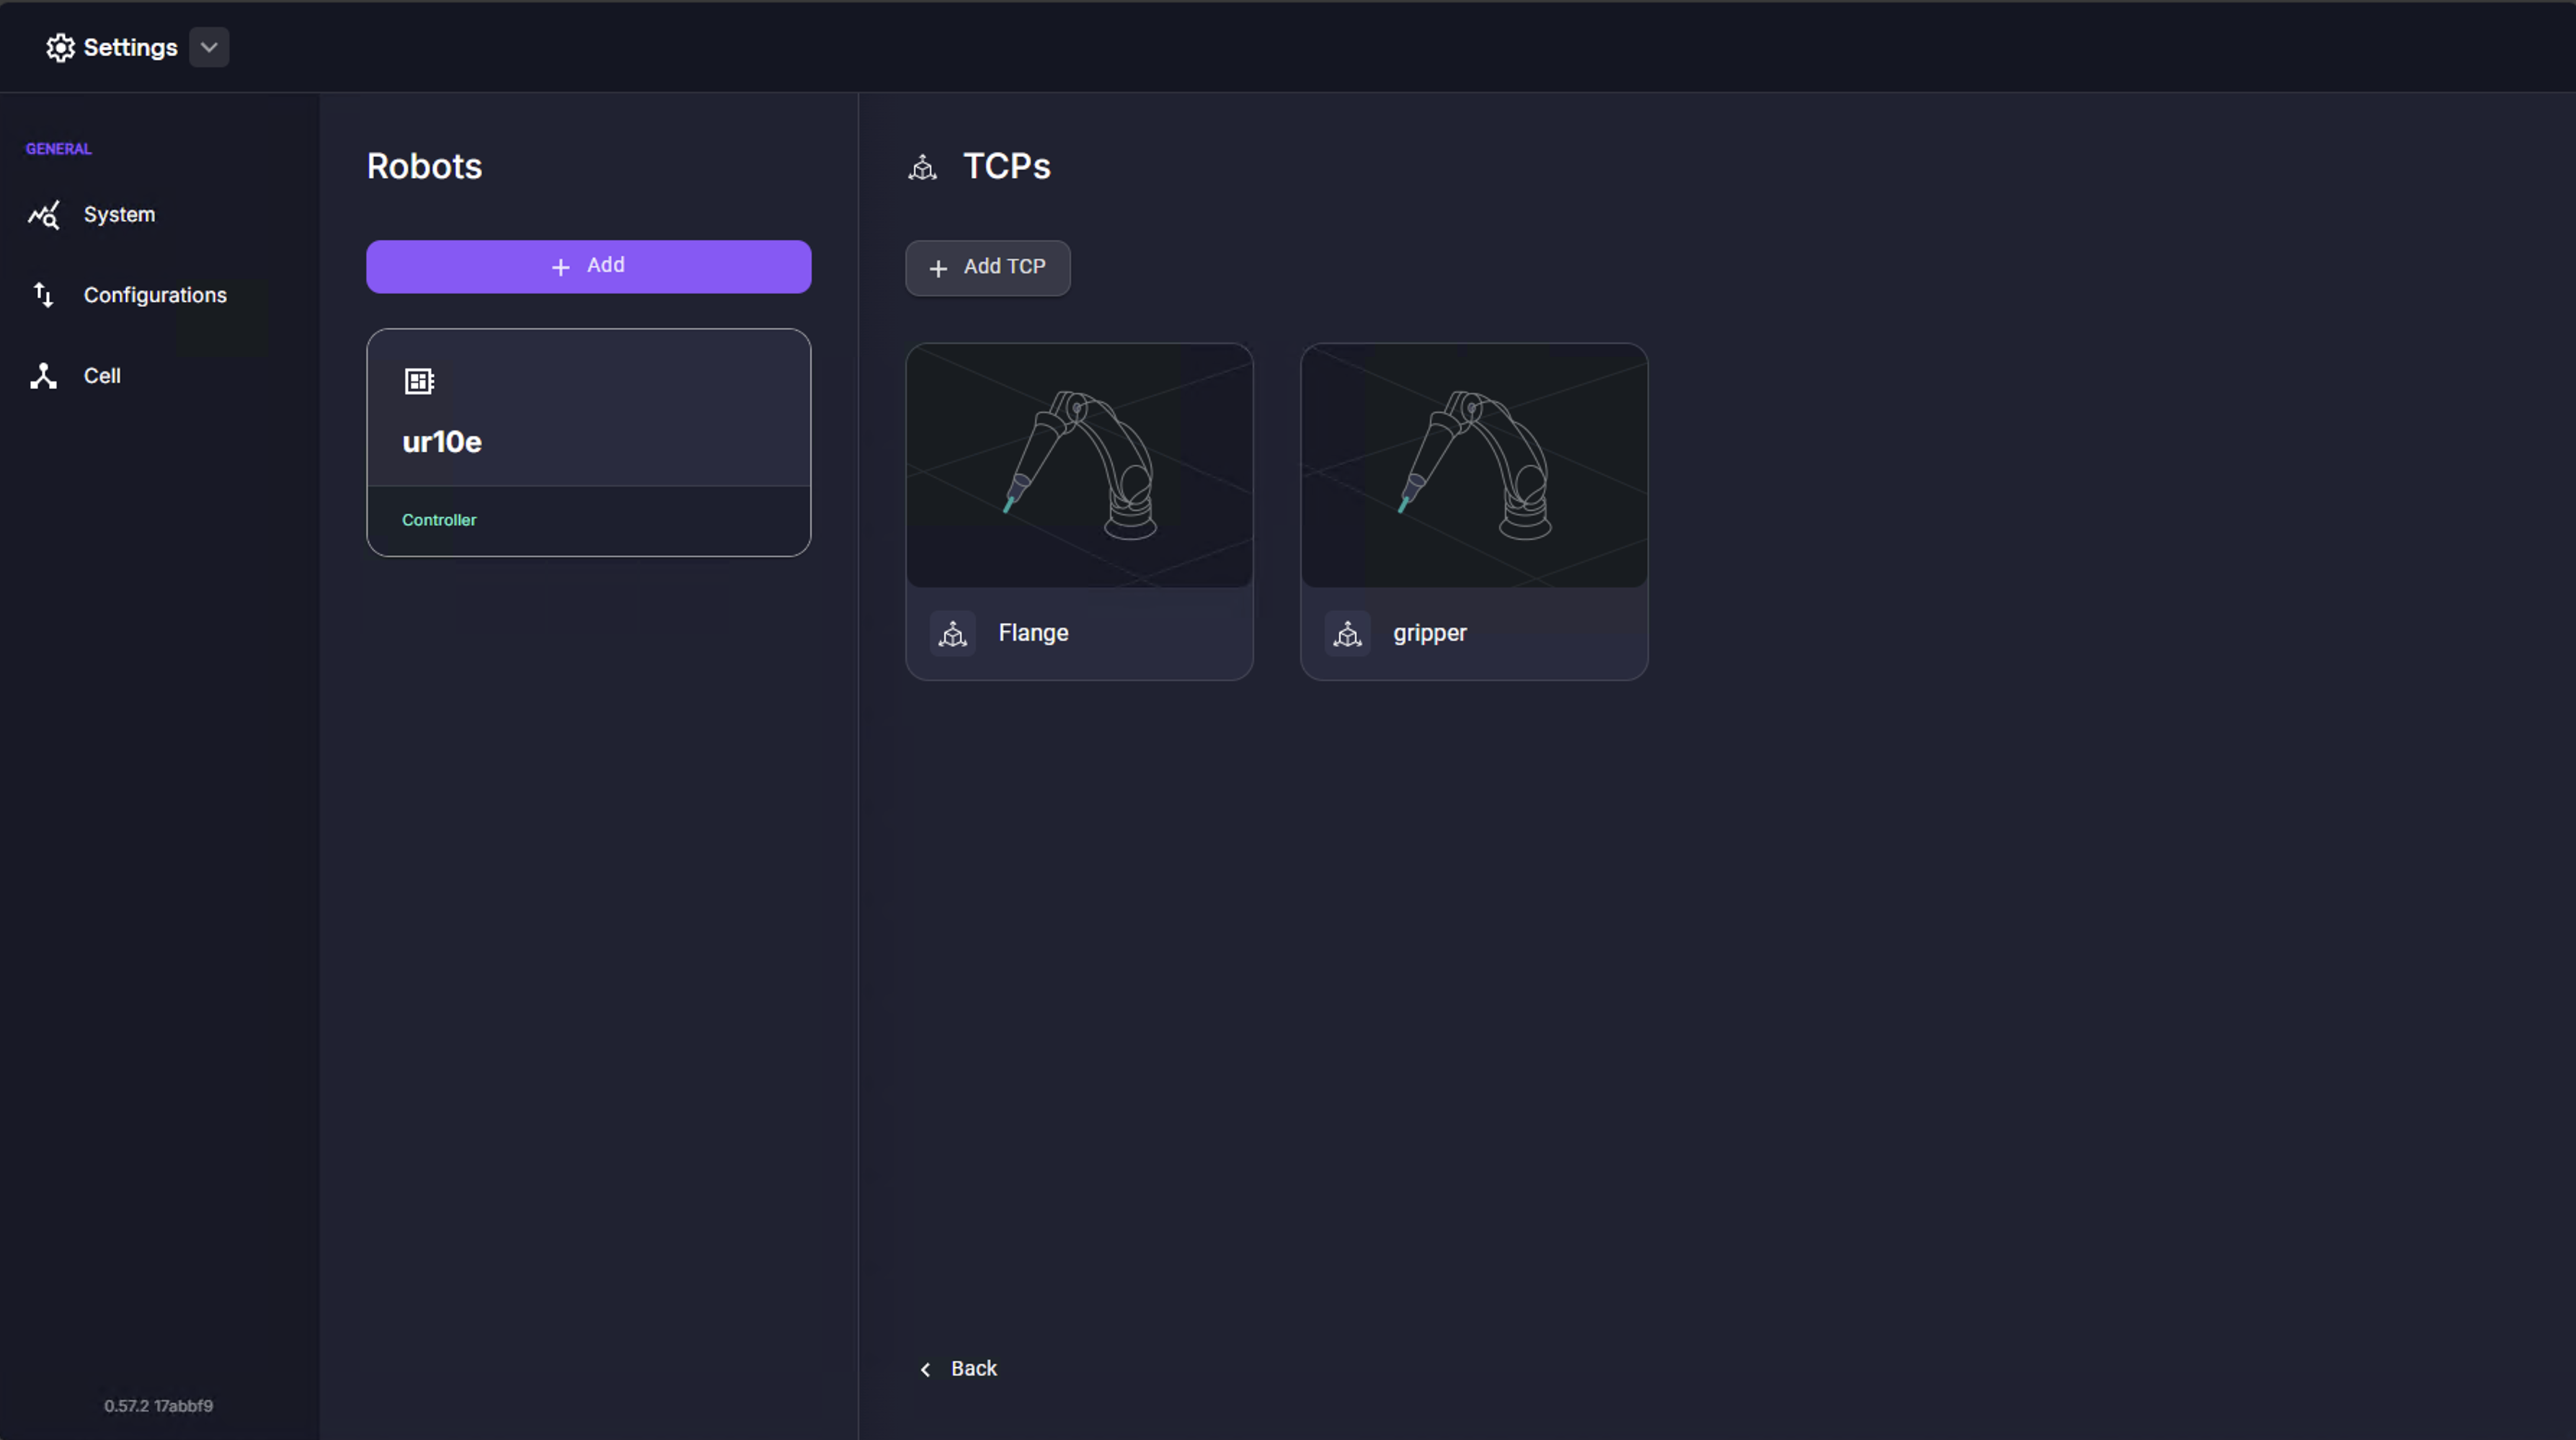
- Select the
ur10erobot and click onConfigure TCPs.
The TCP overview is displayed.
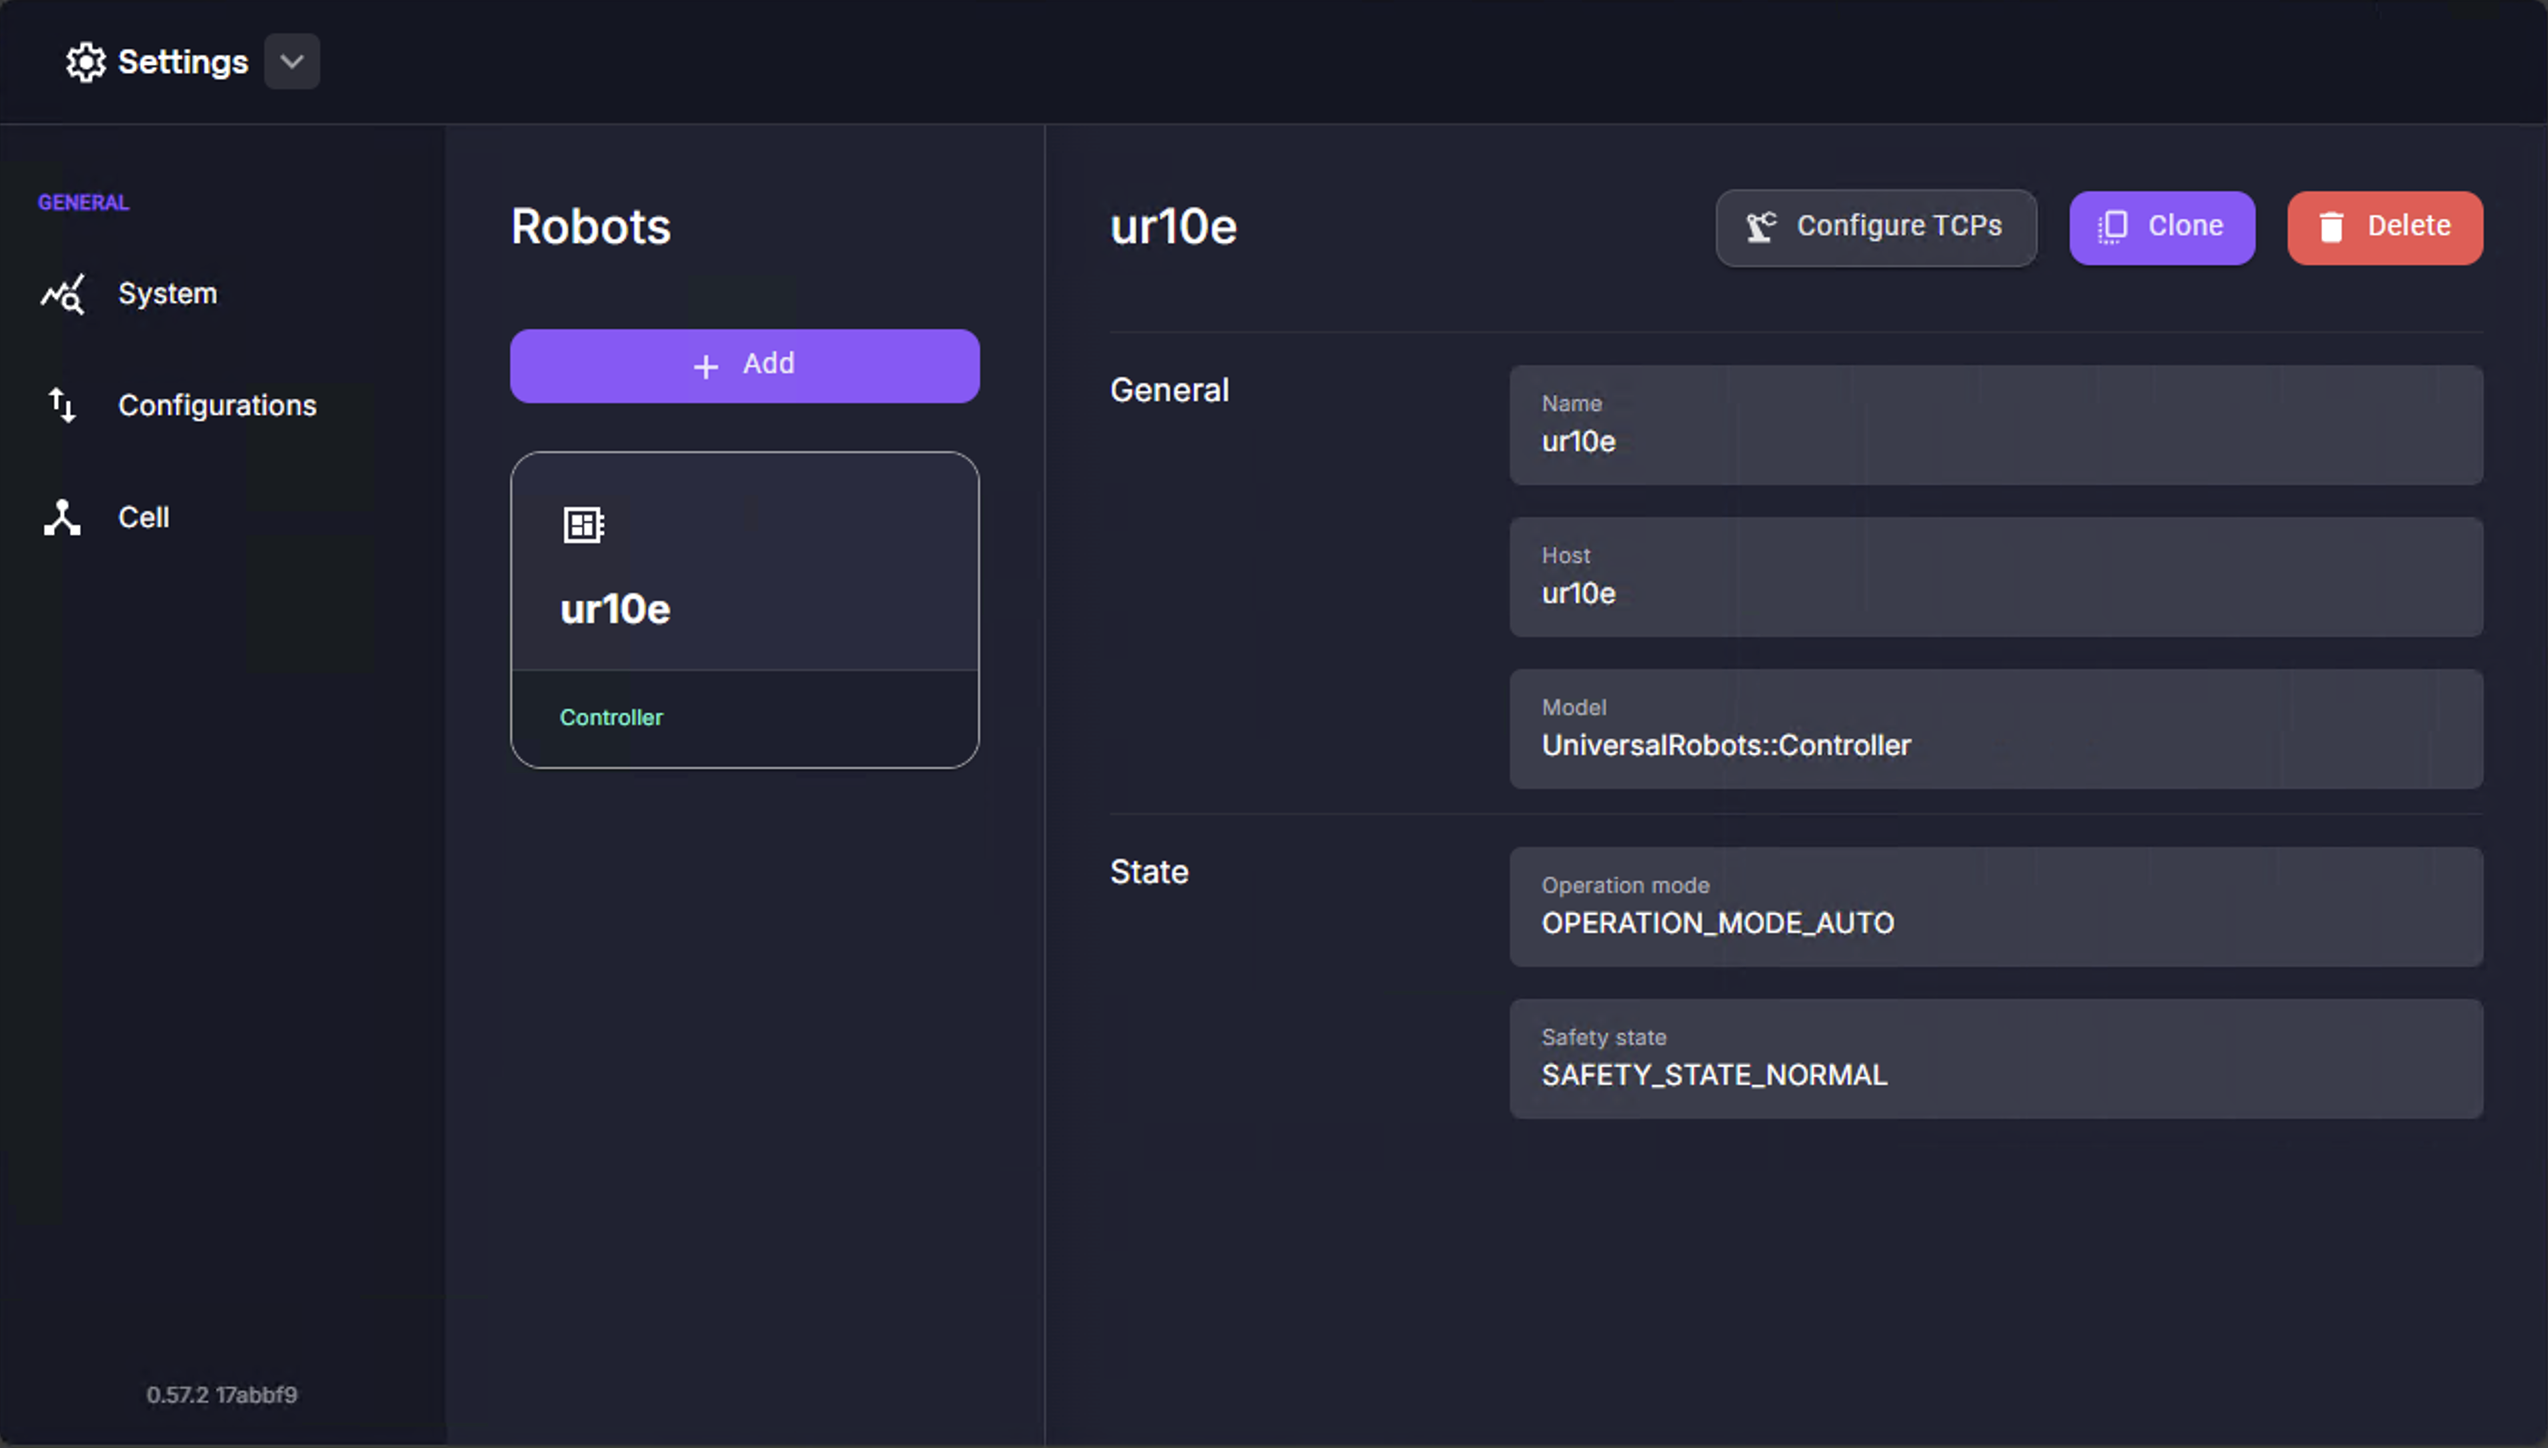
- Name the TCP
gripperand enter the desired values.
The desired TCP values are also provided in the NVIDIA Isaac Sim™ scene.
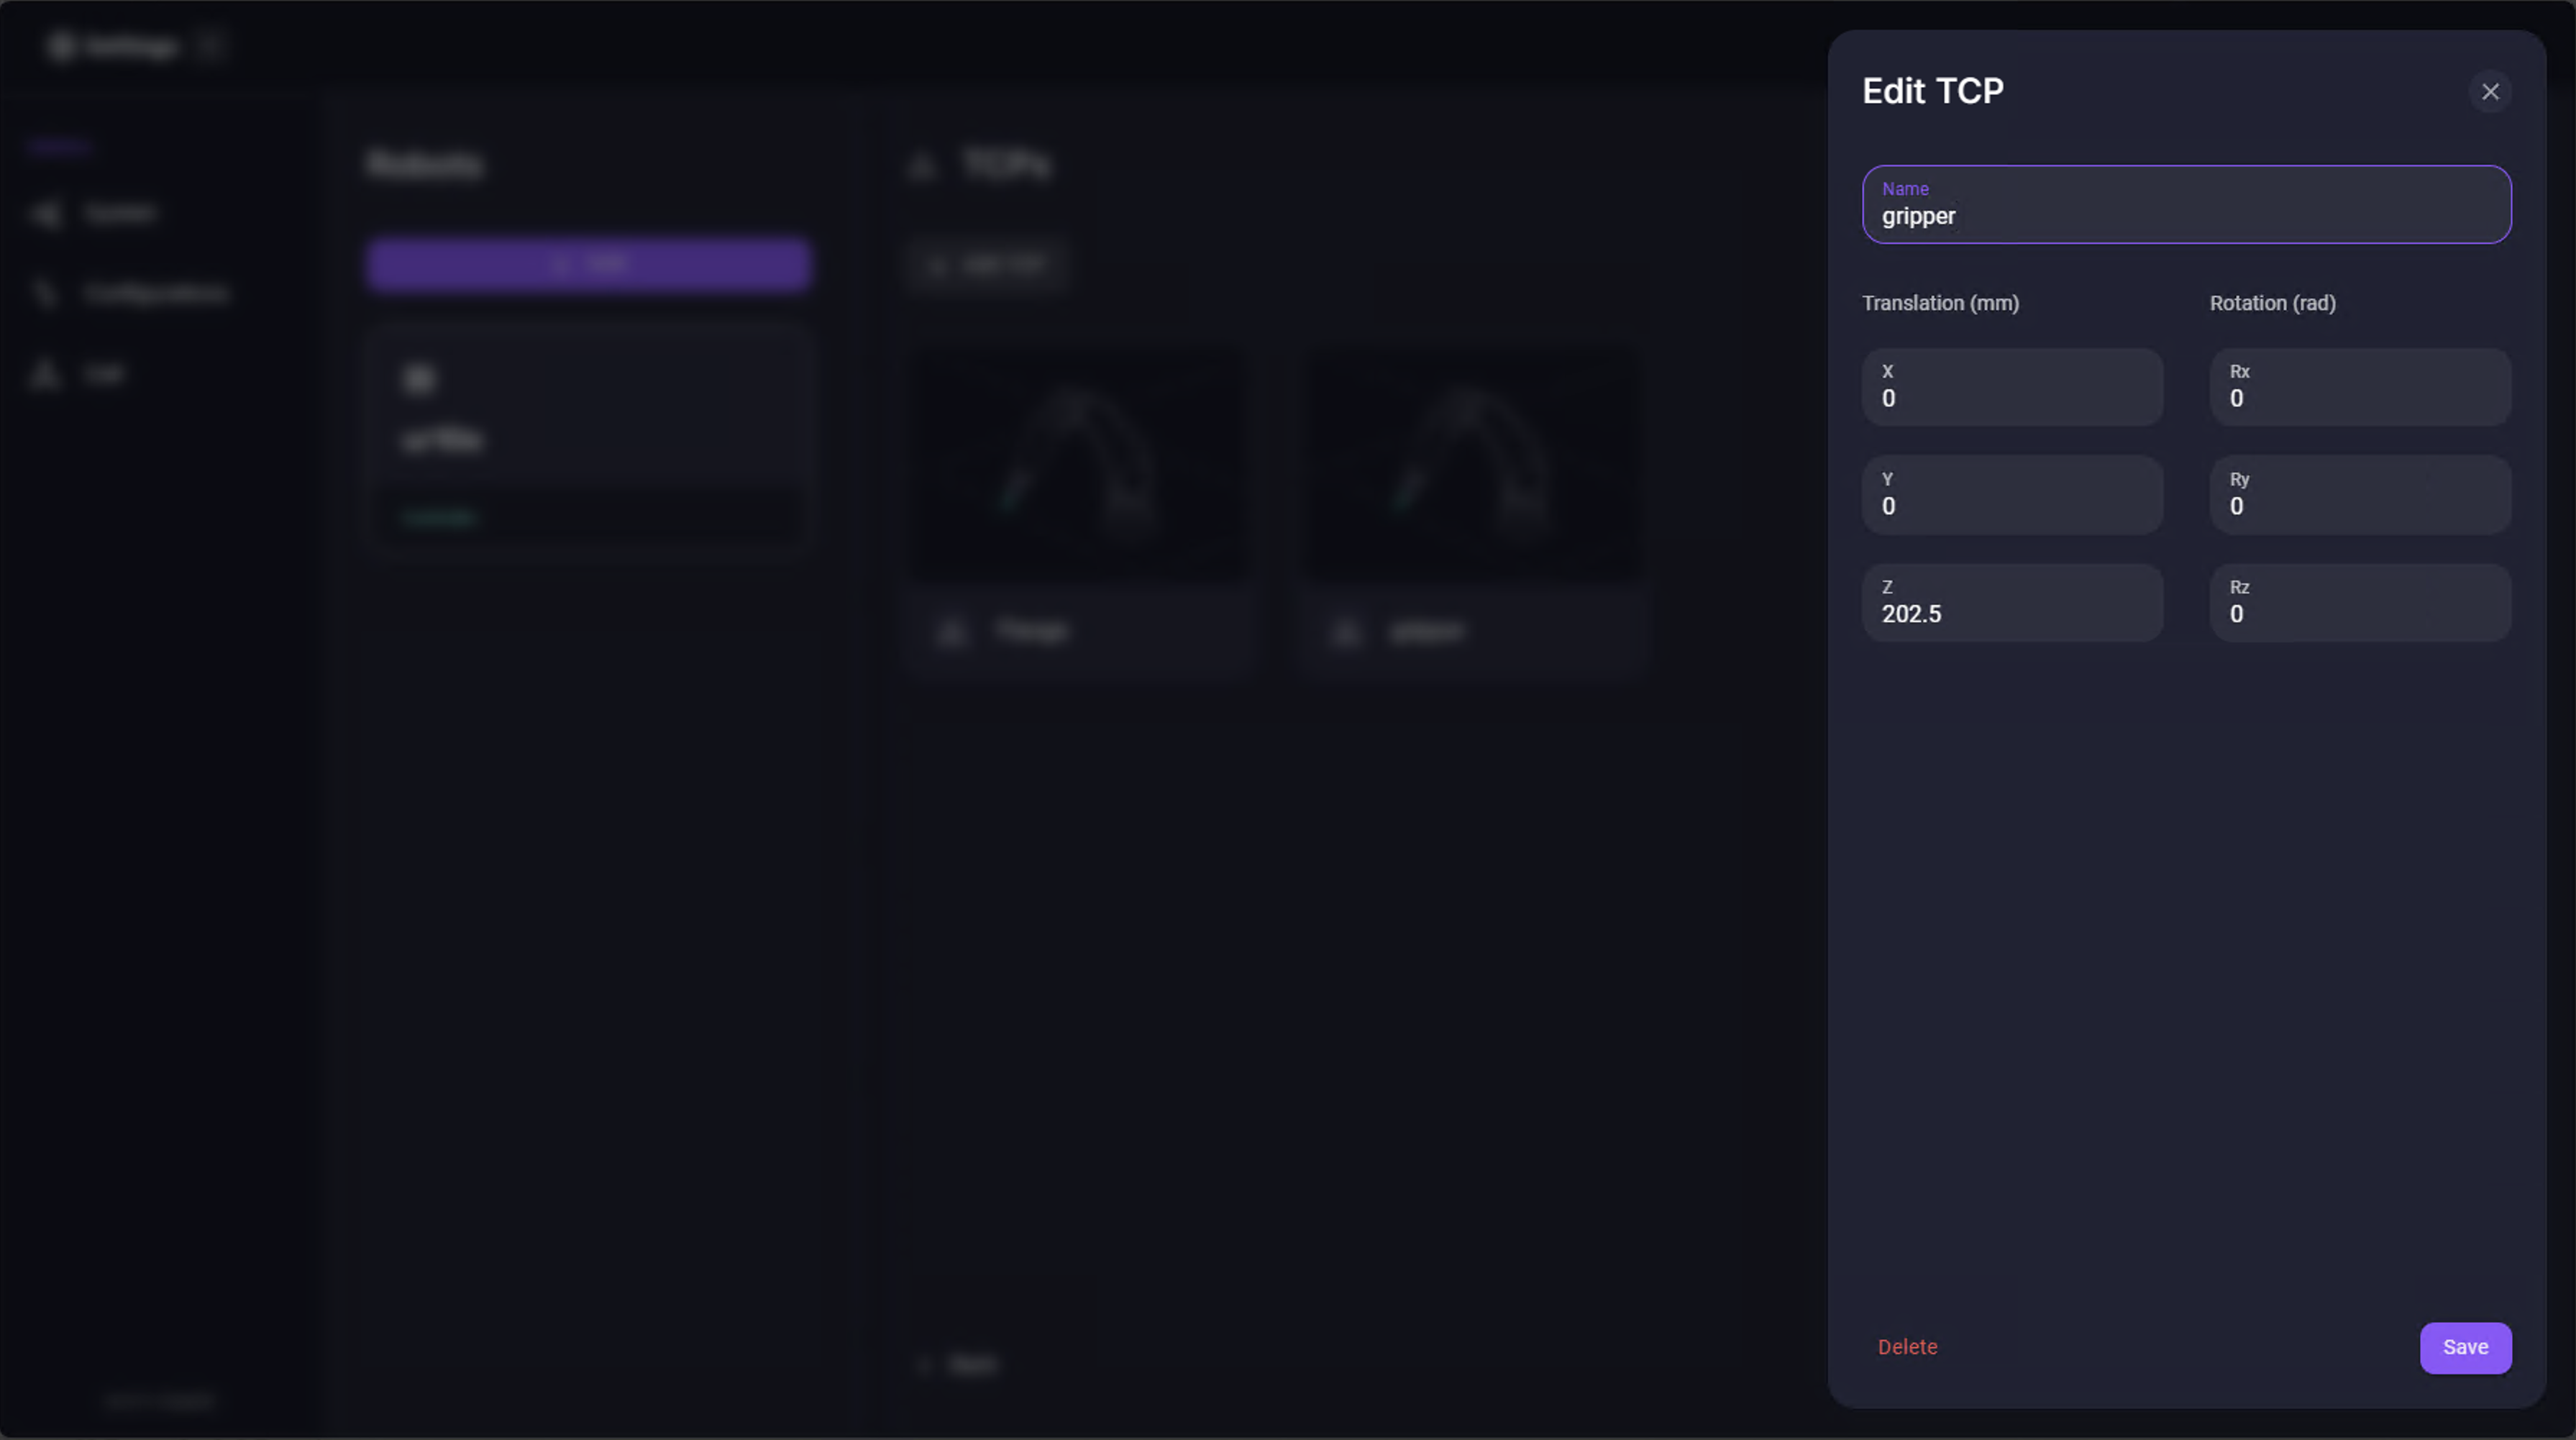
- Click on
Saveto add the TCP to the available TCPs. - Add other TCPs if needed.
The gripper TCP is now available in the Robot Pad TCP selector.
If you want to use your own tool, adjust the TCP values accordingly. Pass the original tool file to a CAD tool and calculate the TCP values. If the TCP has angles, additional calculation is required which the Wandelbots Customer Support is happy to help you with.
Configure the robot
There are two ways to configure robots and tools in the NVIDIA Isaac Sim™ scene: via the Robot Pad or via the Omniservice API. We recommend to start configuring robots and tools in the Robot Pad and switch to the Omniservice API for more complex configurations.
- Open the Robot Pad and click on the NVIDIA Isaac Sim™ icon.
- Enter your instance's IP address as
Host.
A login is displayed. - Enter your Wandelbots NOVA access token to connect.
The token is displayed on your instance's card in the Developer Portal.
All available robots are displayed. You should therefore see the previously addedur10e.
- To connect the
ur10eto the NVIDIA Isaac Sim™ scene, click on "Configure".
An entry field for the robot's prim path is displayed. - Enter the robot's prim path and click on "Create robot".
You have successfully connected the robot to the NVIDIA Isaac Sim™ scene and configured the robot. 🎉
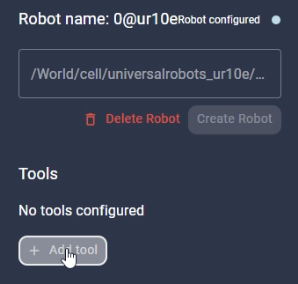
Configure the tool
The tool configuration currently allows for three different tool types: Conveyor belts, surface grippers and custom tools. Depending on the tool type, there are different parameters that can be set.
For the stacking demo we're using a parallel gripper, and we'll thus add a custom tool.
- To add tools to the
ur10e, click on "Add tool".
The tool parameters are displayed. - Select the tool type
Custom Tool. - Name the tool
Gripper. - Enter the gripper's prim path from the NVIDIA Isaac Sim™ scene.
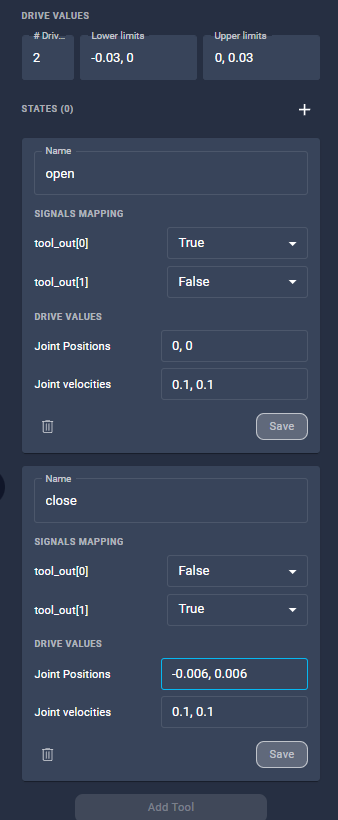
- Add two IO signals to enable communicating with the gripper.
- Enter
2as the number of drives for the parallel gripper as it has 2 fingers. - Enter the drive limits in meters in which the parallel gripper is supposed to operate in:
-0.03, 0for the lower limit,0, 0.03for the upper limit.
The order of the values within one drive limits is important. The first value represents the first drive, the second value the second drive. Values are separated by a comma.

Now the gripper is reachable via the IOs and knows in which limits to operate its fingers. But it still can't be opened nor closed via Wandelscript. Let's fix that!
- To activate the gripper via Wandelscript, you need to assign different states to the IOs. Click on the
+to add a state. - Name the state
open. - Map one of the IOs to
true, the other one tofalse. - Enter
0,0as the drives' joint positions foropen. Enter the desired velocity with which the gripper drives should move. Remember: The order is important, the first value represents the first drive, the second value the second drive.
The default state of a parallel gripper is open. Thus the joint configurations for open are 0,0. The gripper state close therefore has negative joint position values as it's defined in relation to the open joint positions.
- Click "Save".
Congrats, you've successfully added the first state! 🎉 Let's see what you've learned and add the second state close by yourself.
- Click "Add tool" to save your tool configuration.
Your tool is now displayed within the robot's configuration.
Go to the Robot Pad editor and try out opening and closing the gripper by executing:
    WAIT_TIME=100
def open_gripper():
    write(ur10e, "tool_out[0]", True)
    write(ur10e, "tool_out[1]", False)
    wait(WAIT_TIME)
    print("Gripper open")
def close_gripper():
    write(ur10e, "tool_out[0]", False)
    write(ur10e, "tool_out[1]", True)
    wait(WAIT_TIME)
    print("Gripper closed")
tcp=frame("gripper")
home = (-153.3, -538.1, 454.9, 3.068, -0.623, -0.13)
open_gripper()
move tcp via p2p() to home
close_gripper()
The gripper now opens and closes accordingly in both NVIDIA Isaac Sim™ and the Robot Pad. You're all set to start simulating the stacking scenario!
Start simulating
Copy and paste the stacking Wandelscript into the Robot Pad code editor and click Run code.
## poses
# ur10e
home = (-153.3, -538.1, 454.9, 3.068, -0.623, -0.13)
home_j = [1.0215543508529663, -1.4466195106506348, 1.4667991399765015, 1.5146615505218506, 1.6460673809051514, -0.1501000076532364]
# workpieces
wp_cube_01 = (-280.041, -718.812, 44.293, 0.000, 0.000, 3.142)
wp_cube_02 = (14.989, -912.082, 44.293, 0.000, 0.000, 2.706)
wp_cube_03 = (262.941, -715.806, 44.293, 0.000, 0.000, 3.142)
place_pose = (-14.778, -572.383, 50, 0.000, 0.000, 3.142)
# relative
grip_cube_top = (0.000, 0.000, 20.000, 0.000, 3.142, 0.000)
grip_cube_bot = (0.000, 0.000, -20.000, 0.000, 0.000, 0.000)
grip_cube_front = (0.000, -20.000, 0.000, 2.418, 2.418, 2.418)
grip_cube_back = (0.000, 20.000, 0.000, -2.418, 2.418, -2.418)
grip_cube_left = (20.000, 0.000, 0.000, 0.000, -1.571, 0.000)
grip_cube_right = (-20.000, 0.000, 0.000, 2.221, 0.000, 2.221)
approach_z = (0, 0, -100, 0, 0, 0)
stack_offset = (0, 0, 75, 0, 0, 0)
tcp=frame("gripper")
## functions
# parallel gripper
WAIT_TIME = 700
def open_gripper():
    write(ur10e, "tool_out[0]", True)
    write(ur10e, "tool_out[1]", False)
    wait(WAIT_TIME)
    print("Gripper open")
def close_gripper():
    write(ur10e, "tool_out[0]", False)
    write(ur10e, "tool_out[1]", True)
    wait(WAIT_TIME)
    print("Gripper closed")
VEL_APPROACH = 35
VEL_PICKED = 80
VEL_FREE = 300
BLENDING_APPROACH = 100
def get_grip_pose(side):
    if side == "top":
        return grip_cube_top
    if side == "bot":
        return grip_cube_bot
    if side == "front":
        return grip_cube_front
    if side == "back":
        return grip_cube_back
    if side == "left":
        return grip_cube_left
    if side == "right":
        return grip_cube_right
def pick_workpiece(pose, side):
    grip_pose = get_grip_pose(side)
    move tcp via p2p() to pose :: grip_pose :: approach_z with blending(BLENDING_APPROACH)
    velocity(VEL_APPROACH)
    move tcp via line() to pose :: grip_pose
    close_gripper()
    wait(100)
    velocity(VEL_PICKED)
    move tcp via line() to pose :: grip_pose :: approach_z with blending(BLENDING_APPROACH)
def place_workpiece(pose, layer, side):
    stackheight = (layer * stack_offset[0],layer * stack_offset[1],layer * stack_offset[2],0,0,0)
    grip_pose = get_grip_pose(side)
    move tcp via line() to stackheight :: pose :: grip_pose :: approach_z with blending(BLENDING_APPROACH)
    velocity(VEL_APPROACH)
    move tcp via line() to stackheight :: pose :: grip_pose
    open_gripper()
    wait(1000)
    velocity(VEL_FREE)
    move tcp via line() to stackheight :: pose :: grip_pose :: approach_z with blending(BLENDING_APPROACH)
## skill execution
move tcp via p2p() to home
velocity(VEL_FREE)
open_gripper()
pick_workpiece(wp_cube_01, "top")
place_workpiece(place_pose, 0, "top")
pick_workpiece(wp_cube_02, "top")
place_workpiece(place_pose, 1, "top")
pick_workpiece(wp_cube_03, "top")
place_workpiece(place_pose, 2, "top")
move tcp via p2p() to home
The NVIDIA Isaac Sim™ scene will now simulate the stacking scenario.
Congrats! You've successfully set up the stacking demo and simulated the stacking scenario. 🎉
How about recreating the scene with another robot? Download the asset starter package from the Developer Portal (opens in a new tab) which contains a variety of assets, robots, tools and wandelscripts and try changing the robot in the stacking demo!
Let us know how it went!