Set up your scene
To get started with ghost teaching you need to configure the desired tools, place them within the workspace of the robot and .
Configure tool
After having added a tool to the scene, you need to configure the tool settings.
- Name the tool's parent node
tool_<tool_name>, e.g. tool_suction_gripper. - Check the
Rigid Body Enabledcheckbox to ensure that the tool has a rigid body.
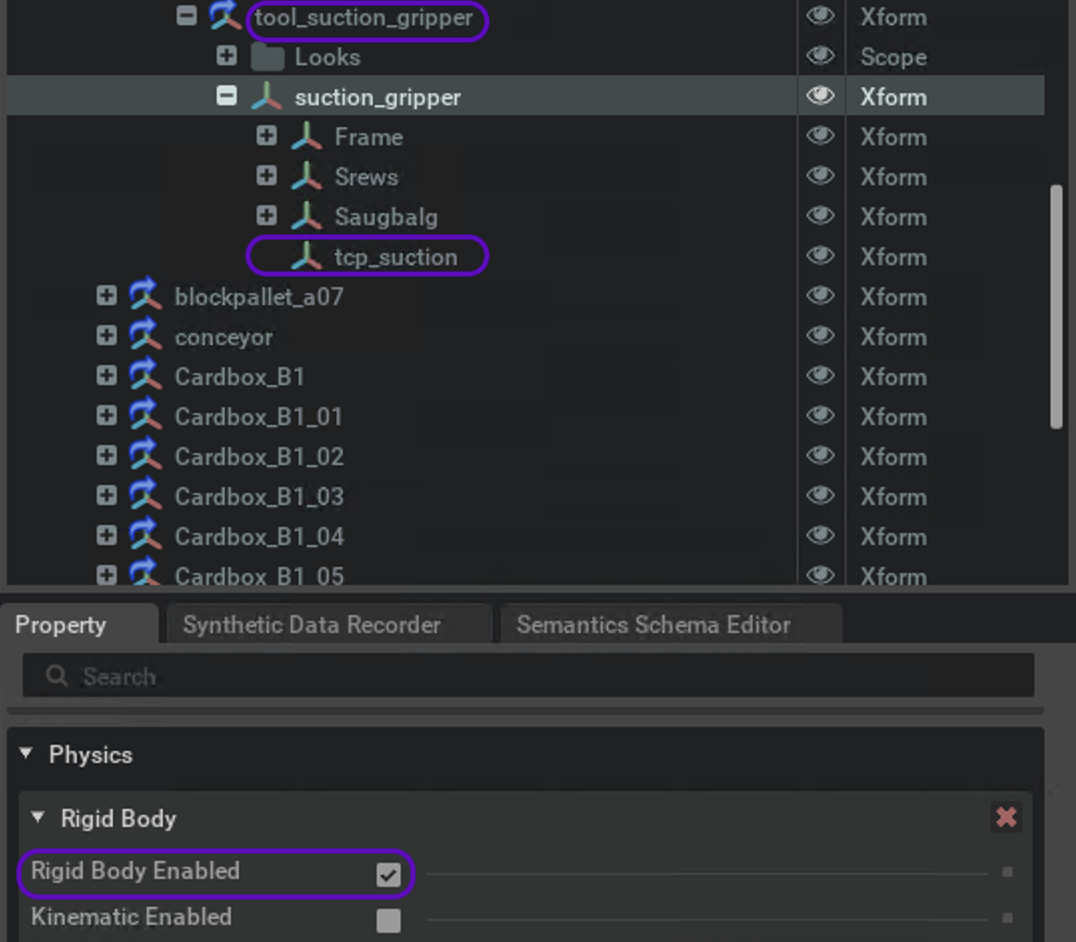
- Add an Xform to the rigid body node that is placed at the TCPs position.
- Name the TCP Xform
tcp_<tool_name>, e.g. tcp_suction
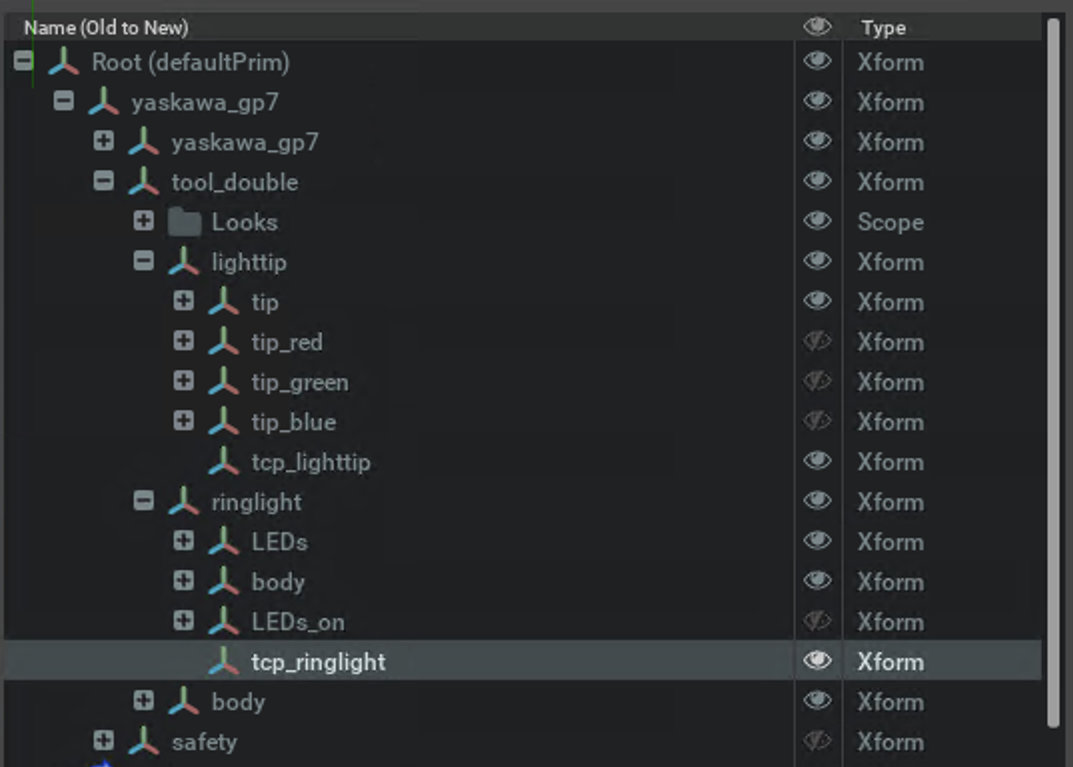
Multiple TCPs

You can also add tools with multiple TCPs, e.g. for a tool that has two tips. The configuration steps are the same as for tools with one TCP, the structure is nested.
Add the tool
- Name the tool's parent node
tool_<tool_name>, e.g. tool_suction_gripper. - Check the
Rigid Body Enabledcheckbox to ensure that the tool has a rigid body.
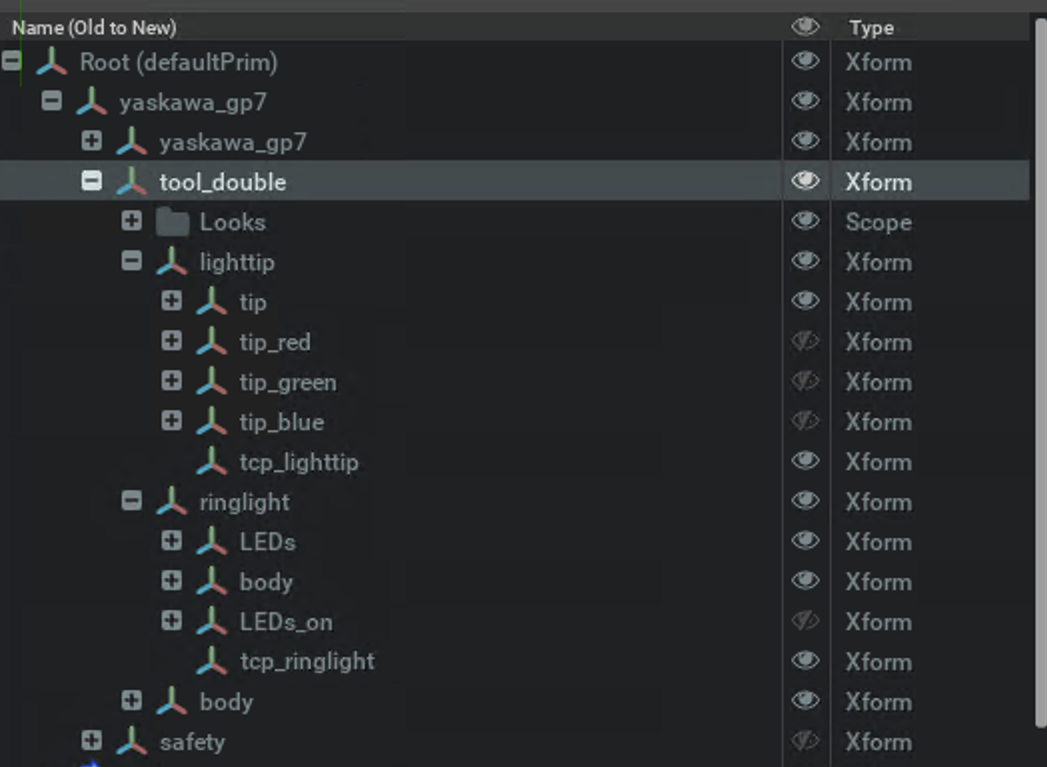
Configure first TCP (lighttip)
- Add the first Xform to the rigid body node that is placed at the respective TCPs position.
- Name the TCP Xform
tcp_<tool_name>, e.g. tcp_suction.
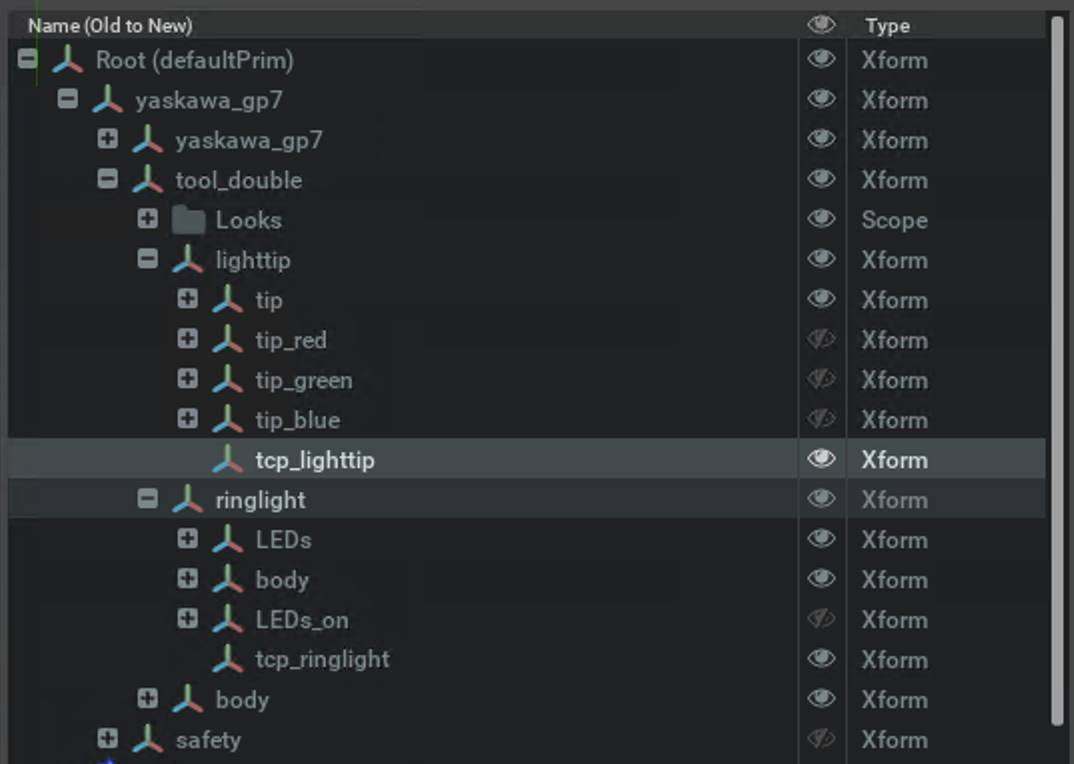
Configure second TCP (ringlight)
- Add second Xform to the rigid body node that is placed at the respective TCPs position.
- Name the TCP Xform
tcp_<tool_name>_2, e.g. tcp_suction. - Repeat the steps for each additional TCP.
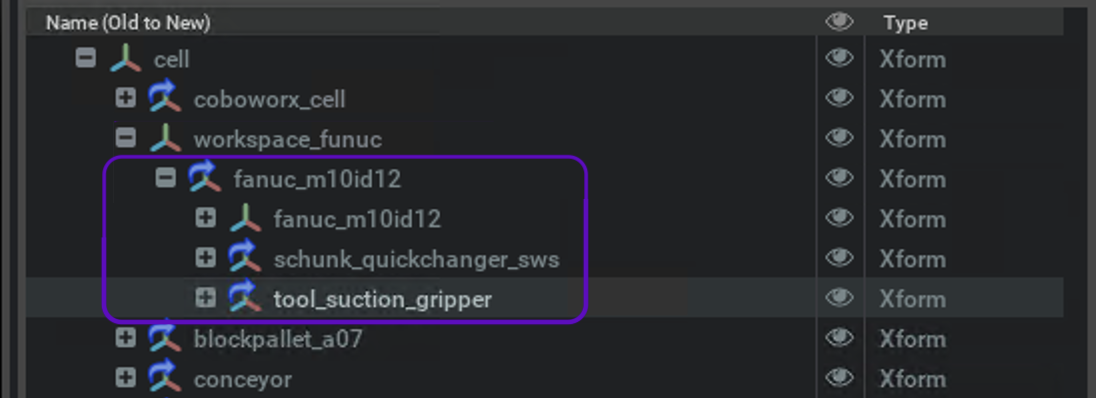
Place tool within workspace
Now it's time to place the tool within the workspace of the robot.
Copy the tool node and paste it into the workspace node of the robot.
Configure TCP
Each TCP is unique and has to be configured to match the virtual robot's TCP. Using the NOVA API, you can add the TCP configuration for the specific motion group.
- Open the NOVA API and navigate to
Virtual Robot Setupand thenAdd TCP. - Add your TCP configuration in JSON format for desired motion group, a.g. a
fanuc_m10id12.
Congrats! You've successfully set up your scene for ghost teaching.